

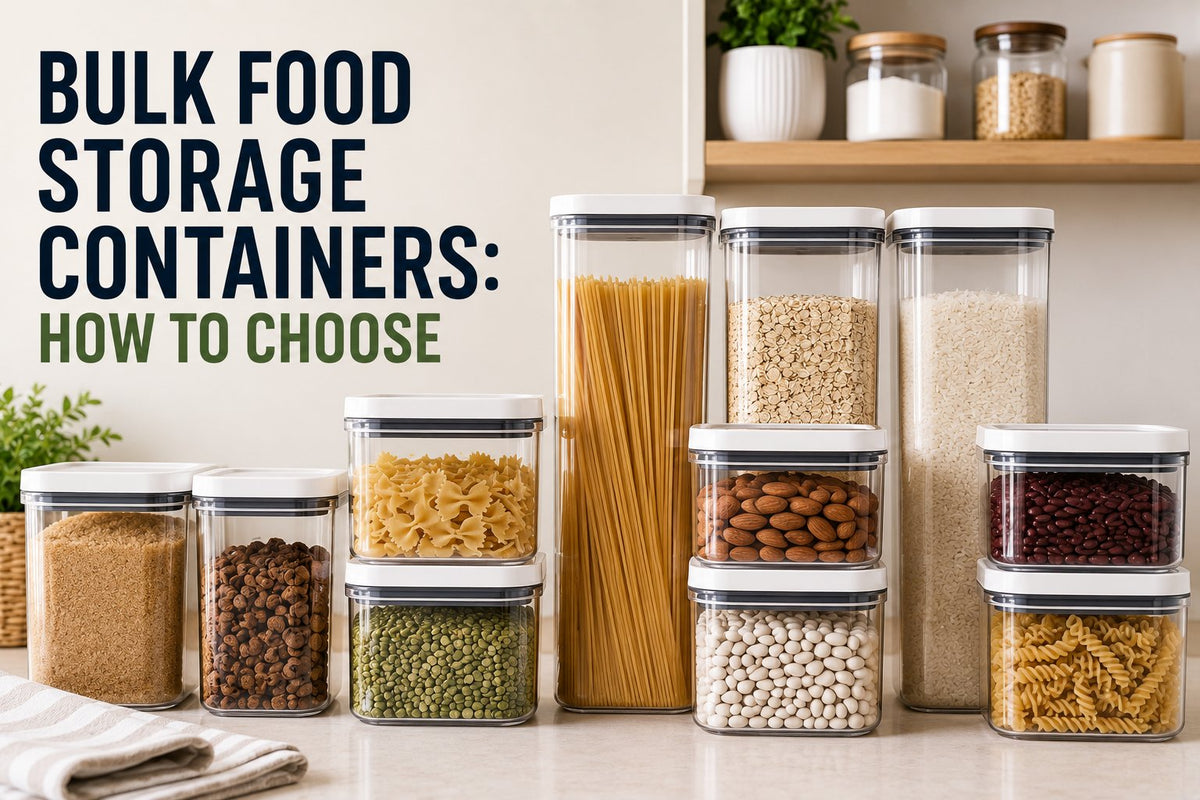
The rice bag splits at the worst possible moment. You're halfway through putting groceries away, the cupboard is already crowded, and suddenly grains are rolling under the shelf while the flour sack slumps across the counter. The food isn't the problem. The storage system no longer matches the way you buy, refill, clean, and use it.
Choosing bulk food storage containers isn't a beauty contest between glass, plastic, and stainless steel. The better question is practical: What container system fits your refill rhythm, shelf shape, pest concerns, and tolerance for washing parts? A beautiful airtight jar that's too heavy to lift is a poor choice. So is a lightweight bin with a lid you stop using after the gasket becomes annoying to clean.
California's packaging context makes reusable storage especially relevant. CalRecycle reports that packaging waste accounts for over 50% of California landfill volume and 27% by weight, while the average person generates 136 bags of packaging waste per year. Its 2023 source-reduction baseline also estimated 171.4 billion single-use plastic components were used in California, including 84 billion packaging items. These figures don't tell you which pantry bin to buy, but they show why reusable systems matter for households, food-service teams, and organisations trying to reduce disposable formats. (California packaging context)
Table of Contents
- When Bulk Buys Outgrow Their Bags
- Glass, Plastic, and Stainless at a Glance
- Airtightness, Lids, and the Real Seal Test
- Sizing Containers to the Food and the Shelf
- Labels, Dating, and First In First Out Rotation
- Cost per Refill and the Disposable Bag Break-Even
- One Container System for Home and Small Business
- Buying Checklist and Two Sample Layouts to Copy
When Bulk Buys Outgrow Their Bags
A 5 kg sack of flour looks manageable at the shop. It becomes a different object when you're trying to pour it into a narrow cupboard, scoop from it with one hand, and keep the paper seam away from moisture. Rice creates the same problem at a larger scale. The bag may stand upright in the shop, but once it's opened, the folded top takes up shelf space, leaks grains, and provides little protection from pantry pests.
Most kitchens reach this point gradually. One household buys rice in bulk, another keeps oats in a large paper sack, and a third repurposes tubs from ice cream or takeaway meals. Each container works on its own. Together, they create a pantry with mismatched heights, lids, labels, and access points.
The useful question isn't “Which material is safest?” It's “What will I still use after the twentieth refill?”
Start by observing the routine you already have. If you refill flour every week, a wide opening and a manageable lift matter more than maximum capacity. If rice sits untouched for long periods, pest resistance and a reliable seal deserve more attention. If children reach for cereal daily, a lighter bin with a simple lid may beat a heavy glass jar even if the jar looks better.
Shelf shape changes the decision too. Deep shelves encourage forgotten stock at the back, while narrow shelves punish containers with lid overhang. A system that fits the shelf but blocks the scoop is still badly designed. You want containers that make the next action obvious: open, scoop, close, label, and return.
California food-service operators also need to think beyond convenience. Bulk food that isn't kept in its original packaging must be stored in containers identified by the food's common name, and most food must be kept at least 15 centimetres, or 6 inches, off the floor, except in large or bulky containers. (California retail food storage requirements) Clear labels and raised placement aren't optional details in a professional setting. They're part of a workable storage system.
Glass, Plastic, and Stainless at a Glance
Treat the three main materials as tools for different jobs, not as a winner-takes-all ranking.

Glass for visibility and neutral storage
Glass is my first choice for low-fat dry goods used frequently, especially flour, white rice, pasta, and lentils. You can see the contents without opening the lid, glass doesn't hold onto odours easily, and it resists the staining that makes older plastic look permanently dusty or oily.
The drawbacks are just as practical. Glass is heavy when full, needs careful handling around tile, and can chip at the rim. Don't put a large glass jar in a high cupboard if you'll need to lift it down with wet hands. Smaller jars work well for active ingredients, while larger vessels belong on a stable, accessible shelf.
Plastic for light, forgiving everyday access
Food-grade polypropylene or high-density polyethylene suits households that value low weight, stackability, and easy handling. Plastic is the sensible choice for children's shelves, frequently refilled snacks, and containers that move between pantry and counter.
Its weaknesses appear with time. Scratches can trap residue, some plastics retain oily smells, and clear walls may fog or become difficult to read. BPA concerns often influence buying decisions, but Health Canada says exposure from food packaging doesn't pose a health risk and recommends stainless steel, glass, or food-grade plastic as storage options. (Health Canada food packaging guidance)
Stainless steel for harsh locations
Stainless steel earns its place in garages, utility rooms, commercial prep areas, and any location where light, impact, or rodents are concerns. It's durable, doesn't reveal inventory at a glance, and usually costs more than a comparable plastic bin.
Choose it when survival matters more than visual stock control. For daily pantry use, the lack of visibility can become an inventory problem unless your labels are large and your rotation habit is dependable.
| Attribute | Glass | Plastic (PP/HDPE) | Stainless Steel |
|---|---|---|---|
| Visibility | Excellent | Good when clear, weaker as it scratches or fogs | None |
| Weight when full | High | Low to moderate | Moderate |
| Odour resistance | Excellent | Varies by plastic and food | Excellent |
| Drop tolerance | Low | High | High |
| Light protection | Low | Low unless opaque | Excellent |
| Best use | Visible, frequently used dry goods | Everyday access and lighter shelves | Garages, commercial areas, pest-prone storage |
For a related comparison of everyday handling and material trade-offs, see this guide to glass versus plastic food storage containers. If your produce workflow also relies on reusable bags, the AS SEEN ON TV 8-Piece Green Fresh Food Bags - 80426 uses a wide-seal zipper closure and a reusable storage design, with a stated focus on absorbing ethylene gases and extending produce freshness. That's a different job from storing bulk flour or rice, so don't substitute produce bags for rigid pantry containers.
Airtightness, Lids, and the Real Seal Test
A lid is only airtight when the rim, gasket, and closing mechanism stay clean and correctly seated. Flour dust in a channel, oil on a glass edge, or heat-related warping can defeat an impressive seal.

Match the lid to your refill behaviour
Snap-clip hinged lids are fast and convenient, especially on plastic bins. They're a good fit for cereal, oats, and ingredients you access several times a day, but the clips and hinges become wear points.
Screw-on lids create a firm closure, though you'll spend more time opening and closing them. They work best for stock that sits untouched or for large containers where a slower access routine isn't irritating.
Push-seal lids with removable silicone gaskets provide a strong everyday seal when the gasket can be taken out, washed, and dried. Lever-lock lids clamp tightly and handle rough use well, but their metal components need proper drying to avoid corrosion.
Run a kitchen-level seal test
Don't test an empty container. Fill it with dry rice, close the lid, and shake it upside down over a tray for 10 seconds. Then leave it inverted on a damp paper towel overnight. A rice trail or damp towel tells you the container won't provide dependable protection, regardless of the packaging language.
Clean the rim before every refill. Remove the gasket when the design allows it, wash the channel, and let both parts dry completely. A damp gasket can create odour and moisture problems that an airtight design can't solve.
For coffee equipment that needs a similarly disciplined seal and access routine, this guide to best coffee storage for Keurig owners offers useful adjacent advice. You can also compare features in this resource on airtight food storage containers.
A short visual guide can help staff or family members apply the same test:
Sizing Containers to the Food and the Shelf
A container that technically holds the food may still be a poor fit. Flour settles, pasta leaves awkward gaps, and a tapered bin wastes useful shelf height when several containers sit together. Size the container from both directions, starting with the food volume and then checking the shelf footprint.
Use these practical volume estimates for planning:
- Flour: approximately 1.7 litres per kilogram
- Rice: approximately 1.25 litres per kilogram
- Rolled oats: approximately 1.5 litres per kilogram
- Pasta: up to 2 litres per kilogram once settled
That means a 5 kg flour purchase needs roughly 8.5 litres before allowing useful headroom, so a container around 9 to 10 litres is more practical than one filled to the rim. Pasta needs more generous capacity because irregular shapes leave air gaps.
Build around the shelf, not the product photo
Measure the usable internal depth, not the advertised shelf depth. A 30 cm cupboard may lose space to hinges or a front lip. A 25 cm narrow pantry usually favours straight, compact bins. A 45 cm utility shelf gives you room for deeper containers, but it also makes forgotten stock more likely.
Standard 60 cm drawer widths can suit a row of smaller containers, provided the lids don't overhang and the drawer can support the full load. Check whether the container walls are straight or tapered. Straight walls stack predictably, while tapered shapes may nest efficiently when empty but waste space when filled.
| Bulk Purchase | Typical Volume Needed | Recommended Container Size | Best Shelf Fit |
|---|---|---|---|
| 2 kg rice | About 2.5 L | 3 L container | Narrow pantry or drawer |
| 2 kg flour | About 3.4 L | 4 L container | Mid-shelf with front access |
| 5 kg rice | About 6.25 L | 7 to 8 L container | 30 cm cupboard or deep shelf |
| 5 kg flour | About 8.5 L | 9 to 10 L container | Deep cupboard or utility shelf |
| 10 kg rice | About 12.5 L | 14 to 15 L container | 45 cm utility shelf |
| 25 kg rice | About 31.25 L | 33 to 36 L container | Floor-level, elevated and stable storage |
These are planning estimates, not universal capacities. Grain shape, packing density, and headroom change the final fit. For broader storage-box selection, eco-friendly storage boxes from Packaging Panda can help you compare formats beyond standard pantry jars. GrifGlo's guide to food storage container sizes is also useful when you're measuring a shelf before shopping.
Labels, Dating, and First In First Out Rotation
A bulk container without a durable label becomes a guessing game. Rice can be obvious, but flour, starch, sugar, couscous, and different oats start to look interchangeable once they're poured into opaque bins.
Use two pieces of information on every container:
- Refill date: write the month and year of the decant.
- Sequential count: record the refill number, such as “Refill 3 of 12”.
The date tells you when the current stock entered the container. The count helps you track the rhythm of a product even when labels fade or a container changes shelves.

Choose labels for the location
Dry pantry shelves need labels that resist grease, dust, and repeated handling. Vinyl labels or strong removable tape work well on smooth walls. Textured plastic is harder because ordinary tape may lift at the edges, so place the label on the lid only if the lid stays with that container.
Open shelving can benefit from chalk panels, particularly when the contents change. Fridge bins are different. Use a removable marker or label that can be changed without leaving a sticky residue.
Don't rely on the best-before date alone. That date belongs to the purchased food, while your container label records when you opened and began using that food. For practical label formats and placement ideas, this guide on how to label food storage containers is a useful companion.
Make FIFO visible
First in, first out rotation fails when new stock gets poured on top of old stock. Keep one container active and one container reserved for incoming stock when your buying pattern supports it.
When a new bulk sack arrives:
- Inspect first: check for moisture, insects, damaged packaging, or an unusual smell.
- Clean before refilling: never top up a container that still holds older food.
- Decant completely: use a dry funnel or scoop, then record the refill date and count.
- Place new stock behind or below: move older containers forward so the next one used is visible.
- Keep the scoop assigned: a clean scoop for each product reduces cross-contact between flour, grains, and sugary ingredients.
A weekly check doesn't need to become a full pantry reset. Look for clumping, condensation, residue around the gasket, faded labels, and signs of insects. Raw flour deserves particular attention because it can leave fine dust in lid channels. Oil residue shortens freshness, while moisture causes clumping and can make a dry product unusable.
Clean according to the material
Glass and stainless steel tolerate thorough washing and can handle dishwasher cycles when the product's instructions allow them. They also resist lingering odours better than many plastics. Avoid assuming that every lid has the same tolerance as its body.
Plastic needs more restraint. Use warm water and mild detergent, inspect for scratches, and let the container air-dry fully before refilling. Never refill while droplets remain inside. That shortcut turns a dry-goods system into a moisture trap.
Expected storage life depends on the food and the conditions inside the container. As a practical planning guide, white rice may remain usable for 2 to 4 years, flour for 6 to 12 months, rolled oats for up to 1 year, dried pasta for 2 years, and sugar for 2 or more years, with heat, moisture, oil content, and repeated opening shortening those windows. Treat these as storage-planning ranges, not guarantees, and discard food that shows mould, infestation, or an off odour.
Cost per Refill and the Disposable Bag Break-Even
A cheap container isn't cheap if you replace it constantly. Judge each option by the number of refills it survives, the cost of lid or gasket replacements, and the effort required to keep it clean.
Use this simple formula:
(Container cost + lid replacements) ÷ refills before wear = cost per use
You'll need your own purchase price and observed lifespan because those figures vary by product and handling. Track the first few refills in a note on your phone. That's more honest than trusting a vague durability promise.
| Material | Avg Refills Survived | Gasket Swap | Break-Even Refills |
|---|---|---|---|
| Glass | Depends on careful handling | Check the manufacturer's replacement guidance | Calculate from your purchase cost |
| Plastic | Depends on plastic thickness and scratching | Replace when the seal or lid no longer works | Calculate from your purchase cost |
| Stainless steel | Often long-lived with proper care | Replace only when the gasket loses sealing ability | Calculate from your purchase cost |
The hidden cost is labour. A container that takes several parts apart, scrubs each channel, and needs careful drying may be annoying enough that you stop using it. That failure matters more than a small difference in purchase price.
For households buying in quantity or organisations standardising purchasing, wholesale kitchen supplies can provide a useful starting point for comparing repeat-use equipment and replacement planning. My recommendation is simple: buy the container you'll wash, label, and return to the shelf. A neglected premium bin is more expensive than a basic one that stays in rotation.
One Container System for Home and Small Business
Home cooks, micro-bakers, café prep teams, church-pantry volunteers, offices, and rental-property managers usually need the same core features:
- Pest-resistant closure: the lid must stay seated during normal handling.
- Washable construction: the body and lid need a repeatable cleaning routine.
- Readable identification: staff and family members shouldn't need to open every bin.
- Stackable footprint: vertical space should work without trapping forgotten stock.
- Predictable replacement cost: lids, gaskets, and bodies should be easy to standardise.
The strongest setup uses one primary material and a small range of sizes. A practical core kit is two 5 litre containers, two 11 litre containers, and one 1.9 litre container for spices, seeds, and smaller ingredients. Add a shared scoop station and use one label format across the entire system.
That standardisation reduces purchasing confusion. A home baker can move a container from pantry to prep area without changing tools or labels. A small business can train staff on one lid style rather than maintaining several incompatible closures.
Before adopting the system, run four checks:
- Same lid: Can every person close it correctly?
- Same label format: Is the food name visible from the normal access position?
- Same wash routine: Does the system tolerate the available sink or dishwasher process?
- Same FIFO rule: Can older stock be identified without opening every container?
For commercial environments, compare this approach with guidance on commercial food storage containers. The best system is the one that survives handoffs between people. If a container only works when one organised person is present, it isn't a system yet.
Buying Checklist and Two Sample Layouts to Copy
Measure before you shop. Product photos hide lid overhang, tapered walls, and the space lost to shelf lips.

Before you buy
- Measure usable space: record shelf height, depth, width, and obstructions.
- Count refill cycles: identify foods you refill often and those that sit for long periods.
- Set a practical budget: include replacement lids, gaskets, labels, and scoops.
- Choose the material by location: lighter plastic for active shelves, glass for visible low-fat goods, stainless for harsh or pest-prone areas.
In the shop
Check that the gasket sits evenly and can be removed for washing. Confirm the dishwasher rating for the parts you'll clean, look for BPA-free markings on plastic, inspect stainless seams and corners, and weigh the empty container against its stated capacity. A bin that feels awkward before it's full will be worse after you add rice.
After purchase
Wash and dry every component. Label the food name before the first refill, add the month and year, assign a shelf location, and log the first refill count. Don't postpone this step. Unlabelled containers become permanent exceptions.
Layout one for a narrow pantry
Use the lower area for three stacked 11 litre bins, but keep them raised rather than directly on the floor. Store rice, flour, and oats in the large bins, with the oldest container positioned for first access.
Place two 5 litre bins at mid-shelf level for pasta and sugar. Use 1.9 litre jars on the top shelf for spices, seeds, and small ingredients. Assign one label colour per category, such as a grain symbol for rice and a whisk symbol for flour, but keep the written food name prominent.
Layout two for a deep shelf
Put two 11 litre bins side by side at the back for less frequently accessed stock. Place a row of 5 litre bins in front for active flour, oats, pasta, or baking ingredients. Keep the front row shorter so the labels on the rear containers remain visible.
Set up the system over one weekend. Measure and clear the shelves first, wash and dry containers second, decant and label by food category third, then test every lid and record the first FIFO positions. If a container is difficult to lift, clean, or identify after that trial, return it before the pantry learns to depend on it.
Don't buy a random collection of attractive jars. Build a repeatable system that matches your shelves and your real refill habits. GrifGlo organises kitchen and home essentials with decision-friendly guides, sizing advice, and routes to third-party retailers, so visit GrifGlo to compare practical storage options and plan a bulk-buying setup that you'll keep using.

Laisser un commentaire
Ce site est protégé par hCaptcha, et la Politique de confidentialité et les Conditions de service de hCaptcha s’appliquent.