

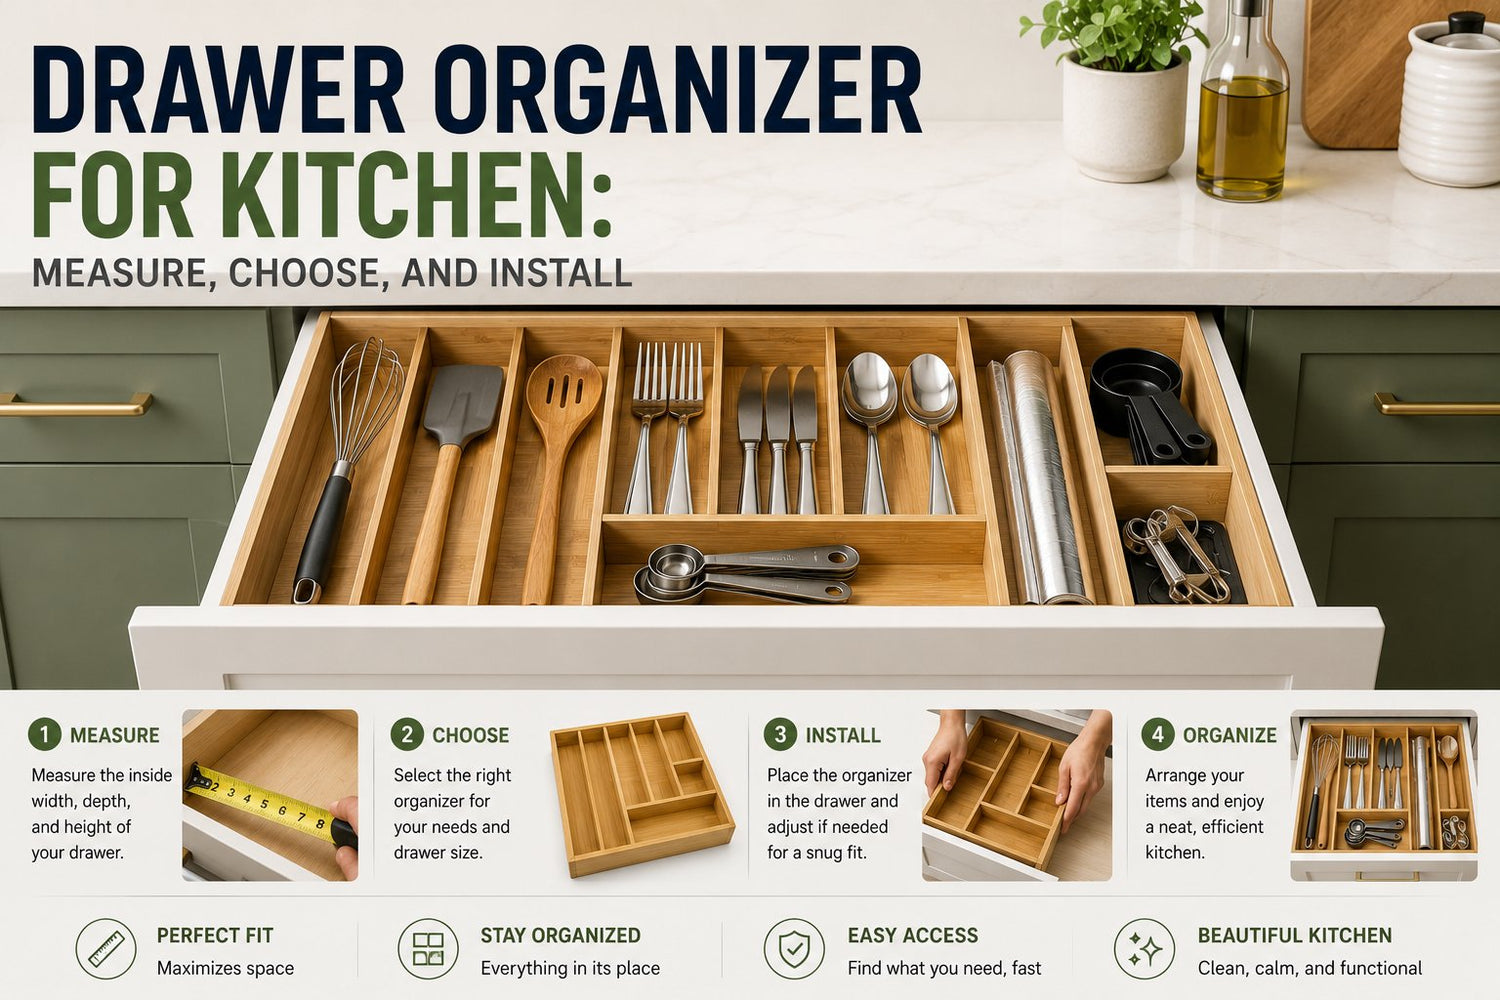
You open the utensil drawer after dinner and find a familiar tangle. Spatulas have trapped the whisks, a can opener is wedged beneath measuring spoons, and every tool shifts when the drawer moves. The problem usually isn't a lack of discipline. It's a poor match between the drawer's usable space, the slide behaviour, and the organizer's geometry.
A reliable drawer organizer for kitchen storage starts with measurement, reach, and movement. Product style comes later. This approach matters in Canadian condos and compact kitchens, where a few wasted centimetres can turn a practical insert into another source of clutter. It also reflects the wider move toward built-in storage. A 2026 Houzz kitchen trends study, summarised by Floor Daily's report on upgraded kitchen storage, found that 94% of renovating homeowners add specialty storage features to upgraded cabinetry, while 84% upgrade cabinets and 68% replace all cabinets during kitchen renovations.
Table of Contents
- Why Most Kitchen Drawers End Up as a Mess
- Measuring Your Drawers the Right Way
- Choosing Between Bamboo, Plastic, and Modular Designs
- Layouts That Actually Work for Utensils and Tools
- Installation, Slides, and Quick Fixes
- Spending Less and Decluttering More
Why Most Kitchen Drawers End Up as a Mess
The post-dinner scramble exposes the weakness of most utensil drawers. Long-handled tools overlap short ones, sharp edges catch on soft silicone spatulas, and small gadgets disappear into the gaps. Opening the drawer repeatedly makes the arrangement worse because nothing has a defined landing place.
A standard off-the-shelf tray rarely matches every kitchen drawer. Interior widths commonly vary from 14 to 24 inches, depths from 15 to 22 inches, and the front may include a curved lip, recessed handle, or face-frame intrusion that steals usable length. Those dimensions are practical planning ranges, not universal specifications, so measure your own drawer rather than assuming a nominal cabinet size tells you anything useful.

Geometry matters more than appearance
The most attractive tray can fail if its compartments don't suit the contents. Narrow cutlery slots work for forks and teaspoons but frustrate anyone trying to store a wide turner or a bundle of measuring cups. Large open bins give flexibility, yet they allow small tools to pile up unless you divide them deliberately.
Slides create another hidden problem. A soft-close drawer may stop short of full extension, leaving the back row partly concealed. Side-mount hardware can also reduce internal width, while an under-mount system may leave more usable side space but still limit how far the drawer travels. If you can't see or reach the rear compartment without leaning over the drawer, the layout is functionally incomplete.
Practical rule: Treat the drawer as a moving container, not a static box. The organizer must fit while the drawer is closed, open, and fully loaded.
Start by removing everything and grouping tools by task. A drawer that combines everyday cooking utensils, baking accessories, and occasional gadgets will become crowded even with a well-made insert. Before buying, review kitchen counter organization ideas for ways to relocate items that don't need drawer space at all.
The fit-first method changes the question from “Which tray should I buy?” to “What must this drawer do?” Once you know the interior dimensions, reach zones, and slide travel, you can choose a tray, divider system, or custom insert with much less guesswork.
Measuring Your Drawers the Right Way
Measure the drawer itself, not the cabinet opening. Cabinet labels describe the unit's nominal size, while the organizer needs the clear internal dimensions after hardware, rails, lips, and obstructions have taken their share.
Empty, inspect, and record
Pull everything out first. Wipe the drawer clean, remove any existing liner, and open it as far as it will travel. Use a tape measure inside the box and record the usable width at the front, middle, and back. If those readings differ, use the narrowest measurement for a fixed organizer. A tension-fit system can tolerate a small variation, but it still needs enough clearance to move without binding.
Measure the internal depth from the front inside wall to the rear wall. Leave room for slide clearance and any rear rail rather than measuring to the outside face. If a charging cable, plumbing line, or rear channel enters the drawer, mark its position on your sketch instead of treating that corner as storage.

Check height and slide behaviour
Measure internal height with the drawer open, then close it slowly while watching for contact with the countertop overhang or face frame. Under-sink drawers and drawers below thick worktops can lose clearance near the front. The height that matters is the lowest available height along the organizer's path, not the tallest point inside the box.
Identify the hardware as side-mount, under-mount, or single-rail. Slide type affects both usable width and access to the back. Government housing guidance in Canada recommends drawers over lower cupboards because they reduce reach distance, and it specifically calls for D-shaped pulls and full-extension slides so the drawer box opens completely and rear contents remain reachable without leaning or twisting. Review the Canadian guidance on accessible kitchen storage when planning a kitchen used by someone with limited reach or mobility.
Write the results on a simple rectangle. Include width at three points, usable depth, minimum height, slide type, and every obstruction. If you use a Mini Digital Pocket Scale 200g, its compact format, clear LED display, multi-unit modes, and stated 0.01g accuracy can be useful for small cooking or household measuring tasks, but it doesn't replace a tape measure for drawer fitting.
A measurement sheet also prevents the common mistake of confusing external product dimensions with internal compartment dimensions. For another compact-storage example, see over-the-door pantry organizer guidance, then return to the drawer and compare only the space you can use.
Choosing Between Bamboo, Plastic, and Modular Designs
Material should follow the drawer's conditions, not the kitchen's colour palette. A busy cutlery drawer needs a surface that tolerates constant contact, while a drawer near a dishwasher needs better moisture management. Expandability matters when the contents change, but a flexible system isn't automatically more durable.
| Material | Moisture Resistance | Weight | Typical Lifespan | Best For |
|---|---|---|---|---|
| Bamboo or wood | Moderate, lower in damp areas | Heavier | Long with dry use and care | Calm, stable utensil drawers |
| Injection-moulded plastic | High and often easy to wash | Light | Moderate, with visible wear over time | Damp areas and easy cleaning |
| Stainless or coated metal | High | Light to moderate | Long | Frequent cleaning and heavy use |
| Expandable modular system | Depends on material and joints | Varies | Adjustable, with clips or fittings as the wear point | Odd-sized drawers and changing layouts |
What holds up in daily use
Bamboo and solid wood feel stable and soften the rattle of cutlery. They handle ordinary contact well, but moisture is their weakness. A damp drawer beside a dishwasher or sink can encourage swelling or warping, especially if the insert sits directly on a wet base.
Plastic is the practical choice when washing matters most. It's light and generally easy to clean, though surfaces can show scratches and grime more readily. Inspect the base carefully if the tray includes a silicone mat, since trapped moisture can become difficult to clean.
Metal cleans quickly and withstands repeated use. The trade-off is noise. Unlined metal can ring when utensils are dropped in, and a smooth tray may slide unless its base is anchored. For a more detailed decision framework, Cooler Kitchen's guide to how to choose a utensil organizer is a useful comparison point.
Expandable modular organizers solve a different problem. Their dividers can adapt to drawers that aren't perfectly rectangular, and separate pieces are easier to replace than a single custom insert. Check the joint design before buying. Clips and tension fittings are convenient, but they become the likely failure point when the drawer is opened heavily every day.
A Magnet Shelf Rack for Refrigerator, Kitchen Organizer serves a separate storage role, with a tray for seasoning bottles or plastic wrap, a middle hook position for paper towels, and a bottom wooden rail for towels or kitchen tools. It shouldn't be used as a substitute for a fitted drawer insert. For material care in another kitchen category, the bamboo versus wood cutting board comparison offers related maintenance considerations.
Layouts That Actually Work for Utensils and Tools
A drawer works when each item has a predictable destination and the most-used tools sit where your hand naturally reaches. Start with the front, middle, and back rather than filling compartments based on shape alone.
The front zone, roughly 0 to 10 cm, should hold daily tools such as spatulas and tongs. These are the items you reach for while cooking, so placing them near the opening reduces rummaging. The middle zone suits cutlery, measuring spoons, and other frequent-use pieces that benefit from narrower divisions.
The back zone can hold less frequent tools such as pastry cutters or corn cob holders. Keep those items contained, but don't allow them to block the main cooking tools. A back compartment is useful only if the drawer extends far enough for you to reach it comfortably.

Match compartments to movement
Long-handled utensils should lie flat in a deep drawer, with handles aligned in the same direction. If the drawer is too shallow, a sloped insert can keep handles readable without forcing them into a pile. Don't place long tools diagonally across several categories. They'll obstruct everything beneath them.
A narrow edge slot works well for frequently grabbed tools such as a can opener or garlic press. Peelers and whisks need a deeper divided bin or an upright cylinder, provided the drawer height allows it. Heads should remain visible, and sharp edges should not face the hand when the drawer opens.
Leave a small empty compartment. It gives new gadgets a temporary home and makes the system less brittle when your cooking habits change.
Design test: If you need to lift one item to reach another, those two items probably don't belong in the same compartment.
Avoid overpacking. A tightly filled drawer may look efficient on installation day, but crowded compartments quickly recreate the original tangle. Remove duplicates and relocate occasional tools before adding another divider. For more ideas on maximizing a compact kitchen space, focus on storing items at their point of use rather than concentrating every tool in one drawer.
The best layout is also the one everyone in the household can reset. If a compartment is too narrow, too deep, or too far back for the person using it, the organiser will be ignored no matter how tidy it looks.
Installation, Slides, and Quick Fixes
Test the drawer before fitting an organiser. Pull it fully open, close it slowly, and listen for rubbing, scraping, or hesitation. Full-extension slides make a deep drawer more usable because they bring rear contents forward. Existing slides may be adequate in a shallow drawer, provided the organiser does not block access or overload the hardware.
Measure clearance at the drawer's tightest points. Keep the insert below the drawer-box lip so the face frame passes over it during closing. A product's stated height is only a starting point. Check the installed drawer, its slide movement, and the surrounding cabinet. If the base is smooth, add a non-slip liner or EVA mat. Lightweight plastic trays can slide forward whenever the drawer stops.
Retrofit options
Expandable dividers with locking tension feet suit many retrofits because they require no drilling. They are quick to reposition, but they can loosen when the drawer is packed tightly or opened forcefully. Bamboo trays may be trimmed with a fine-tooth handsaw and sanded smooth. Measure twice, protect the drawer from sawdust, and seal or smooth every cut edge. A rough edge can catch fabric or interfere with a slide.
Screw-in dividers need a sturdy drawer box. Set the fasteners where they will hold securely, and confirm that the screw path stays clear of slide hardware. If the drawer sits beside a door or another fitting, the guide to common cabinet hinge types can help identify how nearby cabinet components may affect access. For utensil compartments, compare the organiser's width and depth with these utensil storage ideas before drilling or cutting.
Watch for predictable failures:
- Warped inserts: A bowed plywood tray can bind against the drawer sides.
- Compressed feet: Felt pads may flatten, allowing the insert to wander.
- Soft adhesive: Pads can loosen or soften near a warm dishwasher.
- Excess height: A tray that clears while open may catch the face frame during closing.
Accessibility includes the complete interaction zone, not only the tray. Ottawa's guidance gives clear floor-space examples of 915 mm by 1370 mm for forward approach and 1525 mm by 915 mm for side approach where drawers or doors open, as described in Ottawa's accessibility design standards. Check the standing position, handle projection, toe-kick, and open-drawer path before finalising the installation.
Spending Less and Decluttering More
A matching six-piece bamboo set looks convincing in its packaging, but coordinated pieces rarely match the irregular interior of a real kitchen drawer. Unused compartments become catch-alls, while the pieces that fit are forced to carry too much. Two or three correctly sized organisers often outperform a complete set because they leave fewer dead zones and make categories easier to maintain.
Canadian buyers also need a fit-first budget. A Canada-focused interior-design source estimates that a practical organisation setup for a typical 80-square-foot kitchen can cost CAD $450 to $1,200 overall, while targeted drawer improvements are often planned within a narrower household budget. See the Canada-focused kitchen organisation guidance for the wider planning context, but don't treat a full-kitchen estimate as a reason to buy everything at once.
Edit before you shop
Empty the drawer onto a baking sheet or clean counter. Sorting outside the drawer makes duplicates visible and prevents you from designing compartments around items you shouldn't keep.
Use this order:
- Keep daily tools: Return pieces used regularly and in good condition.
- Relocate occasional tools: Move seasonal or specialised gadgets to a baking, serving, or pantry area.
- Donate duplicates: Keep the version that handles the task best.
- Discard damaged items: Broken handles, bent blades, and loose fittings have already spent their useful life.
- Measure survivors: Build the organizer layout around what remains, not what used to fill the drawer.
The cheapest organiser is the item you remove. This is especially true in compact homes, where a single oversized gadget can consume the space intended for several daily tools. California's storage context reinforces the broader pressure to manage limited household space. The state has more than 3,500 self-storage facilities and over 213.3 million square feet of storage space, equivalent to 5.53 square feet per person, according to California Energy Commission documentation. That measures off-site storage, not kitchen drawers, but it illustrates why in-home organisation systems remain practical rather than decorative.
Start with one problem drawer, record what fits, and adjust before standardising the rest of the kitchen. GrifGlo offers curated kitchen and organisation essentials alongside sizing and comparison guidance, so visit GrifGlo to review practical options after you've measured your drawers and edited their contents. Choose the system that fits the box, suits the reach zone, and can survive the way your household cooks.


Laisser un commentaire
Ce site est protégé par hCaptcha, et la Politique de confidentialité et les Conditions de service de hCaptcha s’appliquent.