You open one cabinet looking for a pot lid and trigger the usual chain reaction. A baking sheet slides forward. A plastic container drops out. The colander you need is trapped behind a stack of mixing bowls you forgot you owned. That's the moment you decide you need more storage.
Usually, they need a better system.
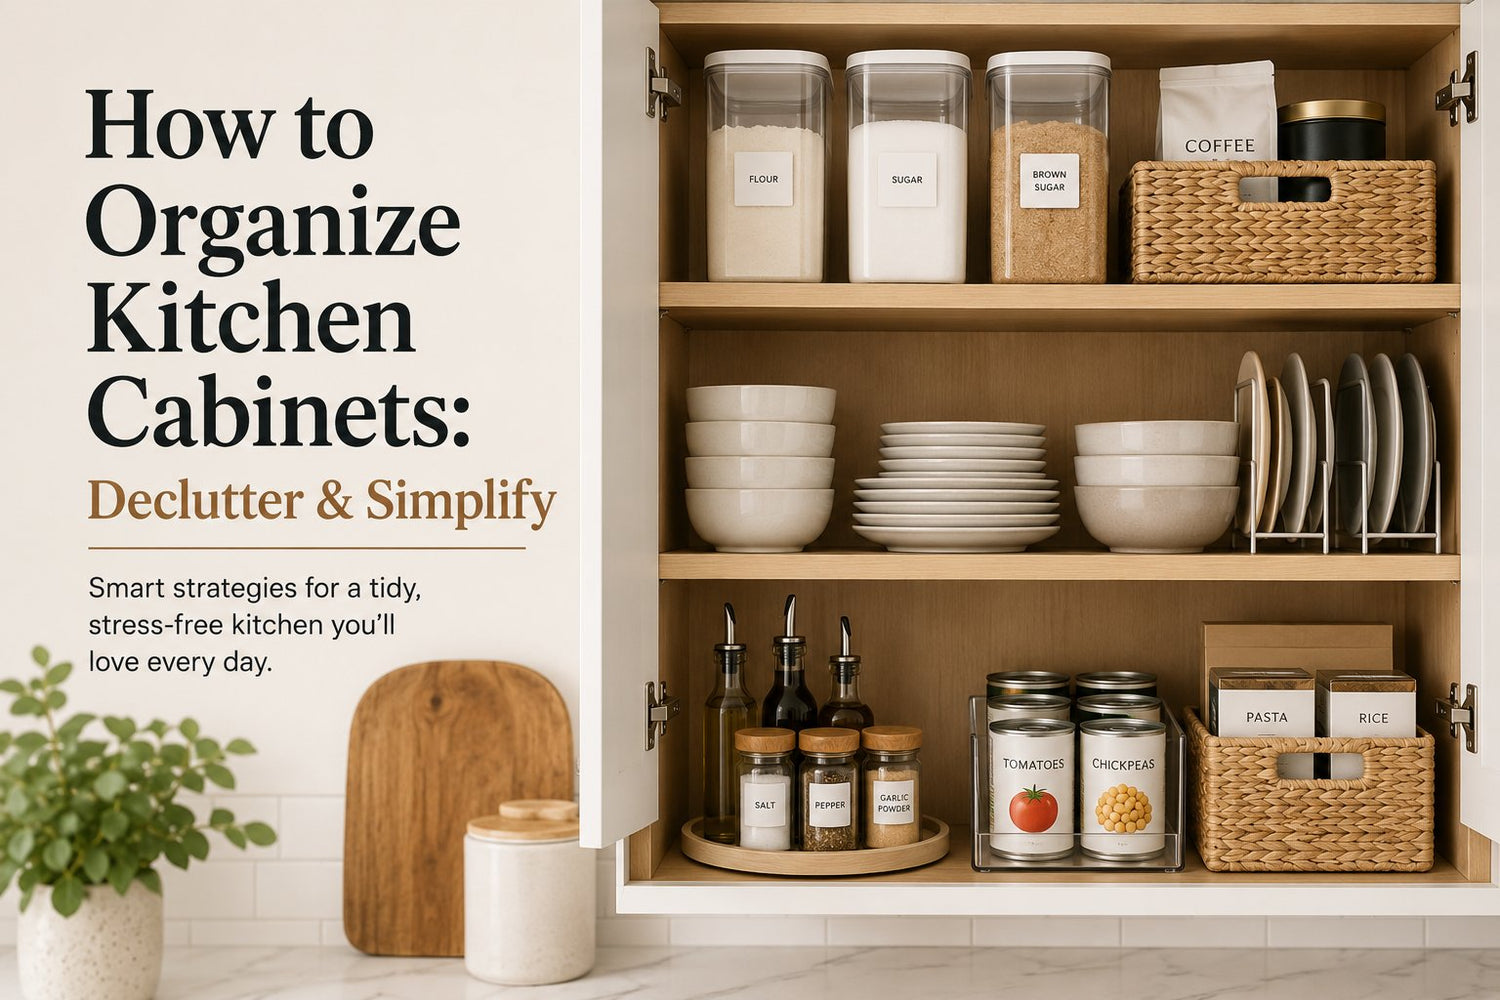
If you're trying to figure out how to organize kitchen cabinets, start with this: good cabinet organisation isn't about making everything look uniform. It's about making the kitchen easier to use on an ordinary Tuesday when dinner is late, the dishwasher is half full, and nobody has time to dig through three shelves to find the cumin. The best setups reduce friction. You reach less, shuffle less, and rebuy fewer duplicates because you can see what you have.
Table of Contents
- Your Strategic Approach to Cabinet Organization
- The Edit Phase Declutter with Purpose
- Create Your Zones for a Smarter Workflow
- Measure and Map Your Cabinet Layout
- Select Organizers That Improve Access Not Just Storage
- Arrange and Maintain Your New System
Your Strategic Approach to Cabinet Organization
Most cabinet frustration comes from treating organisation like a cleaning task instead of a layout problem. If the cabinet is hard to use, it will get messy again even after a very satisfying weekend reset. That's why the process works better when you follow a sequence instead of improvising shelf by shelf.
The sequence is simple: Edit, Zone, Plan, Equip, Arrange.
- Edit means reducing what has to fit. Organising excess is slow and temporary.
- Zone means deciding where kitchen activities happen, then storing tools near those activities.
- Plan means measuring the cabinet interiors and assigning items before shopping.
- Equip means choosing organisers that improve visibility and reach.
- Arrange means placing things by frequency, weight, and ease of use.
Practical rule: If you buy organisers before you edit and map the space, you usually end up organising containers instead of organising the kitchen.
This approach also helps in real-world kitchens that don't have ideal cabinetry. Renters often can't drill into doors or add built-ins. Small kitchens need every shelf to do more than one job. Canadian homes often have deep lowers, under-sink cutouts, and older cabinet sizes that make generic advice feel incomplete. In those spaces, access matters as much as storage capacity.
If your food storage and dry goods spill into cabinets as well, this guide on using bins and zones to organise pantry storage complements the same workflow without turning the kitchen into a matching-container project.
The Edit Phase Declutter with Purpose
The fastest way to make cabinet organisation harder is to begin by shuffling things around in place. Pulling everything out feels disruptive, but it exposes the underlying issue quickly. You can't plan a workable cabinet layout while old duplicates, broken tools, and misplaced items are still hiding in the back.

Empty first so you can see the real problem
Take everything out of one cabinet category at a time if the whole kitchen feels too big. Do all dishes, or all cookware, or all food storage. Wipe shelves while they're empty, but don't stop to make it an elaborate cleaning project.
A practical planning method is to inventory every item, map cabinet zones to daily workflow, and specify organisers only after measuring the inside dimensions of each cabinet or drawer. One planning approach even uses a 1-inch scale sketch so the final layout can be matched to product specs before purchase, as outlined in this kitchen planning workflow.
That inventory step matters because memory is unreliable in kitchens. It's common to think one owns “a few extra containers” and discover a full shelf of mismatched lids.
Use four decisions instead of endless micro-decisions
Don't ask, “Should I maybe keep this just in case?” Ask which of these four categories it belongs in.
- Keep Items you use regularly and would notice if they disappeared. Your everyday frying pan, weeknight plates, lunch containers with matching lids, the measuring jug you reach for.
-
Relocate
Things living in the wrong room or wrong cabinet. Vases, batteries, guest candles, medicine, takeaway menus, seasonal platters that belong in a hall cupboard, or tools that should be in a utility area. -
Donate or sell
Good items that don't fit your actual cooking life. The novelty cake tin used once. The duplicate whisk. The extra mug set from a move. If it's usable but not useful to you, let it leave. -
Toss
Broken lids, warped containers, chipped dishes you won't safely use, rusted gadgets, mystery parts, and anything expired.
If you own three versions of the same tool, keep the one you reach for without thinking. Habit is useful data.
This is also the point where you separate cabinet items from drawer items. Utensils, wraps, and small prep tools often clog up cabinets because they never had a proper drawer home. If that's happening in your kitchen, this guide on how to organise kitchen drawers helps split the load properly.
Finish with an inventory not a pile
At the end of the edit, you should have a tighter list of what the kitchen stores. Write it down if needed. Categories are enough: daily dishes, glassware, pots, pans, baking sheets, baking ingredients, food storage, spices, cleaning supplies, small appliances, serving pieces.
That list becomes your working inventory. It also prevents a common mistake: buying organisers for things that shouldn't stay in the cabinet at all.
In colder kitchens or utility-adjacent cooking spaces, some people also use supplemental heat while doing a cabinet reset. If that applies to your setup, the FAN HEATER E68S PTC Ceramic Heater With Remote Control is described as using PTC heating technology for fast warmth with a touch panel and circulating airflow. That's not an organisation tool, but it's the sort of practical household support item people often pull into a long reset session.
Create Your Zones for a Smarter Workflow
A cabinet system starts making sense when the kitchen is organised by activity, not by vague ideas of neatness. You don't cook in alphabetical order. You cook in motion. That means the best cabinet layouts follow where you chop, stir, load, unload, and serve.

Build zones around actions
A strong principle for how to organize kitchen cabinets is to zone storage by activity so the items you use most are closest to where you use them. Whirlpool recommends storing cookware and bakeware near the range, keeping regularly used dishes and glasses on lower shelves toward the front, and placing less-used serving pieces higher up in its guide to organising kitchen cabinets.
Store items where you use them, not where they seem like they “match”.
That sounds obvious, but many cabinets are arranged by visual similarity instead of function. All the bowls end up together. All the glass goes in one area. All the appliances get crammed into whichever cabinet is tallest. The kitchen may look tidier for a moment, but the daily workflow gets worse.
A better test is simple: when you make tea, cook pasta, pack lunches, or unload the dishwasher, do you have to pivot across the room to finish one task?
Here's a quick visual to help you think through the layout in action.
A simple zone map for most kitchens
Most kitchens work well with a few broad zones:
| Zone | Keep here | Best location |
|---|---|---|
| Cooking | Pots, pans, oils, spices, cooking utensils | Near the hob or range |
| Prep | Mixing bowls, boards, knives, measuring tools | Near your main clear counter |
| Baking | Tins, parchment, mixers, baking ingredients | Near oven space if possible |
| Dishes | Plates, bowls, glasses, mugs | Near dishwasher or sink |
| Cleaning | Cloths, detergents, brushes, dishwasher items | Under sink or nearby cabinet |
| Serving and occasional | Platters, specialty pieces, holiday items | Higher shelves or back storage |
Adjust the plan to fit how you live
The right zones depend on routine. If you bake weekly, baking shouldn't live in the top corner cabinet behind a waffle maker. If you mostly reheat leftovers and pack lunches, food storage deserves prime space. If children unload dishes, lower placement may matter more than classic eye-level storage.
For pantry-heavy kitchens, it also helps to compare airtight, stackable, and modular pantry containers before you assign cabinet space to dry goods. The container style affects how much room a zone needs and whether that zone stays visible over time.
Measure and Map Your Cabinet Layout
Once the zones are decided, the work becomes technical. At this stage, many organising attempts go off course. People estimate, shop, and discover the new bin doesn't clear the hinge, the pull-out catches on the cabinet frame, or the under-sink caddy blocks the plumbing.

Measure the inside not the outside
Measure the usable interior of each cabinet. That includes width, depth, and height. Don't rely on exterior dimensions or product labels for the cabinet itself.
Check for these space thieves before you write anything down:
- Cabinet lips and frames that reduce clear entry space
- Interior hinges that limit the width of bins or sliding trays
- Shelf pin positions that affect riser height
- Plumbing cutouts under the sink
- Disposal units or water lines that break up the cabinet floor
- Door swing clearance if an organiser needs to pull out fully
A cabinet may look deep enough for a large bin, then lose usable depth because the door hinge projects inward. That's why so many storage products work in theory and fail in practice.
Map awkward cabinets before you buy anything
Awkward cabinets need more than one measurement. Under-sink spaces often need left and right widths measured separately around pipes. Deep lower cabinets need reach distance considered, not just volume. Corner cabinets need you to think about what can be retrieved without unloading the front.
Measure for movement, not only for fit. An organiser that fits but doesn't slide, rotate, or clear the opening won't solve anything.
This matters even more in rentals and older kitchens where cabinet boxes weren't designed for standard inserts. If your space has shallow doors, odd depths, or dead corners, sketch it. A quick hand-drawn plan often prevents expensive guesswork.
For slim doors and overlooked vertical surfaces, over-the-door pantry organiser ideas can sometimes relieve pressure on crowded cabinets without requiring permanent changes.
Create a working cabinet plan
Now assign each cabinet a job. Keep it plain. “Left of hob: frying pans, saucepans, lids.” “Upper near sink: glasses and mugs.” “Under sink: cleaning only.” “High cabinet: seasonal platters and speciality appliances.”
A simple planning sheet can include:
-
Cabinet location
Name it by landmark, not by number. -
Zone assignment
Cooking, prep, dishes, cleaning, baking, or occasional use. -
Items stored
Be specific enough to stop overlap. -
Measurements
Interior width, depth, height, plus obstructions. -
Needed organiser type
Only if a clear problem exists.
That last point matters. Some cabinets don't need products at all. They need fewer items and a better assignment.
Select Organizers That Improve Access Not Just Storage
A cabinet can look tidy and still be annoying to use. That usually happens when the organiser stores more stuff but makes you reach farther, lift more, or unload half the shelf to get one item. Good cabinet organisers cut those extra motions.

That matters in older kitchens and many Canadian homes, where cabinet boxes are often deep, narrow, or interrupted by hinges, face frames, and awkward corners. Guidance from Würth notes that awkward cabinets usually work better with tools that improve visibility and retrieval, such as pull-out drawers, slide-out baskets, and fitted inserts, rather than more loose containers in its discussion of organising kitchen cabinets for awkward spaces.
Choose tools that solve a specific access problem
Buy by friction point, not by category name. “I need a bin” is usually too vague. “My pot lids fall over every time I grab a sauté pan” is specific enough to solve.
| Problem | Usually doesn't work well | Better fit |
|---|---|---|
| Deep base cabinet | One large open bin | Pull-out tray or slide-out basket |
| Tall shelf with wasted height | Stacking loose items | Shelf riser or stacking divider |
| Baking sheets falling over | Horizontal piles | Vertical dividers |
| Corner cabinet | Fixed bins at the back | Turntable for smaller items |
| Under-sink around pipes | Full-width box | Custom-fit narrow bins or stepped caddy |
| Food storage lid chaos | One mixed basket | Vertical lid file or separated sections |
The pattern is simple. The best organiser brings items forward, keeps them upright, or makes them visible in one glance.
What usually works better than extra bins
Bins are useful for grouping small packets, cloths, or backstock. They are less useful when they turn a cabinet into a stack of containers inside containers. I see this a lot in lower cabinets, where one oversized bin looks neat at first and then becomes a heavy box nobody wants to pull out.
Tools that usually earn their space:
-
Slide-out shelves or baskets
Helpful in deep cabinets with heavy cookware, mixing bowls, or backup pantry items. -
Vertical dividers
Better for trays, cutting boards, pans, and lids because each piece can be removed without disturbing the rest. -
Tiered risers
Useful for spices, cans, short jars, and small baking items that disappear on a flat shelf. -
Turntables
Good for oils, vinegars, condiments, and smaller items in corners or hard-to-see upper cabinets. -
Custom-fit under-sink inserts
A better answer than one big tub when pipes break up the footprint and moisture is a factor.
When you're ready to shop, look for platforms like GrifGlo that group products by use case and sizing guidance. That makes it easier to match an organiser to a real cabinet problem instead of buying based on appearance.
The organiser should reduce the number of motions it takes to reach an item.
Renter-friendly fixes for small and awkward kitchens
Reversible solutions matter in rentals. So does restraint in small kitchens. A bulky insert that technically fits can still waste space if it steals vertical clearance or blocks the cabinet door from opening comfortably.
Try these options first:
- Tension rods for upright trays, lids, or spray bottles under the sink
- Freestanding risers that add a second level without screws
- Stacking shelves for mugs or bowls only when hand clearance still feels comfortable
- Magnetic or side-mounted storage for light, non-fragile items you use often
- Narrow pull-out style baskets that sit on existing shelves without installation
Under-sink cabinets usually need their own plan. Pipes, shutoff valves, dampness, and cleaning supplies change what works, so targeted under-sink storage ideas for tight, pipe-heavy cabinets are often more helpful than general cabinet advice.
One final trade-off is worth keeping in mind. Matching organisers can make a cabinet look calmer, but matching pieces are not automatically the right pieces. Function comes first. If an organiser slows retrieval, it is taking up space, not solving a problem.
Arrange and Maintain Your New System
This is the part people picture when they think about organising. It's also the easiest part to get right once the earlier decisions are solid. By now, each cabinet should have a defined purpose, and each organiser should solve a specific access problem.
Place by frequency and weight
A practical ergonomic rule is to place daily-use dishes, cups, and spices at eye level, store heavy pots and pans in lower cabinets, and reserve upper cabinets for rarely used appliances or specialty tools because that reduces lifting demands and search time, as noted in this cabinet layout guide.
Use that principle while putting everything back:
- Most used goes front and easy to reach
- Heavy goes low
- Fragile but frequent goes accessible, not precarious
- Rarely used goes high or to the back
- Seasonal or guest items should not occupy prime cabinet real estate
Keep the system from drifting
Cabinets don't usually fail because the household is messy. They fail because the reset path is unclear. If there isn't an obvious home for an item, it gets parked wherever there's room.
A few habits keep the system stable:
- One in, one out for mugs, food storage, and gadgets that accumulate
- Quick seasonal reset every few months to remove drift
- Lid checks so containers don't become plastic orphans
- Category boundaries so baking doesn't gradually consume prep space
A cabinet system is working when putting things away feels almost automatic.
A practical note for hosts and property managers
If you stock a short-term rental, office kitchenette, or furnished property, favour standardisation over personality. Matching dish sizes stack more cleanly. Clearly defined cabinet jobs help guests return items correctly. Durable everyday pieces should get the most accessible shelves, and backstock should stay separate from guest-facing storage.
Labels can help in shared kitchens, but don't label everything just because it looks organised. Label where confusion occurs: food storage lids, cleaning supplies, guest mugs, or restocking zones.
When you organise kitchen cabinets for actual use instead of display, the kitchen gets calmer fast. You stop shifting four items to reach one. You stop storing duplicates because you can't find the first one. And you stop thinking of organisation as upkeep, because the layout starts doing part of the work for you.
If you're choosing organisers, comparing kitchen tools, or trying to set up a cleaner system for a home, rental, or shared space, GrifGlo offers practical buying guides and category-based comparisons that can help you match products to real cabinet problems instead of buying on appearance alone.

Leave a comment
This site is protected by hCaptcha and the hCaptcha Privacy Policy and Terms of Service apply.