

You're cooking a stir-fry on a wide gas cooktop, the pan is smoking, and the hood is running at full speed. Yet vapour curls around the front edge, grease settles on the cabinets, and the motor sounds strained. That usually isn't a sign that you need the biggest blower available. It's often a sign that the hood is poorly positioned, the duct is undersized, or the advertised airflow doesn't survive the installation.
A 36 inch vent hood gives you useful coverage over a broad cooking surface, but width is only one part of the decision. The hood must capture emissions, move them through a suitably designed duct, operate at a sound level you'll be willing to use, and meet the requirements of your local building code. California installations deserve particular care because airflow, sound, makeup air, and installed performance can affect both compliance and everyday comfort.
Table of Contents
- Understanding Sizing and Coverage Rules
- Calculating Airflow and CFM Requirements
- Comparing Ducted and Ductless Venting Systems
- Selecting Mounting Styles and Clearance Guidelines
- Evaluating Noise Levels and Filter Options
- Avoiding Common Installation Pitfalls and Electrical Needs
- Using the Final Measurement and Decision Checklist
Understanding Sizing and Coverage Rules
A 36-inch cooktop can spread pans across a broad surface, while smoke and grease move wherever heat, pan position, and room air take them. A front burner can push vapour past a hood that matches the cooktop exactly, particularly with cross-drafts or a shallow canopy. The result is residue on cabinets and weaker capture, even when the blower is running hard.
Width is the starting point
For a 36-inch cooking surface, a hood with the same nominal width is the minimum practical starting point. Extending the canopy beyond the cooktop by roughly 3 to 6 inches per side gives the capture area more room to contain emissions, as described in this California range hood code guidance. Confirm the applicable requirements with the local building department before ordering, since the hood, duct, and makeup-air arrangements may be reviewed as one installation.
The mounting style changes the coverage problem:
- Wall-mounted canopies benefit from the wall behind them, which helps contain rising air. They are usually simpler to support and duct than island models.
- Island hoods must collect emissions from every direction. Their position, canopy depth, ceiling support, and duct route all need careful planning because no rear wall helps contain the plume.
- Under-cabinet hoods work well in compact kitchens and remodels, but cabinet depth can restrict the capture area. Measure the cabinet, hood body, and duct connection together rather than assuming every 36-inch model fits.
A wider hood does not correct poor installation. Excessive mounting height, an off-centre position, a narrow duct, or several tight bends can leave the outer canopy underused. Choosing a high-CFM blower without planning the duct can also add noise, resistance, and code-related work without delivering better capture at the cooktop.
Match the hood to the cooking surface
Measure the usable burner area, not only the appliance's outside dimensions. Then compare the hood's required mounting height, canopy depth, outlet location, and duct connection. A wall model adapted for an island may have a different capture pattern, support requirement, and practical performance.
Evaluate the complete capture system on site: cooking surface, canopy overhang, distance between the burners and hood, cross-drafts, and the direction of the duct. Clearance requirements also affect cabinet design and the final hood position, so confirm them before framing or installing backsplash materials.
For a comparison between a 36-inch gas cooktop and a narrower appliance, this guide to 36-inch gas cooktops can help assess the footprint before finalising the hood. The right width creates the opportunity for capture. Correct placement and a workable duct determine whether the system uses it.
Calculating Airflow and CFM Requirements
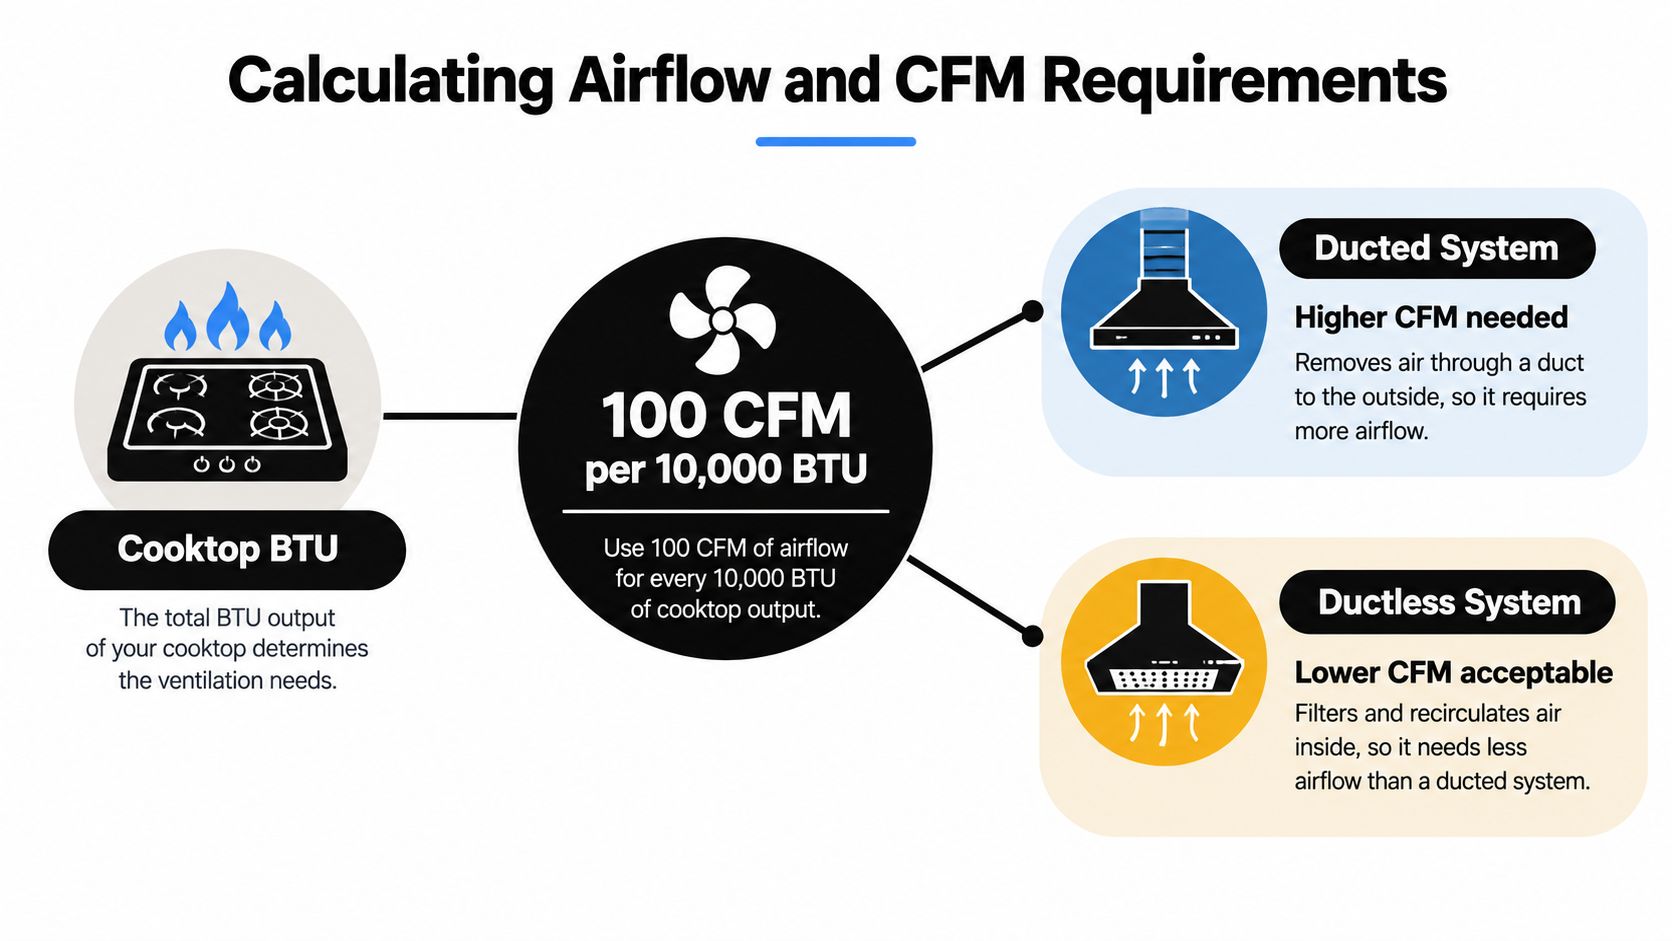
CFM, or cubic feet per minute, describes how much air the blower is intended to move. It doesn't automatically tell you how much air will leave the kitchen once the system includes duct bends, a termination cap, filters, and static pressure.
Read the rating in context
Start with the manufacturer's performance data. Check whether the advertised rating is measured under ideal conditions, whether it refers to the motor or the installed system, and whether the manual specifies airflow at a stated static pressure. A nameplate figure is useful for comparison, but it isn't the same as verified airflow at the cooktop.
California's residential framework requires a code-compliant vented range hood to deliver at least 100 CFM and remain at 3 sones or less, according to California Energy Commission guidance. The requirement is tied to installed performance, so a powerful motor connected to a restrictive duct may not deliver the intended result.
The airflow path loses performance through:
- Long duct runs, which create more resistance than short, direct routes.
- Sharp bends, especially when the layout forces the air to change direction repeatedly.
- Small duct diameters, which increase static pressure and can raise noise.
- Restrictive exterior caps, dampers, and transitions.
- Dirty filters, which reduce the free area available for exhaust.
A blower that sounds impressive in a showroom can become loud and disappointing after installation if the duct route fights it.
More CFM can create more work
A high-CFM hood isn't automatically a better hood. In California, state code references indicate that hoods above 400 CFM require makeup air, and that replacement air must be tempered before delivery, as outlined in this California Title 24 range hood overview. That can bring HVAC coordination, electrical work, controls, and additional equipment into a project that originally looked like a simple appliance replacement.
Buyers often underestimate the true cost at this stage. The hood may fit the budget, but the supporting work can involve opening walls, enlarging duct chases, adding a makeup air path, and arranging inspection or commissioning.
Practical rule: Choose the airflow your cooking and installation can support, then verify the delivered performance. Don't select a large blower first and ask the kitchen to accommodate it later.
For a 36-inch hood, compare the cooktop, cooking habits, duct route, and code requirements together. This range hood comparison for 30-inch models is also useful for understanding how width and airflow are separate specifications. A wider hood may improve coverage, but the CFM decision still depends on the complete ventilation system.
Comparing Ducted and Ductless Venting Systems
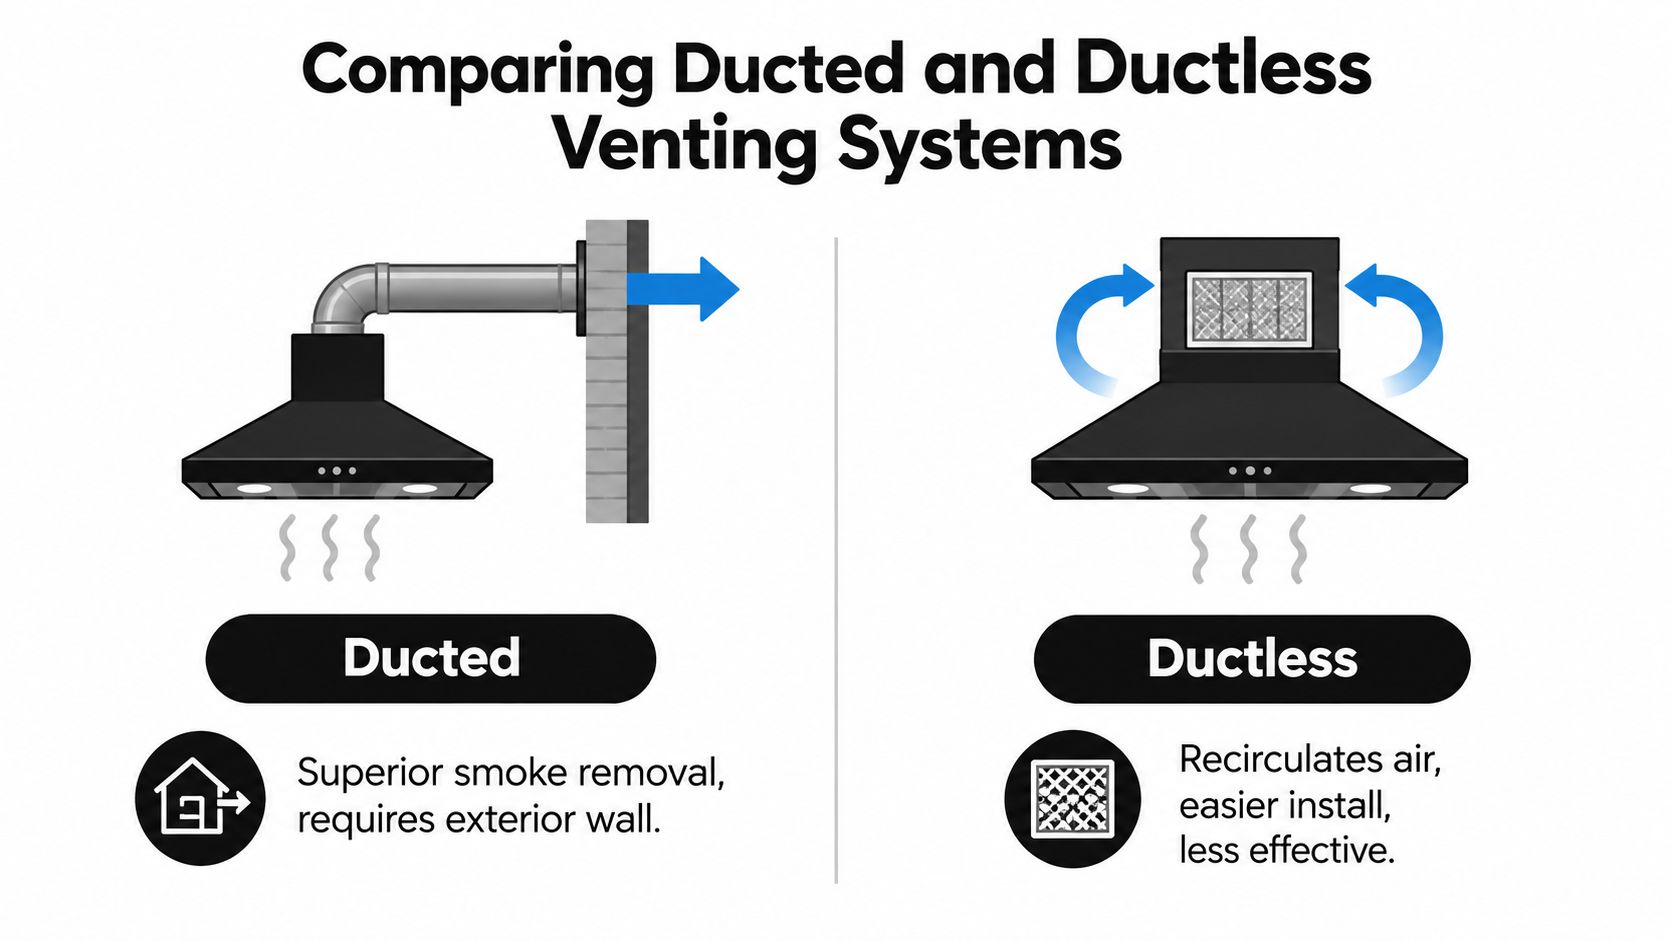
A ducted hood exhausts cooking air outdoors. A ductless hood filters the air and returns it to the kitchen. The two designs can look identical, but their control of moisture, grease, odours, and combustion byproducts is very different.
Ducted systems remove more than odour
For frequent frying, searing, boiling, or gas cooking, exterior exhaust usually delivers better results. It carries moisture, airborne grease, cooking odours, and combustion byproducts out of the building instead of recirculating them.
The duct route determines how much of the hood's rated airflow reaches outdoors. Long runs, sharp bends, undersized ducts, restrictive transitions, and poorly sealed joints increase resistance. A high-CFM blower cannot compensate for a duct that is too small or badly configured. The result can be more noise, weaker capture, and higher installation costs when walls or cabinets must be reopened.
Common lower-capacity installations often use a 6-inch minimum round duct, while higher airflow may require a larger diameter. Confirm the required size in the hood's installation manual and with the authority having jurisdiction. Do not reduce the outlet because an existing smaller duct is easier to connect.
A larger duct can reduce resistance and noise when it matches the hood's airflow requirements. The correct diameter is the one supported by the manufacturer and local code, not the largest pipe that fits the cabinet.
Ductless systems trade performance for convenience
Recirculating models suit rentals, some interior apartments, and finished spaces where creating an exterior route would require disproportionate demolition. They can also be practical when the building offers no suitable exhaust path.
Their limits are clear:
- Charcoal filters reduce odours but don't remove all moisture.
- Grease filters need regular cleaning, particularly after high-heat cooking.
- Air returns to the room, carrying much of the heat and humidity back into the kitchen.
- Filter condition affects performance, and neglected filters can restrict airflow.
A ductless 36-inch model can be preferable to no hood, but it does not provide the same moisture and contaminant removal as a correctly ducted system. Filter replacement and cleaning also become ongoing ownership costs.
For a cabinet remodel involving a microwave combination or compact cooking area, compare the ventilation trade-offs in this over-the-range microwave guide. If you handle cabinet work yourself, the BLACK+DECKER BDC120VA 20V MAX* POWERCONNECT Cordless Drill with 100-Piece Kit is a tool option for general installation work, not a substitute for qualified electrical or ducting expertise.
Selecting Mounting Styles and Clearance Guidelines
The hood's position controls both safety and capture. A unit mounted too high may allow smoke to spread before it reaches the canopy. A unit mounted too low can interfere with cooking, create a clearance hazard, or conflict with the manufacturer's installation requirements.
Follow the appliance-specific clearance
Clearance varies with the hood design, cooktop type, fuel source, and local code. Gas cooking generally demands more careful heat and flame clearance than electric or induction cooking, but the manufacturer's manual remains the controlling reference for the particular appliance.
Before marking the wall, confirm:
- The minimum and maximum distance above the cooking surface.
- Whether the measurement is taken from the grate, burner, or cooktop surface.
- Whether the hood has a deeper canopy that changes the practical capture zone.
- Whether cabinet doors, trim, or shelves interfere with the required position.
- Whether the installation requires a non-combustible surface or additional protection.
Don't rely on a generic clearance figure copied from another product. Two 36-inch hoods can have different canopy depths, motor placements, heat ratings, and mounting requirements.
Support the structure, not just the appliance
Wall-mounted hoods usually attach to studs, blocking, or a manufacturer-supplied bracket. The fasteners must transfer the hood's weight into the building structure, not merely into cabinet material or drywall. A cabinet can conceal the hood, but it shouldn't be assumed to provide adequate structural support without reinforcement.
Island installations demand more planning. The ceiling needs suitable blocking or framing, and the support system must account for the hood, duct connection, vibration, and long-term movement. Decorative chimney sections hide the duct, but they don't replace a proper support bracket.
A 36-inch canopy can also affect sightlines and cabinet proportions. Set the hood centreline against the cooktop centreline, then check that the canopy doesn't collide with lighting, shelving, or upper-cabinet doors. For island layouts, review range hoods designed for islands before ordering, because island models are engineered for a different airflow environment than wall-mounted units.
Evaluating Noise Levels and Filter Options
A hood that's too loud often gets switched off. That behaviour matters more than a high laboratory rating because ventilation only works while the system is operating.
California's code framework sets a 3-sone maximum sound rating for a code-compliant vented range hood, alongside the airflow requirement, as explained in the California residential ventilation report. The practical reason is straightforward. If occupants dislike the noise, they're less likely to run the hood during cooking.
Diagnose noise as a system problem
Motor design affects the character of the sound, but ductwork often determines how harsh the hood feels in the room. A narrow duct, abrupt transition, loose connection, or poorly supported pipe can create turbulence and vibration. The cabinet can then act like a resonating box.
Centrifugal blowers can maintain airflow against resistance better than simple fan arrangements, but they still can't defeat an unsuitable duct route. Ask the installer to check the hood's sound rating at the relevant speed and operating condition, rather than comparing a single maximum-speed figure from one product with a low-speed figure from another.
A quieter installation usually comes from several choices working together:
- Use the correct duct size rather than forcing a high-volume blower through a narrow run.
- Keep the route direct and avoid unnecessary bends.
- Secure the hood and duct so vibration doesn't transfer into cabinets.
- Select the lowest effective speed for light cooking.
- Clean the filters, because grease buildup can restrict airflow and change the sound.
Choose filters for the cooking you do
Aluminium mesh filters are common and can offer a practical balance of cost, weight, and cleanability. Baffle filters use shaped metal channels to redirect air and separate grease from the exhaust stream. Stainless-steel versions are durable and can suit a high-use kitchen, while dishwasher-safe designs reduce the friction of regular maintenance if the manufacturer permits dishwasher cleaning.
Filter choice won't fix a weak duct design. It also won't make a recirculating system equivalent to exterior exhaust. Treat the filter as the first stage of grease management and clean it according to the manufacturer's instructions. A greasy filter increases resistance and gives captured residue more opportunity to drip back into the hood.
Avoiding Common Installation Pitfalls and Electrical Needs
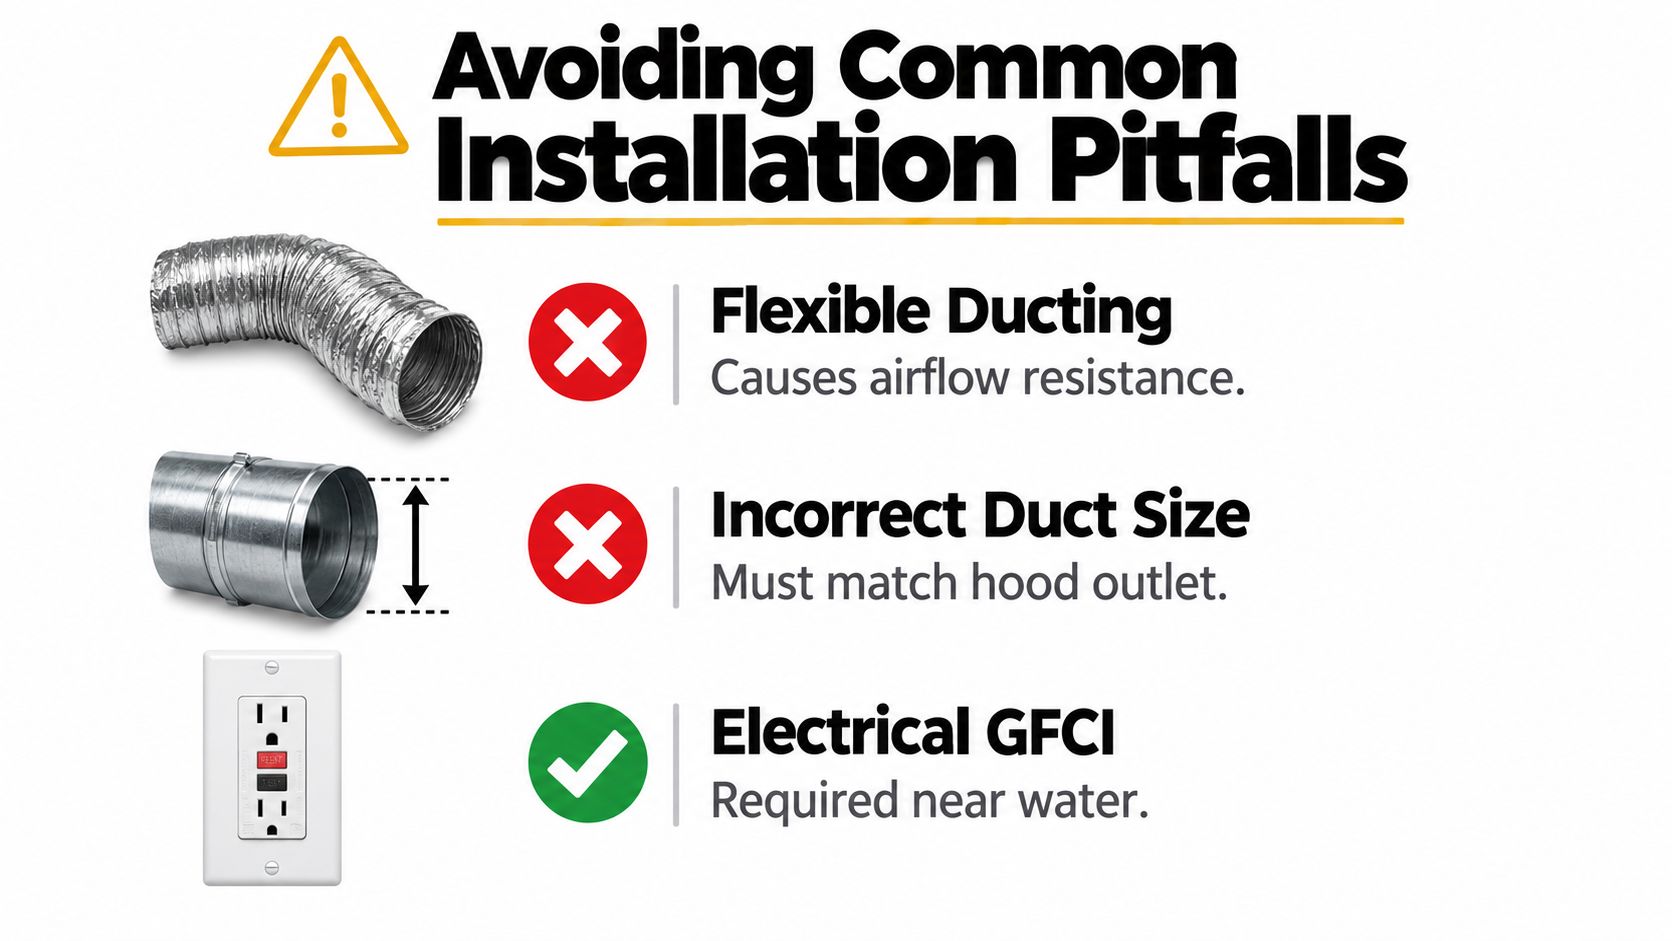
Many poor-performing hoods fail before the motor is ever switched on. The installer uses the existing duct without checking its size, adds a flexible section to save time, or leaves an electrical connection in a place that becomes inaccessible after the canopy is mounted.
Don't treat flexible duct as a harmless shortcut
Flexible or corrugated duct creates a rough interior path that increases turbulence and gives grease more places to collect. It can also sag, kink, or compress behind cabinets. For a high-capacity 36-inch hood, those problems become more costly because the blower is already moving a substantial volume of air.
Use a smooth, rigid metal duct system that matches the hood manufacturer's specifications. Keep the diameter consistent from the hood outlet to the exterior termination wherever the design allows. The range hood installation guide can help you review the sequence, but local code and the product manual still govern the actual installation.
Plan electrical work before closing the wall
The hood's electrical requirements depend on the specific model. Confirm the voltage, amperage, grounding method, connection type, and whether the unit plugs into a receptacle or connects through a junction box. Don't assume an existing cabinet outlet is positioned correctly or that a nearby circuit has enough capacity.
The connection must remain accessible for service. An installer who buries a junction box behind a permanently fixed canopy can turn a simple repair into cabinet or drywall work. Route the cable clear of the duct, protect it from sharp metal edges, and keep it away from heat in accordance with the electrical code.
Water exposure also matters. Where local rules require ground-fault protection near sinks or other wet locations, the installer should use the appropriate protected circuit or receptacle. That decision belongs to a qualified electrician who can assess the kitchen layout and the locally adopted code.
Check the exterior termination
The duct should discharge outdoors through a suitable termination with a backdraft damper where required. Don't terminate into an attic, ceiling cavity, or crawlspace. Moisture and grease belong outside the building envelope, and the termination must be positioned so exhaust doesn't re-enter through a nearby opening.
Using the Final Measurement and Decision Checklist
Take measurements before you visit the showroom or place an order. A 36-inch label tells you the nominal width, but it doesn't confirm cabinet fit, duct alignment, electrical access, canopy depth, or clearance.
Start with the job-site facts
Record the cooktop width and depth, then measure the available wall or island space. Note the cabinet width, cabinet depth, ceiling height, likely duct route, exterior termination point, and location of the electrical supply.
Next, read the hood's installation manual. Confirm its required duct diameter, outlet position, maximum and minimum mounting height, sound rating, airflow data, filter type, and mounting method. If the manual conflicts with a sales listing, use the manual and ask the manufacturer for clarification.
Use this sequence:
- Measure the cooking surface. Confirm that the hood provides suitable coverage and any recommended overhang.
- Check the mounting location. Identify studs, blocking, ceiling framing, cabinet obstacles, and the centreline.
- Map the duct route. Count bends, transitions, and the distance to the exterior.
- Verify installed airflow requirements. Don't rely only on the motor's maximum advertised rating.
- Check the high-CFM consequences. In California, a hood above the applicable threshold can require tempered makeup air, so resolve that before ordering.
- Confirm electrical access. Have the circuit and connection method reviewed before cabinets or wall finishes are closed.
- Plan commissioning. Ask how the installer will confirm that the completed system meets the required airflow and sound conditions.
Use the matrix during selection
| Verification Step | Target Metric | Why It Matters |
|---|---|---|
| Cooking surface measurement | Confirm actual cooktop width and depth | Establishes the required capture area |
| Hood coverage | Hood meets or exceeds the cooktop footprint and recommended overhang | Helps contain emissions from the full cooking surface |
| Installed airflow | Meets the manufacturer's and local code requirements | Avoids confusing motor rating with delivered performance |
| Sound rating | Within the applicable code and manufacturer limits | Makes regular use more realistic |
| Duct route | Correct diameter, smooth metal construction, and practical routing | Reduces static pressure, turbulence, and noise |
| Makeup air review | Required before purchase where high airflow triggers it | Prevents late HVAC and inspection changes |
| Mounting support | Studs, blocking, bracket, or engineered ceiling support confirmed | Keeps the canopy secure and reduces vibration |
| Electrical connection | Correct circuit, grounding, and accessible connection | Supports safe operation and future service |
| Filter maintenance | Filter type and cleaning method understood | Preserves airflow and grease capture |
| Exterior termination | Outdoor discharge with suitable protection | Keeps moisture and exhaust out of the building cavity |
The best choice is rarely the hood with the highest number on the product page. It's the model whose coverage, airflow, duct, sound level, support, electrical supply, and code requirements all agree with the kitchen you're building.
GrifGlo provides decision-friendly guides and curated options across kitchen appliances, tools, and home essentials, helping shoppers compare fit, usability, and installation considerations. Visit GrifGlo before ordering your 36-inch vent hood to organise the measurements and product checks that keep an ambitious ventilation upgrade from becoming an expensive retrofit.


Leave a comment
This site is protected by hCaptcha and the hCaptcha Privacy Policy and Terms of Service apply.