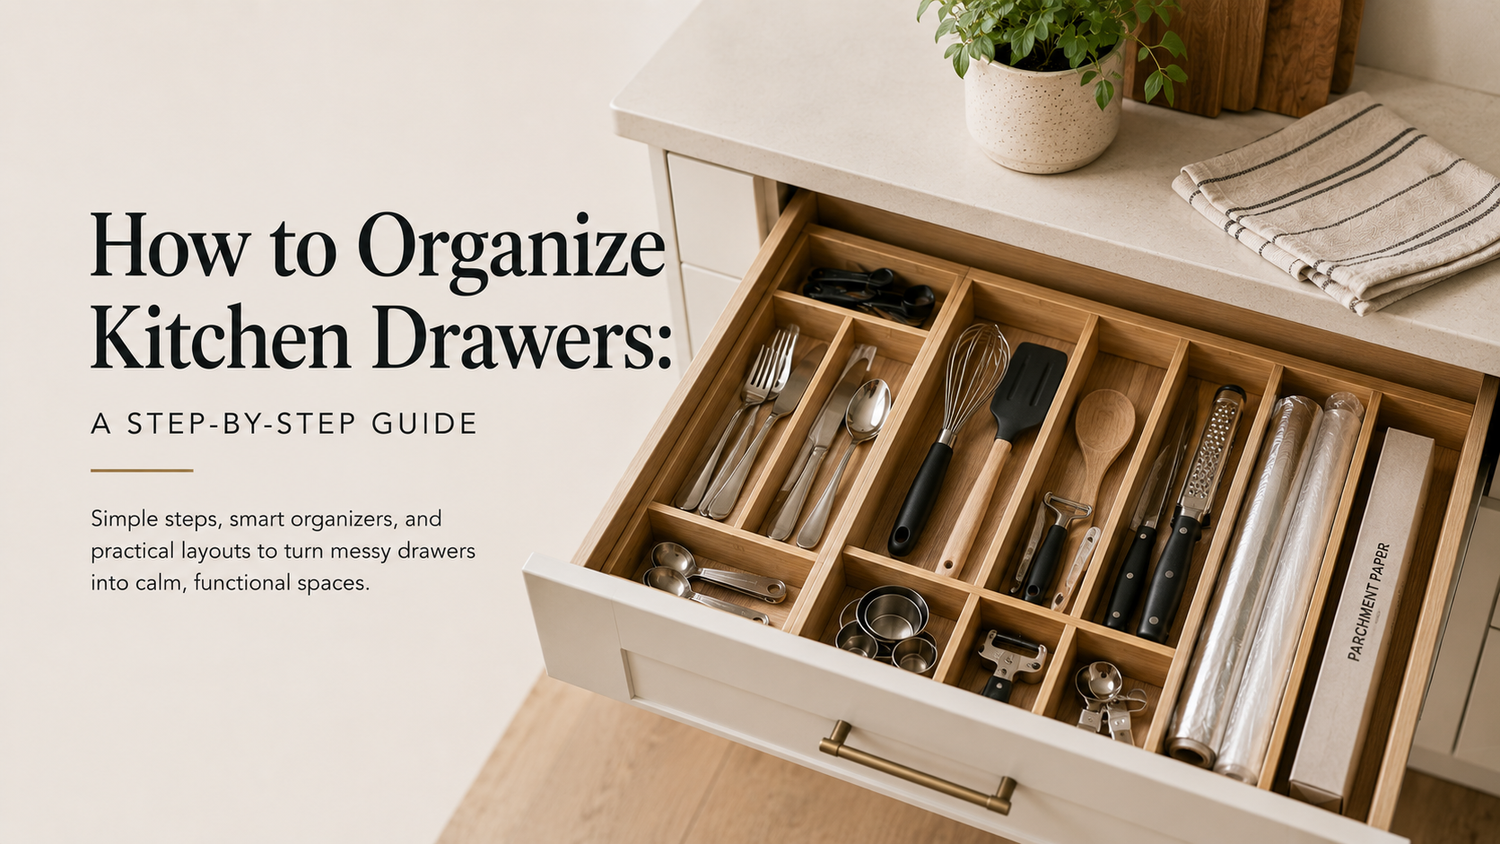
You open the utensil drawer to grab a peeler and get the usual mess instead. Measuring spoons are tangled with corn holders, the can opener has vanished again, and there's a battery rolling around for no good reason. That kind of drawer doesn't just look bad. It slows down every small kitchen task and makes cooking feel harder than it needs to be.
Most people aren't aiming for a showroom kitchen. They want drawers that open cleanly, hold what they should, and stay organised for more than a weekend. That's why how to organize kitchen drawers works better when you plan before you purge. If you start by tossing things into piles without a layout in mind, you often end up with neater clutter and a handful of organisers that don't fit.
Table of Contents
- From Chaos to Calm Why Organized Drawers Matter
- The Pre-Organization Blueprint Plan Your Drawer Zones
- The Great Sort Declutter and Categorize Your Kitchen Tools
- Choose Your Organizers Sizing and Selection Tips
- Drawer Layout Examples and Renter Friendly Solutions
- Keeping the Chaos at Bay Simple Maintenance Routines
From Chaos to Calm Why Organized Drawers Matter
A messy drawer creates friction all day long. You feel it when you cook breakfast half-awake, when dinner is already running late, and when you're unloading the dishwasher with nowhere obvious to put things back. The problem isn't just clutter. It's the lack of a system.
That's also why organised drawers matter more than people think. A 2025 kitchen-clutter survey from Eagle Woodworking found that 67% of homeowners listed organising kitchen drawers as a top priority, and 88% agreed that custom drawer inserts make a kitchen more functional and enjoyable. Those numbers line up with what happens in real homes. People don't want prettier junk drawers. They want less searching, less stacking, and less daily irritation.
When drawers work, the whole kitchen feels calmer. The spatulas stay near the stove. The measuring tools stay together. The sandwich bag clips stop migrating into the cutlery tray. You stop making tiny decisions over and over because the drawer already made them for you.
Practical rule: A drawer should answer one question clearly. Cutlery goes here. Prep tools go here. Foil and wraps go here. If a drawer tries to do five jobs, it usually does none of them well.
Good drawer organisation also connects to the rest of the kitchen. If your pantry is chaotic, drawer systems break down faster because overflow keeps landing in the wrong places. A zoned approach like the one used in this guide to organising your pantry with bins and zones works for drawers too. The same principle applies. Group by use, assign space on purpose, and make it easy to reset.
The payoff is modest but real. You cook faster. You put things away with less effort. You stop rebuying tools you already own because you can see them.
The Pre-Organization Blueprint Plan Your Drawer Zones
Most drawer projects go sideways before the first item comes out. People buy inserts first, then try to force their kitchen tools into them. That's backwards. The layout needs to follow your cooking habits, your drawer dimensions, and your storage limits.

Start with workflow, not drawer labels
Think about where each task happens in your kitchen.
If you prep vegetables at the counter left of the sink, that area should hold peelers, measuring spoons, small knives, graters, and prep tools. If you plate meals beside the stove, serving spoons and trivets should be near that spot instead of buried across the room.
Expert guidance for smaller homes and apartments recommends intentional zoning to create dedicated slots for items, maximising storage density without relying on extra cabinet volume, as noted by The Homes I Have Made on organised kitchen drawers. That matters in Canadian kitchens, where many people are working with tight galley layouts, condo kitchens, or older rental cabinetry.
A simple zone map usually looks like this:
- Prep zone near your main work surface. Measuring cups, measuring spoons, peelers, shears, zesters.
- Cooking zone near the stove. Tongs, spatulas, ladles, thermometers, pot holders if you keep them in a drawer.
- Eating and serving zone near the dishwasher or table. Daily cutlery, serving utensils, napkins.
- Storage and wrap zone where it fits best. Foil, parchment, clips, bag ties, food container lids if they don't fit elsewhere.
- Utility zone for the drawer that usually becomes junk. Pens, tape, batteries, scissors, takeaway menus if you still keep them.
Map the zones before you empty anything
Open every drawer and write down what each one should become. Not what it is now. What it should be after the reset.
Trade-offs become real at this stage. The most convenient drawer should go to the things you touch every day, not the gadgets you use twice a year. A deep drawer beside the range might be better for long utensils than for random baking tools. A shallow top drawer may be ideal for cutlery but terrible for whisks.
Don't assign drawers by category alone. Assign them by movement. The best layout cuts steps and keeps related actions close together.
If you own compact appliances, include them in the plan. A small item such as the HAUZ AOM8021 Non-Stick Omelet & Frittata Maker is space-saving and compact, with non-stick coated cooking surfaces for easy cooking and cleaning, but it still needs a defined home so it doesn't displace daily-use tools from prime drawer space.
Before you buy anything, note three things for each drawer on paper or in your phone:
- Its future job
- The items that belong there
- Whether the drawer is shallow, standard, or deep
That short blueprint prevents most expensive mistakes.
The Great Sort Declutter and Categorize Your Kitchen Tools
This is the part people dread because it looks bigger than it is. The trick is to follow a sequence and not improvise halfway through. Drawers don't get easier to organise when everything is spread across the counter. They get easier when each item has to earn its way back in.

Empty first, decide second
The most effective method is straightforward. Empty the drawers completely, then sort the contents into logical categories before deciding what to keep, following the category-first method described by Small Stuff Counts. That order matters because you can't see duplicates, odd overlaps, or obvious misplacements while things are still hiding in separate drawers.
Pull everything out onto a clear surface. Wipe the inside of each drawer. If a liner is dirty, curled, or sticky, replace it. If a drawer sticks or wobbles, fix that now. There's no point building a tidy system inside a drawer you already avoid using.
Then sort by actual use, not by vague similarity. Measuring spoons and measuring cups belong together. Vegetable peelers, zesters, and handheld graters usually belong together. Cake decorating tips do not need to live with everyday spatulas unless you bake constantly.
A helpful way to sort is by four broad groups:
- Daily drivers like cutlery, cooking utensils, prep tools
- Weekly tools like baking gear, storage clips, specialty knives
- Occasional items like corn skewers, melon ballers, holiday serving pieces
- Misplaced non-kitchen items such as pens, chargers, elastic bands, receipts
If you need a benchmark for what belongs in a functional daily setup, a practical product guide like this one on choosing a cutlery set in Canada can help you define what stays in prime drawer space and what doesn't.
How to make keep, move, and let-go decisions
Many people stall at this point. They know the drawer is overstuffed, but every item seems possibly useful.
Use sharper questions:
- Keep it if you use it regularly, it works properly, and it supports the zone you planned.
- Move it if you need it, but not in your best drawer space. Seasonal cookie cutters, duplicate bottle openers, and niche tools usually fit better in a higher shelf or less convenient cabinet.
- Let it go if it's broken, duplicated without purpose, or attached to a cooking phase you've clearly moved on from.
If you forgot you owned it, ask one more question. Would you notice its absence this month?
One common mistake is treating all duplicates as bad. They aren't. Two spatulas can make sense. Three can openers usually don't. The point isn't minimalism. It's reducing drawer competition.
Another mistake is keeping awkward items in top drawers because they fit nowhere else. That's how one potato masher ruins an entire layout. Hard-to-store pieces often belong in a deeper drawer or an upright crock, not forced into a shallow tray system.
Choose Your Organizers Sizing and Selection Tips
Organisers should solve a storage problem, not create a new one. The wrong insert wastes space, slides around, or blocks the drawer from closing. The right one disappears into the routine because it fits the drawer, fits the tools, and still leaves a little flex.
Measure the inside, not the outside
Always measure the drawer interior after it's empty. Don't use cabinet specs, and don't assume two top drawers are identical. Older kitchens and rentals often vary slightly.
Write down:
- Interior width from side wall to side wall
- Interior depth from front to back
- Usable height from drawer base to the point where the drawer can still close cleanly
Height gets ignored all the time. It's also the reason stacked tools jam a drawer. A divider may fit the base perfectly and still fail because the whisk handle or can opener sits too high.
If you're buying multiple organisers, sketch the footprint first. That helps you see whether you need one fitted tray, two modular bins, or a combination with a narrow leftover channel for odd tools. It's the same logic used when comparing food storage container sizes. Sizing works best when you match the container to the actual dimensions of the space and the objects going into it.
Leave a little breathing room. A drawer packed wall to wall with fixed pieces often looks tidy on day one and becomes annoying by day ten.
Pick materials that match the job
Material matters less for style than for behaviour. Some organisers slide. Some warp. Some are easy to wipe clean. Some are forgiving in odd-sized rental drawers.
| Material | Pros | Cons | Best For |
|---|---|---|---|
| Bamboo | Warm look, sturdy, easy to pair with most kitchens | Less forgiving in size mismatches, may need precise fit | Cutlery drawers, visible top drawers |
| Plastic | Easy to clean, light, common in modular sizes | Can look cluttered if too many pieces are mixed together | Utility drawers, deep drawers, renters |
| Metal mesh or wire | Durable, good visibility | Small items can catch or tip, less polished in food-prep drawers | Utility tools, wraps, packets |
| Expandable mixed-material trays | Adjustable, useful for changing layouts | Moving parts can shift, not always ideal for heavy tools | Shared drawers, transitional setups |
| Non-slip compartment bins | Stay put better, flexible to rearrange | Can waste space if oversized for the drawer | Small rentals, odd interiors |
A few selection rules save frustration:
- Use fitted trays for cutlery. That drawer benefits from exact lanes.
- Use modular bins for mixed tools. They're easier to adjust when your collection changes.
- Use deeper dividers for long utensils. Shallow trays don't control bulkier items well.
- Avoid over-compartmentalising. Too many tiny sections create dead space and force awkward placements.
If you want a product-finding layer rather than a giant retailer search, GrifGlo groups kitchen and organisation items into decision-friendly categories and sizing guides. That's useful when you know the dimensions you need and want to compare fit-for-purpose options without scrolling through unrelated products.
Drawer Layout Examples and Renter Friendly Solutions
Good drawer layouts are usually boring in the best way. You open them, grab what you need, and close them without thinking. That's the standard. Not colour coding. Not perfection.

Three layouts that work in real kitchens
A cutlery drawer works best with a simple tray and one overflow decision. Daily forks, knives, spoons, and teaspoons get the prime slots. Serving spoons, steak knives, and odd pieces either get a narrow side section or move elsewhere. The mistake is cramming entertaining pieces into the daily tray until nothing sits flat.
A deep utensil drawer needs vertical control. Without dividers, everything rolls into one heavy pile. Use long compartments for spatulas, tongs, wooden spoons, and whisks. If the drawer is tall enough, a floating tray or shallow top bin can hold smaller tools above bulkier pieces below. That setup uses depth without losing visibility.
A utility drawer should stop pretending to be a junk drawer. Give it strict categories. Pens together. Tape and scissors together. Batteries contained in a small bin. Chargers bundled. Keys only if the kitchen is where they land every day. If the drawer becomes a holding zone for undecided objects, it will collapse fast.
Some households also benefit from support outside the drawers. If the rest of your dry storage is causing spillover, these ideas for pantry storage racks can relieve pressure so drawers aren't forced to hold items better stored vertically.
What renters should do differently
Renters need systems that lift out, wipe down, and move with them. That rules out most permanent fixes.
Guidance for smaller Canadian rental homes points toward reversible solutions such as modular trays, non-slip liners, and adjustable dividers that can adapt to odd-sized drawers and be removed for cleaning or moving, as outlined in On Sutton Place's kitchen drawer organisation ideas. That approach works because many rental drawers are shallow, slightly warped, or not worth custom-fitting.
The best renter setup usually includes:
- A non-slip liner under everything so bins don't skate forward
- Adjustable dividers instead of fixed inserts when drawer widths are awkward
- Separate removable trays for categories that may change after a move
- A small gap left intentionally so the system can flex instead of binding
Here's a useful visual walkthrough for drawer organising ideas in action:
One more renter-specific point matters. Don't chase a custom look if it makes maintenance harder. A slightly mixed set of trays that stays in place and survives your next move is better than a beautiful fitted system that only works in one drawer of one apartment.
The best renter system isn't the one that photographs best. It's the one you can lift out, clean, and set up again without starting from zero.
Keeping the Chaos at Bay Simple Maintenance Routines
A well-organised drawer doesn't stay that way because you have discipline. It stays that way because the system is easy to reset. If each category has a clear home, maintenance takes minutes. If the layout is too tight or too clever, it starts failing the first busy week.

Use short routines instead of occasional overhauls:
- Do a one-minute nightly reset. Put back the tools that wandered during cooking and clear out anything that landed there temporarily.
- Apply a one-in, one-out rule for problem categories. New spatula in means one tired old spatula out.
- Review drawers seasonally. Remove crumbs, wipe liners, and question anything that keeps getting shoved to the back.
- Correct drift quickly. If baking tools keep invading the prep drawer, that's a layout issue, not a personal failure.
A clean system is easier to maintain than a sticky one. Liners, trays, and bins should come out easily for wiping, just like the habits covered in this guide on how to clean food storage containers. The easier something is to clean, the more likely you are to keep using it properly.
The long-term test is simple. Can someone else in the house unload the dishwasher and put things back without asking where they go? If the answer is yes, your drawer system is doing its job.
If you're building a practical kitchen setup and want help comparing organisation tools, cookware, and everyday storage options without digging through overwhelming catalogues, GrifGlo offers decision-friendly guides and curated essentials designed around real household use.

Laisser un commentaire
Ce site est protégé par hCaptcha, et la Politique de confidentialité et les Conditions de service de hCaptcha s’appliquent.