

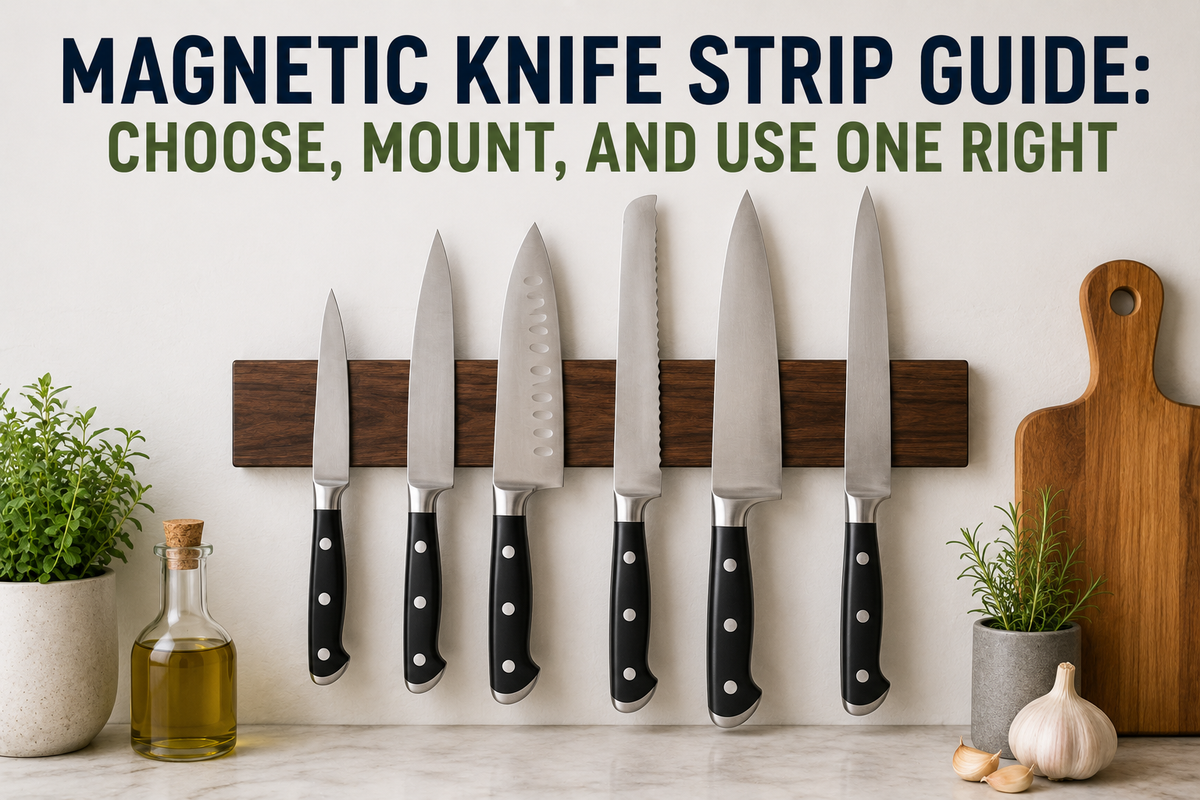
You're halfway through chopping vegetables, the saucepan is threatening to boil over, and the knife you need has disappeared into a crowded drawer. You pull out the wrong blade, scrape it against another handle, and lose the rhythm of dinner. A magnetic knife strip can fix that bottleneck, but only if you treat it as a real wall installation, not a decorative bar you stick wherever there's room.
The right choice depends on your knives, wall material, mounting method, and clearance around the stove, sink, cabinets, and children. Renters need a different solution from homeowners with stud-backed walls, and a small kitchen needs stricter spacing than a wide professional prep area. This guide gives you a practical way to choose, mount, and use one safely.
Table of Contents
- Why a Magnetic Knife Strip Earns a Spot on Your Wall
- What a Magnetic Knife Strip Is
- Materials, Magnet Strength, and What Your Knives Need
- Sizing and Capacity Without the Guesswork
- Mounting Options for Homeowners, Renters, and Small Businesses
- Placement, Safety, and Smart Layout for Tight Kitchens
- Maintenance, Misconceptions, and the Knives You Should Not Hang
- Buyer Checklist and Common Questions Before You Commit
Why a Magnetic Knife Strip Earns a Spot on Your Wall
In a tight galley kitchen, the right storage location can shorten every prep task. A knife block consumes counter space and hides the blades you need. A magnetic strip keeps your chef's knife, paring knife, and utility knife visible, separated, and ready at the wall.
Visibility improves the workflow in a practical way. You choose a blade by its shape, take it down without searching through a drawer, then return it to the same position after washing. The Smithsonian's account of Julia Child's kitchen describes knives arranged on magnetic strips between the kitchen windows and above the sink, allowing her to “just grab what she needed” and return each knife after washing. Preserved through a California-linked culinary landmark and documented in the magnetic knife holder review from Serious Eats, the example treats the strip as part of a working kitchen layout rather than wall décor.
The practical gains
A well-placed strip can:
- Free counter space: Remove a bulky block from the main prep area.
- Reduce drawer friction: Keep blades from knocking against other tools or being forced into narrow slots.
- Improve drying: Give washed knives an open place to dry instead of trapping moisture in a drawer.
- Speed selection: Keep frequently used knives within reach and arrange them by task.
Installation determines whether those gains hold up. Place the strip where you can grasp one handle without brushing another blade, and secure it according to the wall material and mounting method. For more ways to organise utensils, compare the strip with the approaches in this guide to kitchen utensil storage ideas.
The trade-offs are real
Open blades require disciplined placement. A strong magnet may pull a knife sideways onto the bar, nicking an edge or startling the person removing it. Screw mounting leaves holes in the wall. Adhesive mounting can fail on a greasy, textured, or damp surface, or under a load beyond the product's stated limit.
Choose a magnetic knife strip when you cook regularly and have a clear backsplash or wall run. Check the installation surface before buying, and keep the strip outside children's reach and away from busy passages. If those conditions are unavailable, use a secured drawer insert or enclosed block instead.
What a Magnetic Knife Strip Is
In a tight kitchen, the strip's location matters as much as its appearance. A magnetic knife strip is a wall-mounted bar with magnets behind or along its face. Those magnets attract the ferromagnetic steel in compatible blades, holding each knife against the bar without a slot or sheath. Standardised rails include 15-inch and 16-inch lengths, which affect knife spacing and the wall area required, as shown by Canadian Tire's 15-inch Sabatier storage strip listing.
A block keeps knives in separate cavities and occupies counter space. An in-drawer organiser hides the blades and clears the work surface, though crowded compartments can let edges touch or make retrieval awkward. The strip puts the blades in view, so plan clearance around each handle and keep the rail away from busy passages.

Two common strip designs
Surface-mount strips expose the magnetic face or cover it with metal. They wipe clean easily and give the blade a direct contact point. Strong magnets can create a sharp pull, so remove knives by lifting the spine or handle in a controlled motion.
Recessed-magnet strips conceal the magnets inside a wood, metal, or composite housing. They look more integrated, while the front material creates a gap between magnet and blade. That gap lowers holding force, making the internal magnet layout and housing thickness important.
Pay close attention to the back plate. A rigid metal housing protects the magnets and spreads load across the mounting points. A thin or flexible body can twist when you remove a heavy knife. Compare the magnet position, face material, mounting hardware, and compatibility with your blades instead of relying on the word “strong.”
Mounting determines whether the design works in your kitchen. Homeowners should favour stud-backed placement where possible. Renters need a mounting method suited to the wall finish and the strip's load. Adhesive alone deserves caution on greasy, textured, or damp surfaces.
A HAUTE CUISINE Stainless Steel Garlic Press - 80710-HC is a separate countertop houseware item with a stainless steel build, comfort-grip handles, a garlic-crushing design, and simple cleanup. Hang it only when its magnetic contact and weight clearly suit the strip.
Materials, Magnet Strength, and What Your Knives Need
The bar's material determines how it behaves in a humid kitchen, while the magnet design determines how confidently it holds a blade. Stainless steel is my default recommendation for a working kitchen. It resists routine splashes, wipes clean, and doesn't depend on a finish staying perfect near the sink.
Wood looks warmer and can suit a traditional kitchen, but it needs a sound finish and protection from concentrated steam. Bamboo and beechwood can work well when the housing is sealed and the mounting back is rigid. Aluminium is light and corrosion-resistant, though the overall quality still depends on the internal rail, face design, and fasteners.
Magnet types in practical use
Neodymium, also called rare-earth magnet material, generally provides stronger attraction in a compact design than ferrite ceramic magnet material. That makes it suitable for heavier steel chef's knives, but strength isn't automatically safer. A forceful snap can pull a blade sideways onto the bar, damaging the edge or causing the handle to swing into another knife.
Ferrite magnets offer a gentler hold and may suit lighter knives or households that prioritise controlled removal. They're less forgiving when you try to hang a broad, heavy blade or place several tools on a small rail. The magnet must also work through whatever sits between it and the blade. A thick wood face, a decorative cover, or an air gap can reduce the effective hold.
Practical rule: Choose enough holding power for your heaviest compatible knife, then practise removing it by lifting the handle outward and away instead of yanking sideways.
Material comparison
| Material | Hold Strength | Moisture Resistance | Best For |
|---|---|---|---|
| Stainless steel bar | Depends on the internal magnet rail | High for routine kitchen use | Busy kitchens, modern finishes, easy cleaning |
| Aluminium bar | Depends on the internal magnet rail | High, with a lightweight body | Renters and installations where low weight helps |
| Beechwood housing | Depends on the recessed magnets | Requires sealing and care | Warm, traditional kitchens |
| Bamboo housing | Depends on the internal magnets | Needs protection from prolonged moisture | Light-duty home storage and natural finishes |
Do not assume every stainless knife will attract to every strip. Knife steel varies, and some stainless formulations are not magnetic. Test each blade with a small magnet before you commit to the rail.
Ceramic blades need special caution. They don't behave like steel blades, and direct contact with a hard or forceful magnetic face can chip or crack them. If your set includes ceramic knives, keep them in a suitable protective block or drawer insert unless the strip manufacturer specifically approves that design.
Sizing and Capacity Without the Guesswork
Start with the knives, not the product listing. Lay the set on a counter and measure each knife from handle end to tip. Then note the blade width, because a broad cleaver or bread knife needs more visual and hand clearance than a slim paring knife.
For a rough planning method, add the full lengths of the knives you intend to hang, then allow additional space between neighbouring blades. A strip should never force handles together or make one blade overlap the next. The Canadian retail format of 15 to 16 inches is generally more appropriate for a small-to-medium home collection than a complete professional lineup, so match the rail to the combined envelope of your own knives rather than buying by appearance.
A usable sizing guide
| Number of Knives | Typical Use | Recommended Strip Length | Spacing Notes |
|---|---|---|---|
| One to two | Essential daily prep | Short bar suited to the measured set | Leave clear separation around each handle |
| Three to four | Basic home cooking | Medium bar with room for blade width | Keep broad blades from overlapping |
| Five to six | Regular home cooking | Longer home rail | Arrange the most-used knives at the centre |
| Larger collection | Varied or small commercial prep | Long rail or multiple rails | Separate heavy and broad blades instead of crowding one bar |
These categories are deliberately practical rather than tied to invented capacity claims. The actual fit depends on your knife profiles and how much empty space you need to remove one blade safely.
Measure the wall as well
Check the uninterrupted wall run, not just the strip length. Account for cabinet edges, backsplash seams, outlets, corner returns, and the space your hand needs to pull a knife forward. A strip that technically fits may still be unusable if the first handle sits against a cabinet or the last blade points into a passage.
For a narrow kitchen, a slightly shorter rail with disciplined spacing is safer than a long rail loaded edge to edge. If your set keeps expanding, install a second rail in a separate work zone rather than stacking extra tools onto one crowded face. Use these kitchen drawer organisation tips to decide which knives need wall access and which can stay enclosed.
Mounting Options for Homeowners, Renters, and Small Businesses
Mounting determines whether a magnetic knife strip stays reliable after daily use. An empty rail may feel secure, then loosen when several heavy knives are added. Choose the wall method before choosing the finish, especially in a rented home or a compact kitchen where a failed mount creates a real hazard.
Four ways to attach the rail
Wood screws into a stud provide the strongest permanent option for a busy home kitchen. Use a stud finder, mark the rail holes, drill pilot holes, and drive screws into solid framing. If the holes miss the stud, add suitable fixing points rather than relying on one weak location.
Drywall anchors suit walls without accessible studs, provided the anchor matches the wall thickness and expected load. Hollow-wall fixings can loosen as knives are removed repeatedly, particularly when the bar flexes or carries heavy blades. A generic plastic plug does not provide the same support as a stud connection.
Adhesive mounting suits renters and smooth, clean tile, glass, or sealed surfaces. Grease, steam, textured paint, grout contact, and repeated loading can cause it to fail. Follow the fastener maker's weight rating, clean and dry the surface, press the adhesive firmly, and allow the stated curing time before adding knives. Keep heavy cleavers off an adhesive rail above a busy prep area.
Rail-mounted systems suit small businesses, shared kitchens, and layouts that change. They allow adjustment without drilling a new hole pattern for every change, though the supporting rail still requires proper attachment to the wall. Plan the load across the full rail.
Before drilling, identify the wall material and check for plumbing and electrical runs. Avoid drilling directly above or below outlets, switches, taps, and visible pipework. For plasterboard, this guide to secure plasterboard wall mounting explains how to select fixings for hollow walls.
A sensible installation kit
Keep a level, pencil, stud finder, drill, suitable bit, screwdriver, measuring tape, and the manufacturer's fixing hardware close by. Spare compatible screws or anchors help when the supplied hardware does not suit your wall.
Check the installation process before starting, particularly with strips that use hidden brackets instead of visible screw holes.
For a renovation or commercial fit-out, check nearby cabinet doors before fixing the rail. Reviewing cabinet hinge types helps identify places where an opened door or hinge cup could block knife handles. In a tight kitchen, leave enough clearance to remove each knife without contacting the cabinet or wall.
Placement, Safety, and Smart Layout for Tight Kitchens
In a tight kitchen, the wrong wall turns knife storage into a daily hazard. Choose a position where you can see each blade, grasp its handle cleanly, and step away from the prep area without brushing the rail. Keep it within comfortable reach of the primary cook, while keeping blade tips clear of cabinet doors, appliance housings, and normal shoulder paths.
Keep the strip away from direct stove heat and heavy splash zones. Steam, oil, and boiling-water spray soil blades and can weaken some adhesive systems. A sink-side position works only when the rail sits high enough and knives are dried before storage. Beside the main cutting board is usually the better choice.

Build the layout around movement
Arrange knives by use frequency, not size alone. Put the chef's knife and utility knife closest to your natural reach, then place the less-used bread knife or boning knife farther along the rail. Leave visible space between blades so you can remove one without striking its neighbour.
If children can reach the wall, use enclosed storage instead. If a strip remains your choice, mount it outside their access path, away from chairs, step stools, counter corners, and other climbing aids.
A narrow kitchen often suits a horizontal rail on the least crowded backsplash section. A vertical arrangement can keep handles clear of cabinet doors, but check the removal angle before fixing it. For compact work-area ideas, the kitchen storage guide Southwest Michigan offers useful small-space planning context. This kitchen counter organisation guide covers broader ways to keep preparation space clear.
Check the removal path
Hold each knife against the proposed rail before drilling. Rehearse the exact removal motion, including the handle's outward tilt. If your wrist meets a cabinet underside, or the blade points toward the cooktop, choose another position.
Test the clearance with cabinet doors open and the main work area occupied. In a rental, favour a mounting method that matches the wall and can be removed cleanly. In an owned home or busy small business kitchen, place the rail where solid wall support and daily access work together. A few minutes of dry testing can prevent a poor installation and an unsafe habit.
Maintenance, Misconceptions, and the Knives You Should Not Hang
“Strong magnet” is not a complete buying argument. A powerful rail can still be poorly mounted, badly placed, dirty, or incompatible with your knives. The contact face needs regular attention, and the blade must arrive dry and clean.
Wipe the magnetic face with a dry microfibre cloth during routine kitchen cleaning. If you use a wood strip, maintain the finish with a food-safe mineral oil suitable for the product's material. Inspect screw heads, brackets, and adhesive edges for movement or creeping before the bar develops a visible tilt.

Knives and tools to leave elsewhere
- Ceramic blades: Store them in a protective block or drawer insert unless the strip is specifically designed for them.
- Non-magnetic blades: Test unusual stainless steels before relying on the rail.
- Wet knives: Dry them completely before hanging to reduce the chance of rust and staining.
- Plastic-handled scissors: Don't assume they'll hold securely just because the metal blades are nearby.
- Heavy implements: Keep bulky cleavers, cast-metal tools, and overloaded utensil collections off a light-duty rail.
Serrated knives deserve careful handling too. The teeth can catch or scrape the face, and the uneven edge makes controlled contact less predictable. If the strip's design doesn't clearly accommodate them, store them separately.
Hang the blade correctly
Place the broad, flat side of the blade against the magnetic face, with the blade's sharp side angled away from the wall rather than slammed directly onto the bar. Remove the knife by taking the handle first and rolling the spine or flat side away, which reduces abrupt edge contact.
Hanging won't compensate for poor sharpening. Use a consistent sharpening method and avoid dragging the blade across the rail. The knife sharpening tools guide can help you choose a blade-care routine that matches your knives and skill level.
Buyer Checklist and Common Questions Before You Commit
Run this checklist before ordering:
- Measure the knives: Record each handle-to-tip length and identify broad or unusually heavy blades.
- Inspect the wall: Confirm whether you have a stud, drywall, tile, plaster, or a smooth adhesive-friendly surface.
- Choose the mount: Use stud-backed screws for serious loads, anchors for suitable hollow walls, and adhesive only for compatible light-duty setups.
- Check the clearance: Test cabinet doors, stove heat, sink splash, hand reach, and child access.
- Pick the face material: Stainless steel is the practical low-maintenance choice; sealed wood suits a warmer kitchen.
- Keep backup hardware: Have suitable anchors or screws available before you begin.
Common questions
How much magnet strength do I need? Don't buy by a vague strength label. Match the rail to the weight and steel compatibility of your knives, then prioritise a secure wall fixing.
Will a magnetic strip void a knife warranty? Check the knife maker's warranty terms. The storage method isn't universal, and warranty language can differ.
Does California law make a kitchen strip problematic? The American Knife & Tool Institute's California knife-law summary discusses Penal Code § 20810 and explains that openly carried knives in a sheath aren't considered concealed under several sections. It also addresses restrictions on undetectable knives. That legal context concerns knife manufacture, sale, and carry, not ordinary wall storage of household kitchen knives, so use the strip for normal kitchen storage rather than concealed carry.
For most homeowners, I'd choose a 16-inch walnut or stainless strip mounted to studs if the wall and knife set justify it. Renters should use a 12-inch adhesive-mounted bar only for a light, compatible set on a smooth surface, while a small commercial kitchen should consider a 24-inch heavy-gauge bar with secure structural mounting. These recommendations are starting points, not substitutes for measuring your knives and checking the installation surface.
If you're organising a kitchen around real daily use, visit GrifGlo for decision-friendly guidance and curated essentials across kitchen storage, tools, and home organisation. Use the measurement and mounting advice here to narrow your needs before you shop, then choose products that fit your space instead of forcing your space to fit the product.



Laisser un commentaire
Ce site est protégé par hCaptcha, et la Politique de confidentialité et les Conditions de service de hCaptcha s’appliquent.