

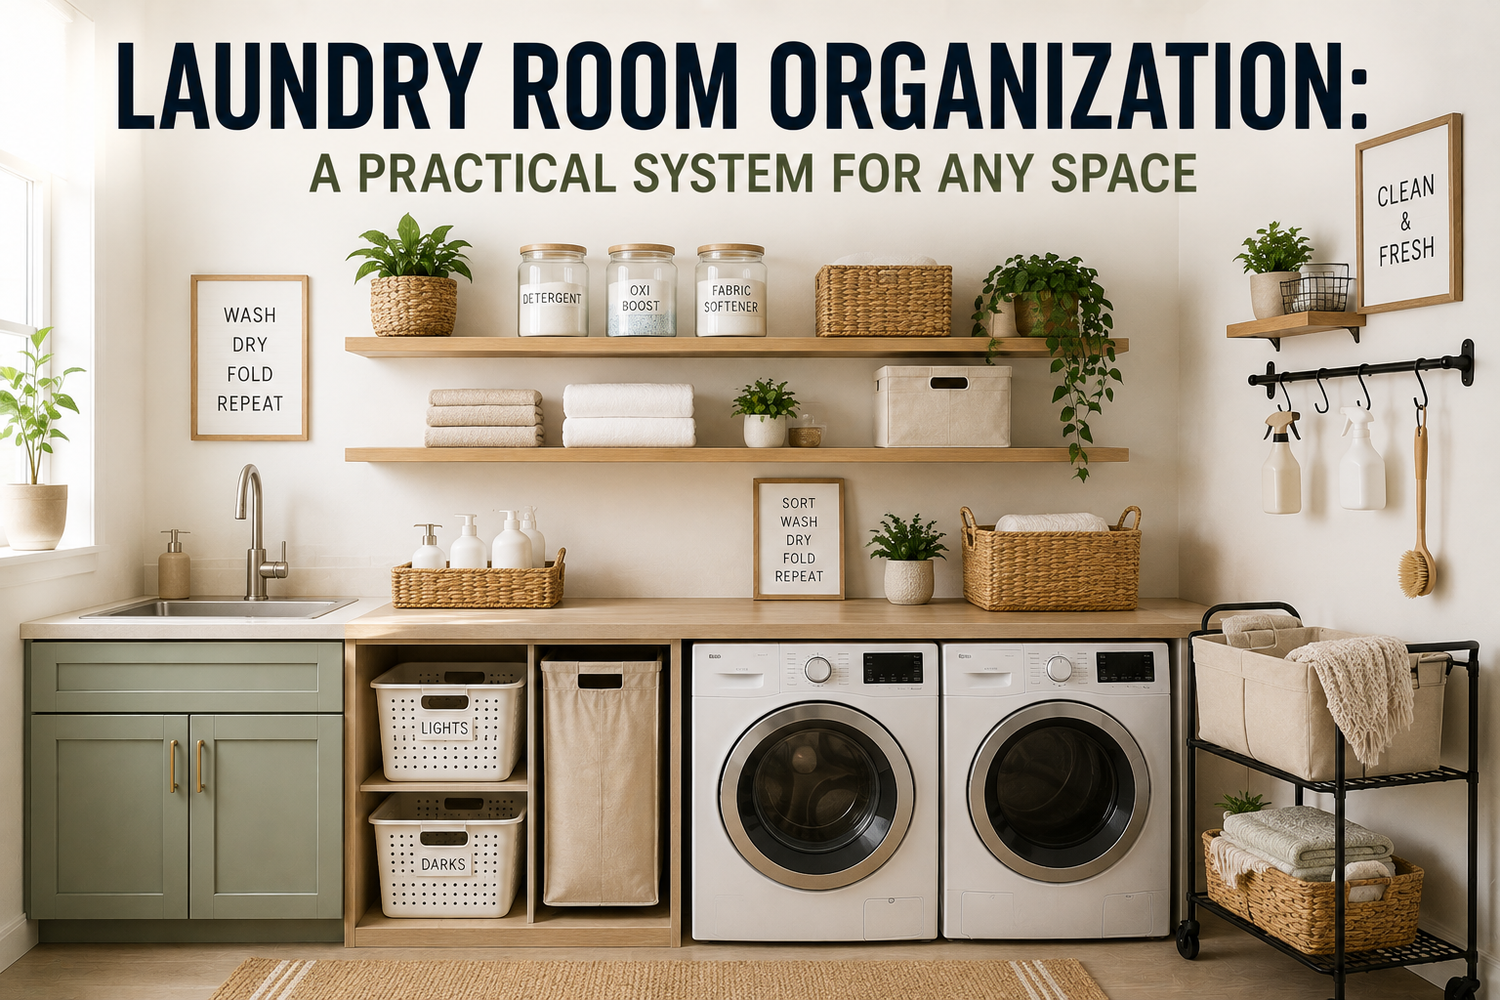
The laundry room fills up the same way in almost every home. A detergent bottle gets left on the washer, a clean towel lands on a chair, the spare bulbs and cleaning cloths move in “temporarily”, and before long the space stops working as a room and starts behaving like a storage closet with plumbing. In compact Canadian homes, that collapse happens faster because the room often has to handle sorting, washing, drying, folding, and supply storage in one tight footprint.
Laundry room organization works when the room is treated like a workflow, not a display. Measure what you have, protect the walking path, keep moisture under control, and give every item a fixed return point. That's the difference between a setup that looks tidy for a weekend and one that survives real weekly use.
Table of Contents
- Why Most Laundry Room Organization Systems Fail
- Measuring and Zoning Your Laundry Space
- Choosing the Right Storage Solutions for Your Layout
- Renter-Friendly Fixes and Small-Space Strategies
- Managing Moisture and Ventilation in Compact Laundry Spaces
- Building a Maintenance Routine That Actually Lasts
Why Most Laundry Room Organization Systems Fail
A typical laundry room fails in plain sight. The shelves look neat on day one, the baskets match, and the labels feel reassuring. Then the room starts collecting half-finished loads, extra shampoo, missing socks, cleaning rags, and whatever else had nowhere better to go.

The first mistake is buying storage before measuring
The fastest way to waste money is to order bins and shelving before you know your clearances. A practical planning guide recommends measuring 180 to 250 cm of vertical wall height, placing floating shelves 45 to 60 cm above appliances, and reserving at least 35 cm of countertop depth for folding and stain treatment, which is a much more realistic starting point than shopping by appearance alone. Those dimensions matter because many Canadian homes and apartments don't have the luxury of spare floor area.
I've seen too many rooms where a “solution” crowded the washer door, blocked a vent, or left no flat surface for a basket. Once that happens, the household stops using the system and reverts to piles on the machine, which defeats the whole point. The room wasn't under-organised, it was mis-measured.
Practical rule: if you can't open the machine door, set down a basket, and still keep a narrow walking line, the system is too big for the room.
The second mistake is ignoring workflow
Laundry room organization fails when supplies are stored by category of container instead of by how the room is used. The workable pattern is task-first, then container. That means detergent, stain remover, and dryer sheets live near the washer and dryer, folding tools stay near the folding surface, and off-cycle items move into a separate return zone.
A second recurring problem is turning the room into a catch-all. When the space starts holding dog leads, lightbulbs, seasonal decor, and old paint samples, the laundry process gets interrupted every single time someone opens a cupboard. A room can't support quick weekly use if it's also acting like the house's forgotten back shelf. Keep the function narrow, and the maintenance gets easier.
Measuring and Zoning Your Laundry Space
Start with the room, not the product catalogue. Measure the wall height available for storage, the width of the appliance run, and the depth in front of the machines where you need to stand, turn, and carry baskets. If the room feels tight already, the priority is not squeezing in more pieces, it's deciding where each laundry action happens.

Build three zones before you buy anything
A functional layout usually splits the room into washing and drying, folding, and storage. The washing and drying zone should keep cycle-critical items within arm's reach, because nobody wants to hunt for stain remover with wet clothes in hand. The folding zone needs that shallow counter depth, at least 35 cm, so the surface is useful without becoming a deep catch-all ledge. Storage belongs higher or lower depending on reach and frequency.
That zoning approach is easier to keep clean than one giant open shelf. It also makes the room easier to use in a hurry, because every stage of the load has a place to land. I've found that households stick with systems when the room answers the same question every time, “Where does this step happen?”
Use the dimensions to decide what goes where
Keep the most frequently used supplies at eye level or counter level, then push low-frequency items higher. Use floating shelves 45 to 60 cm above appliances if you need overhead storage without making the room feel boxed in. For sorting, the guide's 15 to 20 litre bins are a sensible size for whites, colours, and delicates, because the bin choice follows your actual weekly categories instead of forcing everything into one oversized hamper.
For readers who already organise other small spaces, the same logic used in this pantry bins and zones guide applies here, keep the path clear, define zones first, then choose containers to fit those zones. Even a large-format surface like the All-Clad HA1 Double Burner Grill Pan – 13×20-Inch Nonstick shows the same principle in a different context, a wide work area only helps when the surrounding space is planned for access and movement.
Working standard: if a bin or shelf forces you to twist, crouch, or move another item every time you reach for detergent, it's in the wrong zone.
Keep accessibility in the layout
In compact Canadian homes, accessibility matters as much as storage capacity. Clear floor pathways reduce strain, and lower-reach storage helps renters, seniors, and anyone managing mobility limits. If you can't move a basket without nudging a door or stepping around a cart, the layout is already too crowded.
The simplest test is whether you can complete a full load without crossing the room more than necessary. That's the sign the zones are doing real work instead of just looking organised.
Choosing the Right Storage Solutions for Your Layout
Once the room is measured and zoned, the storage choice gets much simpler. The right option depends on what you need to reach quickly, what needs to stay dry, and how often you clean the room. Open shelving, closed cabinets, slim carts, and under-counter storage all have a role, but they solve different problems.
| Storage Solution Comparison by Space Type | ||
|---|---|---|
| Storage Type | Best For | Key Consideration |
| Open shelving | Everyday detergents, stain removers, folded towels | Easy access, but it needs disciplined grouping so it doesn't become visual clutter |
| Closed cabinets | Chemicals, backup supplies, items that should stay dry | Better for hiding visual noise and protecting contents from humidity |
| Vertical storage systems | Tight rooms with unused wall height | Works best when the room still has enough clearance for the door swing and shelves stay reachable |
| Under-counter storage | Folding stations and built-in supply zones | Useful only when the counter depth still leaves room to work comfortably |
| Slim rolling carts | Small gaps beside appliances | Good for portable overflow, but they can become a dumping point if not labeled and assigned |
Open shelving works for speed, not for everything
Open shelves make sense when the items are used constantly. Detergent, stain treatment, cloths, and a small stack of towels are easy to grab and easy to return. That's why open storage often works better for the “washing and drying” zone than for the rest of the room.
Open shelving fails when it gets overloaded. Too many visible containers make the room feel busier, not calmer, and the dusting burden goes up. If the shelf holds things you use once a season, it's probably the wrong place for them.
Closed storage is for control
Closed cabinets are the better choice for chemicals, back stock, and anything that should stay out of sight or away from humidity. They also help in homes with children, because the doors create a layer of separation between everyday access and stored supplies. The trade-off is slower retrieval, so don't use closed storage for items you reach for every load.
For people comparing built-ins, modular units, and closet-style layouts, the logic in this closet organisation units guide transfers well. A laundry room works better when the structure matches the task, not when every inch is filled for its own sake. That also applies to supply volume. Keep sorting bins sized to the categories you wash, not to a fantasy version of your household.
Containers should match the job
Use baskets and hampers that reflect the way laundry really happens in your home. If the weekly rhythm includes lights, darks, towels, and delicates, the containers should make those categories obvious. When the labels match behaviour, people stop improvising and the system lasts longer.
Renter-Friendly Fixes and Small-Space Strategies
Renters need solutions that work without drilling, mounting, or risking damage. That usually means freestanding pieces, tension-based tools, and adhesive or magnetic accessories that can be removed later. The aim is still the same, a clear workflow, just with less commitment to the walls.

Build up, not out
In a closet-width laundry area, the safest move is usually to use vertical space without permanently altering it. Freestanding shelving units can hold folded linens and back stock. Over-the-door organisers work well for brushes, cloths, and smaller bottles. A tension rod can create a temporary hanging zone for air-drying garments or freshly steamed items.
The advantage is flexibility. If the space doubles as a hallway closet, mudroom, or bathroom corner, freestanding pieces can be reconfigured when the household changes. That matters in small Canadian homes, where one room often has to do more than one job.
Keep the path open. In a shared utility area, a narrow clear route is more valuable than one extra shelf crowded with rarely used supplies.
Use lightweight systems with a fixed home
Magnetic hooks can help when the appliance surfaces are metal, and adhesive-mounted organisers can hold lighter tools if the wall finish allows it. These are not replacements for structural storage, but they're useful for taking frequently used items off the floor and off the washer top. The key is restraint, because too many add-ons create the same clutter problem in a different shape.
When a laundry area shares space with a bathroom or hallway, group items by activity, not by room. Keep dirty-laundry transport separate from clean-laundry staging. That small distinction stops the area from becoming a drop zone for every household errand.
If you already use a door-mounted organiser elsewhere in the home, the same logic in this over-the-door pantry organiser guide translates neatly here. The door becomes usable storage only when the contents are light, visible, and easy to return after each cycle.
Choose products that don't fight the room
Avoid bulky carts that block door movement or deep units that force you to unload one item to reach another. In a rental, the best piece is often the one that disappears into the space instead of dominating it. That's especially true when the laundry area is squeezed between a bathroom and a closet, where every inch of swing room matters.
Managing Moisture and Ventilation in Compact Laundry Spaces
A tightly organised laundry room can accidentally become a moisture trap. Closed cabinets, packed textiles, and drying racks all compete with airflow, and that's a problem when damp items need to dry and appliances need room to breathe. In compact Canadian homes, especially during colder months, the urge to fill every vertical inch can backfire.
Airflow comes before extra storage
One practical guide recommends extractor fans or openable windows to reduce moisture buildup and mould risk, and that advice is even more important in enclosed laundry closets and humid inland microclimates. If you close off every surface with cabinetry, you may end up trapping damp air around the machines and textiles. Open shelving can be better than closed cabinets in the immediate appliance area if the room needs to keep moving air.
I'd rather leave one section slightly under-used than pack it so tightly that the room starts holding humidity. That trade-off protects the machines, the walls, and the textiles stored nearby. The room should feel breathable, not sealed.
Keep the maintenance points visible
Lint traps should be cleaned after every dryer use, and dryer vents should be cleaned at least once a year because lint buildup is a fire risk. Those aren't optional chores tucked into the background; they're part of how the room stays safe and usable. The same applies to wiping machine surfaces, because residue and dust build up faster in compact spaces than is often realized.
For households thinking about airflow in other rooms, the same practical logic appears in this window air conditioner sizing guide, match the equipment to the space and don't block the path it needs to function. Laundry storage should follow that same rule. If a shelf, hamper, or drying rack interrupts circulation, it's working against the room.
Don't let damp items sit without a plan
Hampers and drying racks need a place that won't hold moisture against a wall or crowd the exhaust path. If wet towels live too long in a closed corner, they add humidity and keep the room from drying out properly. That's why the room should include a clear place for damp items that's separate from the shelf for dry supplies.
Simple rule: if an item is still damp, it doesn't belong in enclosed storage.
Building a Maintenance Routine That Actually Lasts
A laundry room stays organised only when the upkeep is small enough to repeat. The strongest pattern is a weekly reset, monthly surface cleaning, and a seasonal deep clean. That cadence works because it keeps the room from drifting back into the “temporary pile” stage.
Weekly reset
Spend about 10 minutes each week putting supplies back in their bins, tossing empty containers, wiping machine surfaces, and checking that the hampers still match the sorting system. This is the moment when drift gets corrected before it turns into clutter. It also keeps the room aligned with the way the household launders clothes, which changes faster than many notice.
If you use a garment steamer, keep it where it can go back to the same spot after use, and review the habits in this garment steamer care guide so it doesn't become another loose accessory in the room. Small tools are usually the first things to wander.
Monthly and seasonal tasks
A monthly wipe-down of all laundry-room surfaces keeps residue from building up on shelves, doors, and appliance tops. Then, once or twice a year, do a fuller declutter, with spring and fall being the best reset points in the guidance provided. Some routines also call for a quarterly deep clean behind appliances, which is where dust and lint tend to collect unnoticed.
These deeper cleanings are the right moment to check whether the current zones still match the household's habits. Families change, load sizes shift, and seasonal laundry patterns move around. If the room is still organised for an old routine, it will start misbehaving again.
Avoid the common relapse points
Duplicate supplies create clutter faster than almost anything else. So does mixing laundry categories, because then the sorting step gets delayed and the room becomes a holding area instead of a working room. Leave an outgoing zone for clean loads, mending, donations, or dry cleaning, because every laundry cycle produces items that are not yet put away.
A labeled basket system keeps those handoffs visible and cuts decision time. That's what makes the routine stick. When every item has one return point, the room stays useful instead of slowly turning back into a storage catch-all.
If your laundry room still feels cramped, start with the measurements, then rebuild the zones before you buy another bin. For a more practical home-organisation system that helps you choose storage by fit and function, explore GrifGlo and use it as a planning tool before your next purchase.


Leave a comment
This site is protected by hCaptcha and the hCaptcha Privacy Policy and Terms of Service apply.