

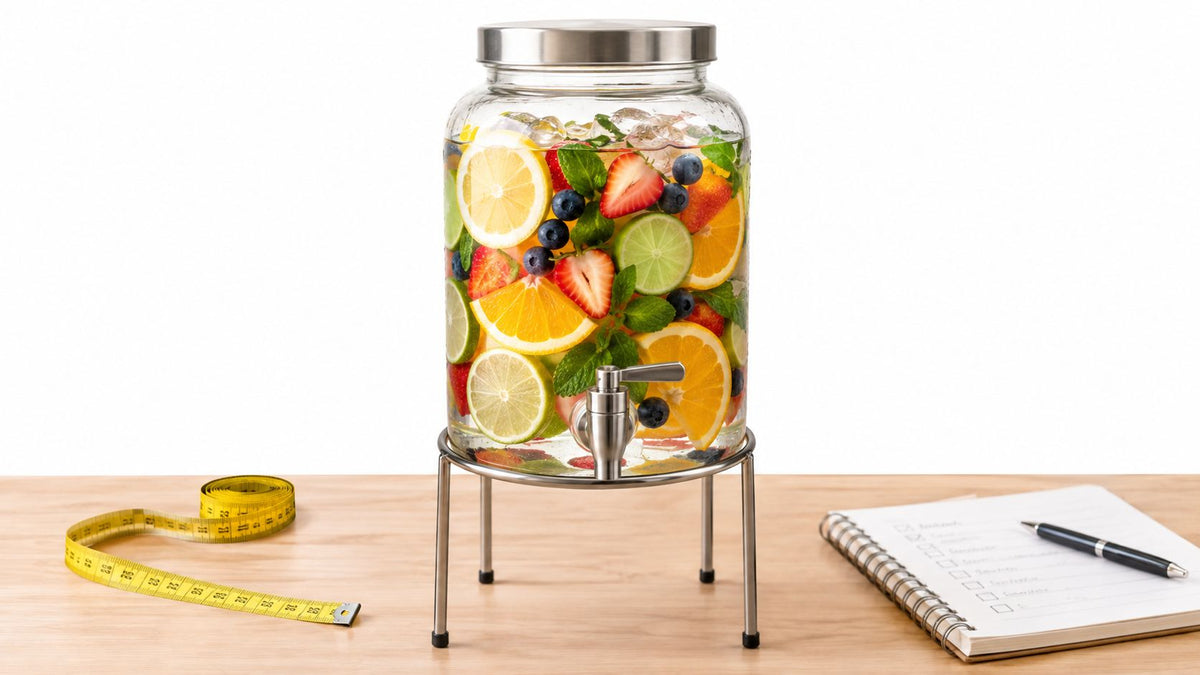
You've set out a buffet, the first guests have arrived, and the same small problems appear immediately. People crowd around the kitchen tap, someone knocks over a pitcher while reaching for a glass, and you spend the evening refilling cups instead of enjoying the gathering. A drink dispenser and stand can turn that improvised corner into a clear, self-serve station, but only if the vessel, support, height, and placement work together.
The right choice depends less on appearance than on who will use it, how often they'll refill, and how easily you can clean it. A compact dispenser may suit family dinners, while an insulated unit or commercial-style stand may make more sense for offices, rentals, catered events, and foodservice. This guide breaks the decision into type, material, capacity, placement, maintenance, and final checks, so you can choose a setup that feels natural in the space rather than buying the largest attractive container.
Table of Contents
- Introduction to Drink Dispensers and Stands
- Understanding Drink Dispenser and Stand Types
- Materials Finishes and Durability Trade Offs
- Capacity Sizing and Choosing the Right Fit
- Setup Placement and Use Across Home Event and Hospitality
- Cleaning Maintenance Safety and Accessibility
- Final Checklist and Confident Buying Decision
Introduction to Drink Dispensers and Stands
A dispenser does more than hold a beverage. It creates a small service point with an entry, a filling action, and an exit. Guests approach, place a cup beneath the spigot, fill it, and move away. The stand determines whether that sequence feels smooth or awkward.
Without a stand, a glass jar may sit too low for a cup, forcing users to tilt the vessel or hold the cup at an angle. That increases drips and makes the spigot harder to reach. A stable stand lifts the outlet, gives the cup room beneath it, and keeps the container's weight centred over its base.
Think of the setup as one system
Choose the dispenser and stand together. A wide glass container needs a support with enough surface area to prevent rocking. A tall, narrow unit may need a lower centre of gravity, particularly when children or hurried guests will use it. The stand also needs clearance for the largest cup you expect to serve, not just the small glass shown in a product photograph.
Placement completes the system. At home, the station might sit on a kitchen island where guests can reach it without entering the cooking area. At an outdoor gathering, it may belong at the end of a buffet, away from food preparation and close to a waste or recycling point. In hospitality, the layout must support repeated use, quick replenishment, and sanitation routines.
Practical rule: If users have to ask where to stand, where to place a cup, or how to avoid the drip, the station needs a better layout.
This guide is useful for three different buyers. Home hosts usually value manageable cleaning and attractive presentation. Event organisers need stability, transportability, and enough capacity to reduce interruptions. Hospitality teams need durable materials, accessible components, and equipment that fits applicable food-safety requirements.
The sizing examples ahead use common household categories such as a smaller party dispenser, a medium insulated unit, and a larger commercial-style arrangement. Treat those categories as starting points, then check the actual usable capacity, footprint, spigot clearance, and cleaning instructions before ordering.
Understanding Drink Dispenser and Stand Types
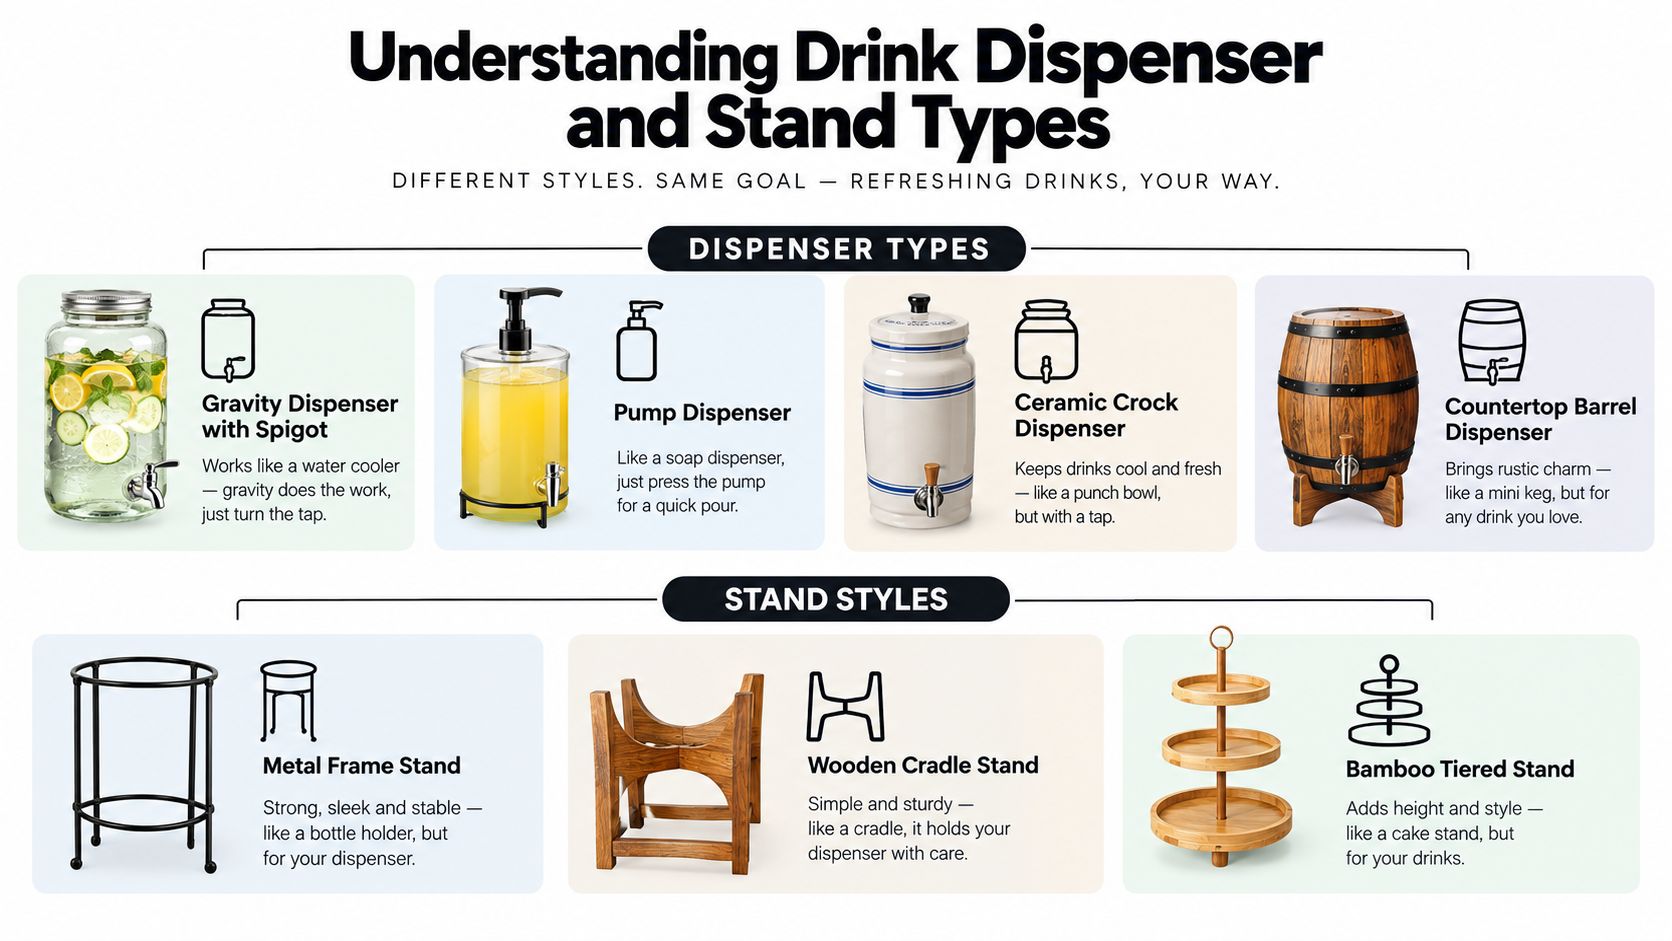
Start with the dispensing method. A gravity dispenser behaves like a water cooler turned on its side. Liquid sits above the spigot and flows when the valve opens. A pump dispenser works more like a hand soap bottle, drawing liquid upward through a mechanism, while a crock-style dispenser resembles a punch bowl with a controlled outlet.
Match the format to the drink
Glass gravity jars suit clear water, lemonade, iced tea, and fruit-infused drinks because users can see the contents. Their broad shape feels like a punch bowl with a tap, but the weight increases as the container fills, so the stand must be rigid and level.
Plastic infusers are easier to carry and less vulnerable to breakage. Many include a central tube for fruit or herbs, though narrow openings can make scrubbing difficult. Look for a lid that comes off fully and a spigot that can be removed or reached from inside.
Insulated beverage dispensers are designed for temperature control and transport. They work well for events where you fill the unit before service and want to limit handling during the gathering. Their opaque walls make it harder to judge the remaining liquid, so a refill plan matters.
Commercial self-serve units focus on repeated use, controlled dispensing, and serviceability. Some are countertop models, while others sit on purpose-built frames. In California, the Department of Food and Agriculture has warned that commercial beverage dispensers cannot be sold or used until they receive the required approval, and its 2025 notice specifically addresses machines that declare measured quantities such as 8 fl oz or 1 litre. Read the California notice on commercial beverage dispenser approval before purchasing equipment for commercial use.
Understand the stand styles
A tabletop stand adds modest height and suits a kitchen counter or buffet table. A freestanding metal frame creates a dedicated station and usually offers better clearance beneath the spigot. A wooden cradle, barrel-style support, or bamboo tiered stand adds visual warmth, but the finish must tolerate condensation and repeated wiping.
Check the spigot before admiring the styling. A lever that opens easily can help users with limited grip strength, while a stiff or tiny valve slows a busy service point. The lid should stay secure during movement, and the stand should prevent the container from sliding when someone presses the lever.
The gravity-fed principle also appears in other kitchen organisers. For example, the Automatic Egg Dispenser Rack – Rolling Storage Holder uses an inclined track to move eggs forward one at a time, illustrating how slope and controlled release can simplify access without an electric mechanism.
Materials Finishes and Durability Trade Offs
Material choice affects how the station feels after repeated use. A dispenser that looks elegant on its first day may become frustrating if it stains, retains odours, develops leaks, or requires awkward handling every time it needs washing.
Dispenser materials
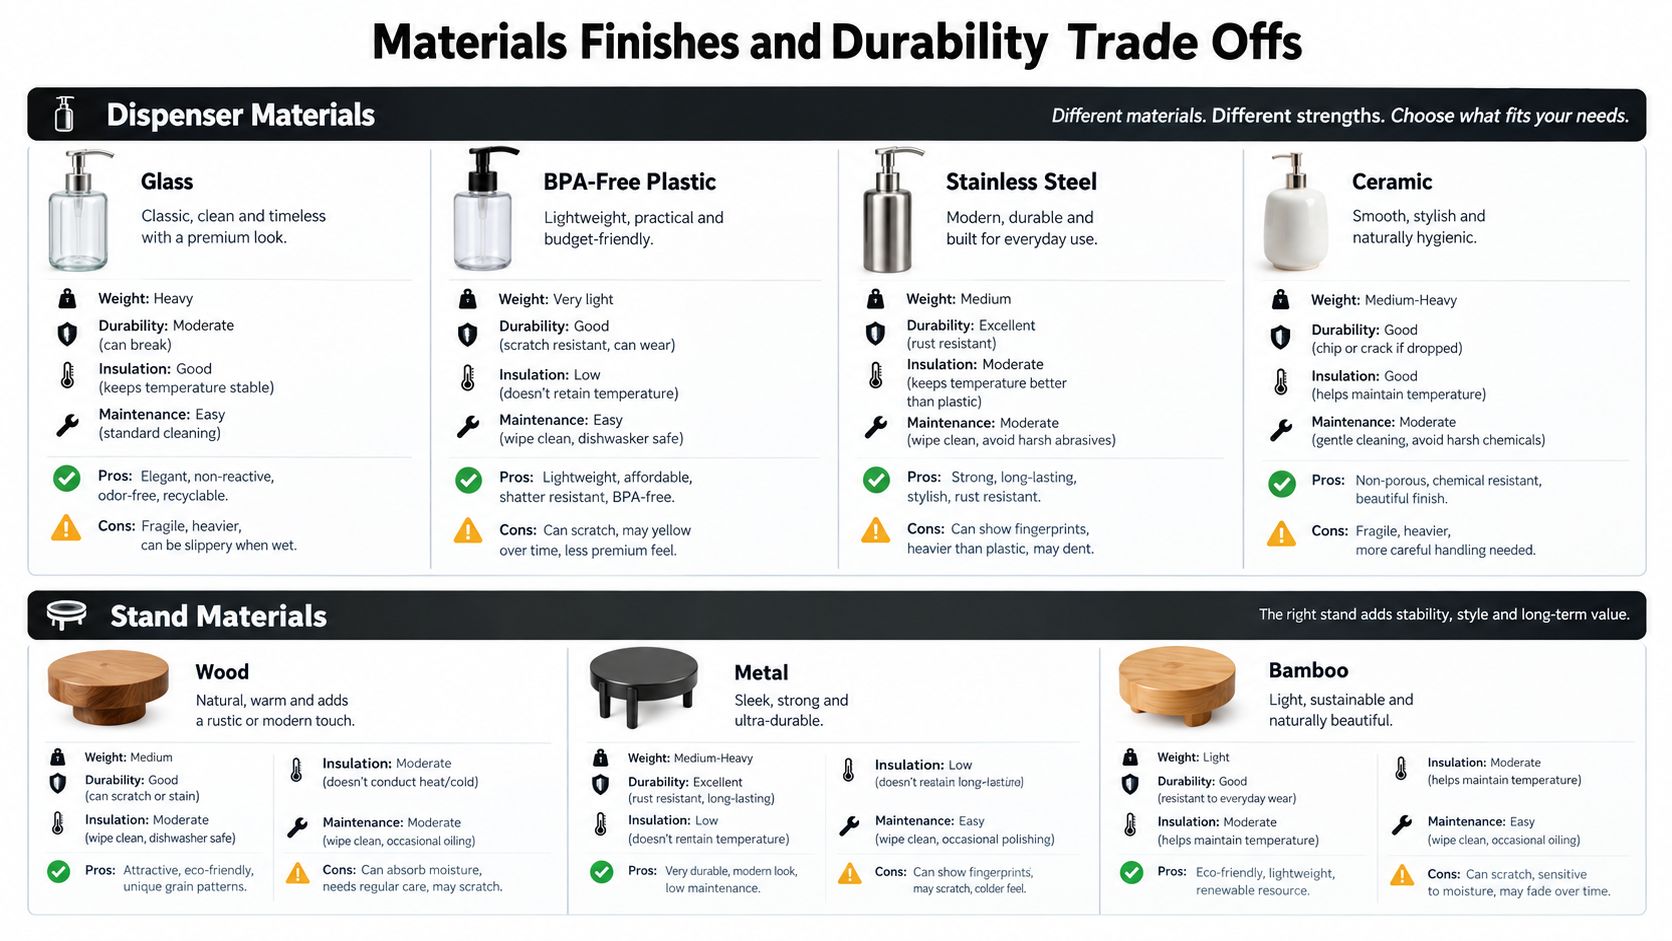
Glass gives you a clear view of the drink and makes fruit or herbs part of the presentation. It's heavy and breakable, so it's better for a controlled indoor setting than a crowded lawn or a rental kit that travels often.
BPA-free plastic is lighter and easier to transport. It's a practical choice for family use and outdoor service, but scratches can make the surface harder to inspect, and some plastics may retain strong flavours if cleaning is rushed.
Stainless steel is suited to frequent handling and commercial-style service. It hides the remaining volume and may show fingerprints, but a sound finish is durable and easier to pair with a strong metal stand.
Ceramic brings the visual weight of a crock or serving bowl. It can help a station feel established and decorative, though it's heavy, breakable, and often more demanding to lift for cleaning.
Stand materials
Wood creates a warm, furniture-like appearance. It needs protection from standing water and should have smooth, sealed contact points so condensation doesn't soak into joints or leave marks on a table.
Metal usually offers the most direct route to a rigid support. Check welds, fasteners, feet, and the finish around joints. A coated frame can resist household moisture, while exposed or poorly protected metal may rust in damp conditions.
Bamboo is light and visually soft, but it still needs careful drying. Its suitability depends on the finish, joint design, and whether the stand sits in a place where spills can remain unnoticed.
For broader guidance on choosing containers for foodservice environments, see this commercial food storage container guide. The same principle applies here: inspect not only the material, but also the seams, closures, handles, and areas that need routine cleaning.
Build the pairing around the setting
For an indoor family station, glass with a sealed wood stand can work well if adults handle refills. For an outdoor party, lightweight plastic with a coated metal frame reduces carrying and breakage concerns. For hospitality turnover, stainless steel with an accessible, stable frame generally makes more sense than a decorative support with hidden joints.
Condensation deserves attention in every setting. Place a drip tray or absorbent mat beneath the spigot, and choose stand feet that won't slide or mark the surface when moisture collects.
Capacity Sizing and Choosing the Right Fit
A dispenser that suits a family meal can become awkward at a busy event. Start with the service setting, then match capacity to refill tolerance, cup size, and the space needed around the stand. The labelled volume is not the same as pourable volume because ice, fruit, infusers, and headspace take up room. Large cups also empty a container faster, while a smaller dispenser may work well when the drink is concentrated and ice is served separately.
Use this table for planning, not as a promise of exact servings. Actual output changes with cup size, ice, drink strength, and guest refill habits.
| Capacity | Servings Approx | Best For | Stand Consideration |
|---|---|---|---|
| 1.5 gallons | Small rounds of drinks | A family meal, a kitchen counter, or a short gathering | Use a compact stand with enough spigot clearance for everyday cups |
| 2.5 gallons | Moderate self-serve service | A home party where you want fewer interruptions without creating a large station | Choose a stable tabletop stand and leave room for a drip tray |
| 3 to 4 gallons | Extended gathering service | A larger buffet, community room, office refreshment point, or rental setup | Prefer a wider base or freestanding frame, especially for heavier fills |
| 5 gallons | High-volume or longer service | Events, hospitality areas, and situations where refilling during service is difficult | Use a purpose-built stand with strong weight support and easy access around the unit |
The “servings approximate” column helps compare options, but a water test gives a more useful answer. Before an event, fill the dispenser, place the usual cup under the spigot, and check that the outlet clears the rim. The cup should remain level without forcing users to hold it sideways.
Choose by refill tolerance
A home host may accept one refill when the kitchen is close by. An event organiser generally needs the station to last through the busiest service period. A hospitality operator needs a refill process that staff can complete without dismantling the setup or blocking customers.
Canadian beverage demand also shows why equipment should match its setting. Canadians drank 427 million fountain soft drinks in the 12 months ending December 2025, up 6% year over year, according to Canadian beverage demand and household appliance context. The same source notes that cold beverages reached 27% of beverage sales at one major chain in Q4 2025, while cooking and other household appliance prices were largely stable in 2025.
Use this kitchen appliance buying guide for a fit-first check. Measure the available surface, then account for the stand footprint, drip area, and space for users to approach the spigot. A full unit should also be liftable or replenished safely. In a home, that may favour a smaller tabletop model. At an event, a wider base can matter more than a compact footprint. In hospitality, capacity should support service volume without creating a container that staff cannot move, clean, or refill efficiently.
Setup Placement and Use Across Home Event and Hospitality
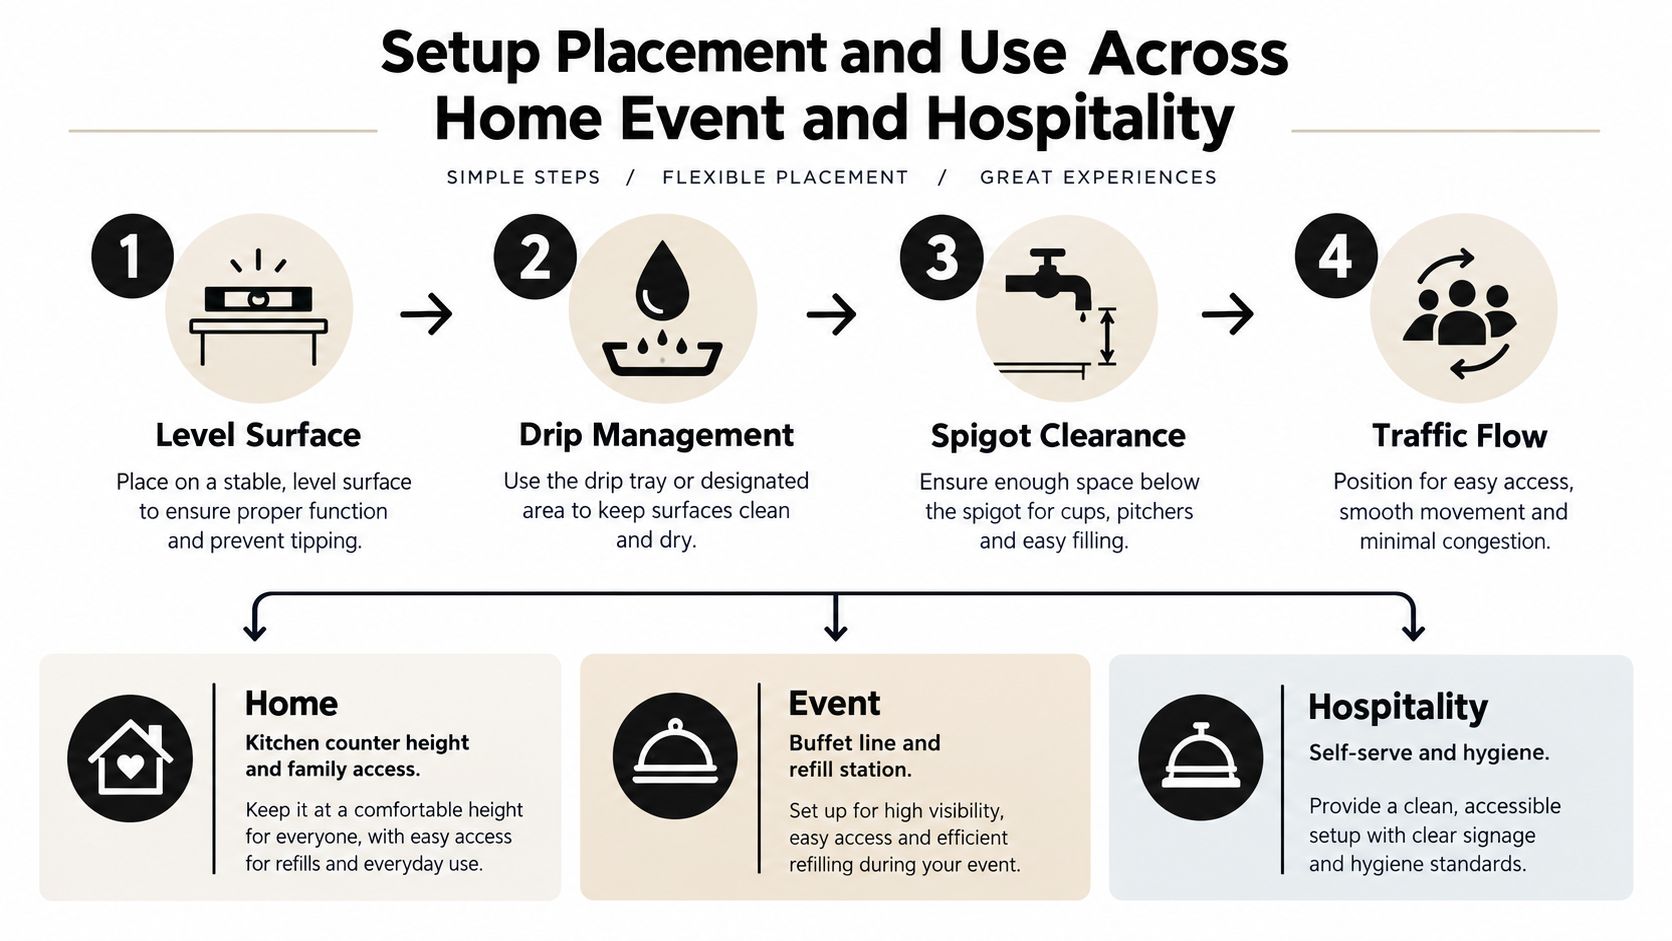
A reliable station follows a simple physical sequence. The container must sit level, the spigot must clear the cup, drips must have somewhere to go, and users must be able to approach and leave without crossing the refill path.
Use the four-point placement check
- Level surface: Put the stand on a firm, flat counter, table, or floor. A slight wobble becomes more serious as the container fills and users repeatedly operate the spigot.
- Drip management: Add a tray or washable mat beneath the outlet. Keep towels close enough for quick response, but don't place loose fabric where it can catch on the stand.
- Spigot clearance: Test the tallest cup, travel mug, or pitcher you expect to use. The vessel rim should sit below the outlet without touching the lever or filling device.
- Traffic flow: Place cups before the dispenser and waste or recycling after it. Keep refills behind or beside the station so staff don't reach across active users.
Adapt the layout to the context
In a home kitchen, counter height matters more than maximum capacity. Keep the dispenser near the fridge or beverage prep area, but not beside hot pans, sharp tools, or the main cutting board. A small station on an island works when guests can serve themselves without entering the cook's working zone.
At an event, use a sturdy table or frame on a level surface, with shade where possible for temperature-sensitive drinks. Put a second container or pitcher at the refill point, rather than storing extra liquid where guests are already filling cups.
In hospitality, separate customer access from staff replenishment. California's Retail Food Code allows certain consumer self-service bulk beverage dispensing operations to remain unenclosed during operating hours only under defined conditions, including continuity with a permanent food facility, operation by that facility, and enclosed equipment that prevents beverage exposure until the nozzles. The code also addresses overhead protection, protected single-use utensils, and cleaning and sanitation controls in California's Retail Food Code provision.
Canadian guidance adds an important geometry check. The lip-contact surface of a cup should not touch the actuation lever or filling device, and carbonation systems need an appropriate pressurised water and carbonation control arrangement. Keep a clear separation between the cup rim and mechanical controls, then align the stand so the drink falls into the centre of the vessel with minimal splash-back.
A short visual demonstration can help staff see the difference between a stable service point and an awkward one:
For offices, rentals, and other repeat environments, product standardisation guidance can help you compare the same clearance, refill, and cleaning requirements across multiple locations.
Cleaning Maintenance Safety and Accessibility
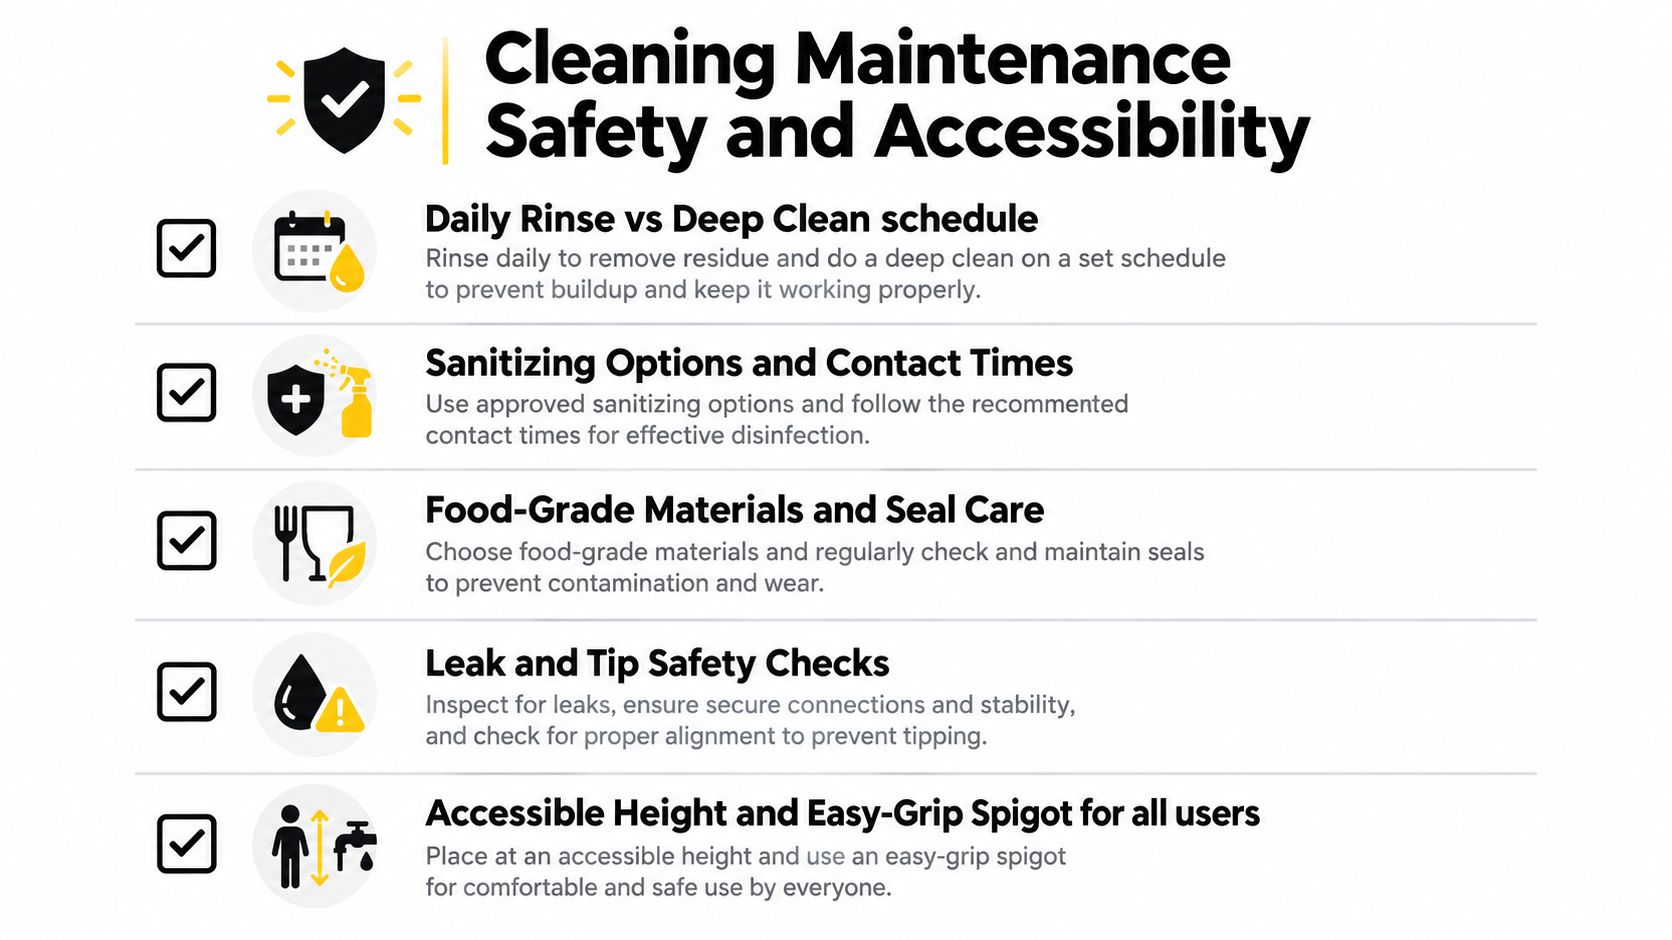
Cleaning starts with the parts users touch and the surfaces the drink contacts. Rinse the container and spigot after service, then follow the manufacturer's instructions for disassembly and deeper washing. Don't assume that a clear jar is clean inside, since syrup, fruit pulp, and mineral residue can collect around threads and valve seals.
Build a routine you can repeat
After use, empty leftover drink, rinse the vessel, flush the spigot, and let components dry fully. During regular service, inspect for leaks, sticky handles, loose seals, and drips that reach the stand or floor. Before storage, separate removable parts where the instructions permit and store the unit dry with the lid loose enough to prevent trapped moisture.
Canadian sanitation guidance specifies sanitising contact surfaces and utensils at 77°C for at least 45 seconds, or using chemical sanitation at concentrations such as 100 ppm chlorine, 200 ppm quaternary ammonium, or 25 ppm iodine for at least 45 seconds. Follow the applicable local requirements and the product instructions rather than combining chemicals or guessing concentrations. The Ontario food-premise reference document also supports using food-grade, potable-water-rated contact materials and backflow prevention devices for water-dispensing systems.
Design for access and inspection
A good stand lets you reach the underside of the dispenser, the drip tray, and the floor around the feet. Hidden corners may look neat, but they make spills harder to spot and sanitise. Choose a base that stays stable when wet and doesn't force users to grip a slippery container while filling.
Accessibility includes more than height. Keep the cup separate from the lever or filling device, use an easy-grip spigot, and avoid a stand so tall that a child must stretch or pull on the container. Test the action with one hand before purchase, particularly if the station will serve older adults or guests with limited dexterity.
For compatible cleaning tools and maintenance supplies, browse commercial cleaning supplies guidance. The useful test is simple: can someone clean every wetted surface, inspect every seal, and dry the support without needing special contortions?
Final Checklist and Confident Buying Decision
Before ordering, answer these questions in writing:
- Use case: Is the setup for everyday home use, occasional entertaining, outdoor events, rentals, or hospitality?
- Capacity: Will you accept refilling, or do you need a larger unit for uninterrupted service?
- Material: Do you value visibility, low weight, insulation, break resistance, or repeated-use durability most?
- Stand stability: Does the base support a full container without rocking, sliding, or marking the surface?
- Spigot quality: Can users operate it comfortably, and does the outlet clear your tallest cup?
- Cleaning access: Can you remove or reach the valve, seals, lid, interior, drip tray, and stand contact points?
- Placement: Have you measured the footprint and planned a route for cups, waste, refills, and staff access?
- Compliance: If the setup is commercial, have you checked the relevant approval and food-safety requirements?
A 2.5-gallon party set often suits a home host who wants a manageable self-serve station. A 5-gallon insulated unit is more appropriate when carrying capacity and fewer refills matter, provided the stand can safely support the filled weight. A commercial-style stand makes sense when repeated service, cleaning access, and controlled user flow outweigh decorative styling.
The final choice should also account for retailer support, replacement seals, clear care instructions, and realistic delivery or business purchasing needs. A structured decision-making framework can help you compare those factors without letting a striking finish hide an impractical design.
GrifGlo organises practical home, kitchen, storage, and hospitality purchasing guidance around fit, usability, and reliable sourcing. Visit GrifGlo to compare everyday essentials and build a drink service setup that suits your space, capacity, and cleaning routine.



Laisser un commentaire
Ce site est protégé par hCaptcha, et la Politique de confidentialité et les Conditions de service de hCaptcha s’appliquent.