

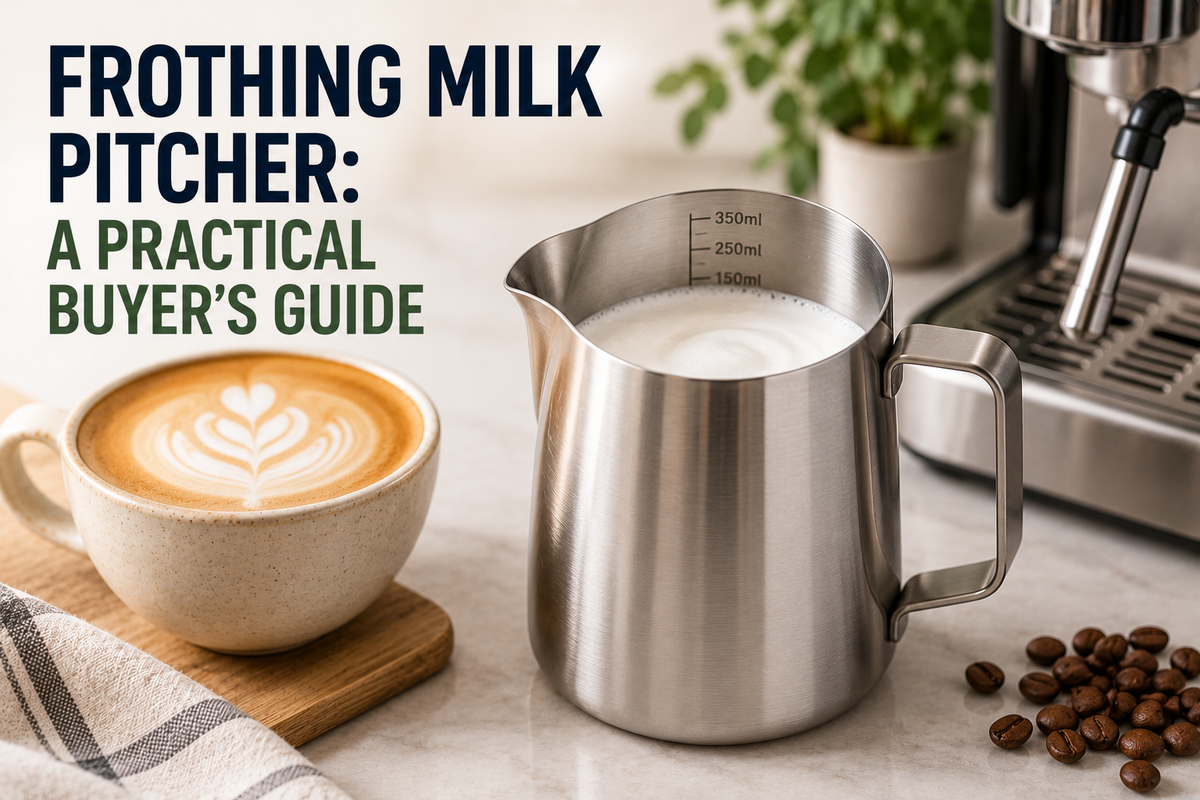
You've set a saucepan beside the espresso machine, poured in what looks like enough milk, and started whisking. Instead of a glossy layer of foam, the milk slides sideways, splashes over the rim, and leaves you with a thin drink and a messy counter. The missing piece usually isn't another appliance. It's a frothing milk pitcher that gives the milk somewhere to roll and gives your hand control over the final pour.
A good pitcher connects two jobs that buying guides often separate. It helps you texture milk with a steam wand or handheld frother, then directs that textured milk into the cup through a controlled spout. The right capacity, body shape, material, and pouring tip can make a noticeable difference between a repeatable home latte and a frustrating one.
Table of Contents
- What a Frothing Milk Pitcher Actually Does
- Key Features That Change How a Pitcher Feels
- Home Use vs Small Commercial Use
- Basic Frothing and Pouring Technique
- Compatibility With Steam Wands and Frothers
- Cleaning and Long-Term Care
- Sizing and Serving Guide for Real Setups
What a Frothing Milk Pitcher Actually Does
A frothing milk pitcher is a small stainless-steel jug, usually lidless, with a handle and a shaped pouring spout. Some models are made from copper or plastic, but stainless steel remains the practical choice for steaming because it tolerates heat, rinses cleanly, and lets you feel temperature changes through the wall.
Its first job is containment. When a steam wand stretches milk, the liquid expands and moves in a circular roll. A saucepan is too broad and awkward for that movement, while a measuring jug usually lacks the balance and pointed spout needed afterward. The pitcher keeps the milk in a compact, controllable space while the steam wand or frother adds air.
Its second job is hand control. The handle lets you tilt the vessel without gripping a hot body, and the shape helps you adjust the wand's position with small movements. That matters during the transition from adding air to creating a smooth vortex. A pitcher also gives you a consistent surface against which you can judge heat by touch.
The third job happens after steaming. The spout narrows the flow so you can blend foam into espresso, place a white heart on the crema, or sweep a thin line for a rosetta. A cream pot may pour liquid, but it usually won't give you the same combination of handle position, rim control, and spout precision.
Practical rule: A pitcher isn't just a container for milk. It's the connection between texture and presentation.
You can use one with an espresso-machine steam wand, a handheld frother, or a separate milk-texturing device. It can also serve as a temporary pouring vessel after milk has been prepared elsewhere. For a separate cold preparation, the same emphasis on vessel choice appears in this guide to how to make cold foam.
Capacity, material, spout geometry, handle design, and the base shape all influence how the pitcher behaves. Those details matter more than a shiny finish or a product label.
Key Features That Change How a Pitcher Feels
A pitcher can look simple on a shelf, yet small design choices change how it behaves under steam and during a pour. Start with the features you'll notice immediately in your hand.

Capacity controls movement
For most home users, 12 oz or 350 ml is a useful compact size for one drink or a carefully divided pair. A 20 oz pitcher, commonly listed around 600 ml, gives more room for two drinks or a larger latte. A 32 oz option, listed around 950 ml, is more appropriate for small-business service where larger volumes are prepared repeatedly.
Capacity isn't the same as usable fill volume. Milk needs room to expand and circulate, so an oversized pitcher can make a single serving feel shallow and difficult to control. A small pitcher can also be cramped if you're trying to prepare two drinks. Canadian retailer listings commonly group pitchers around 12 oz/350 ml, 20 oz/590 ml, and 32 oz/940 ml, which makes these practical reference points rather than arbitrary labels, as shown by Canadian pitcher sizing guidance.
Material changes heat feedback
Food-grade stainless steel, particularly 18/8 stainless steel, is the everyday standard. Canadian barista guidance describes pitchers with approximately 1.3 mm walls as a way to improve thermal stability and make heating more predictable, while measurement marks and precision spouts support repeatable preparation and less waste, according to this Canadian barista pitcher listing.
Copper heats quickly and has a distinctive appearance, but it can dent more easily and needs more careful upkeep. Plastic may be useful for travel or non-steam frothing, but it generally doesn't provide the same heat feedback and isn't the natural choice for a steam wand. For a broader material comparison in the kitchen, see this discussion of stainless steel versus non-stick cookware.
Spout shape sets the pouring style
A narrow, sharply curved spout supports slow, deliberate pours and fine latte-art lines. It gives you more control when you lower the tip close to the espresso surface. A wider, rounder opening releases foam more quickly, which can suit cappuccinos, broad fills, or busy service where speed matters more than intricate patterns.
A hybrid spout can be a useful compromise if you alternate between hearts, tulips, and simple rosettas. If you're comparing shapes in person, a resource such as shop AQEEK Coffee milk pitcher can help you focus on the relationship between the tip and the body rather than capacity alone.
Handle and markings reduce guesswork
An open loop handle usually leaves room for different grips and keeps your fingers away from the hottest part of the vessel. Some pitchers include a thumb rest or angled handle, which can make slow pours feel steadier. Interior measurement marks are useful when you're still learning because they help you reproduce the same starting volume.
The base deserves attention too. A rounded or gently curved bottom can encourage a smoother vortex during steaming, while a flatter base may feel more stable when the pitcher rests on the counter. As an unrelated but straightforward stainless-steel kitchen tool, the HAUTE CUISINE Stainless Steel Garlic Press - 80710-HC is described as having a durable stainless-steel build, comfort-grip handles, and simple cleanup. It isn't a milk pitcher, but the comparison reinforces a useful buying habit: judge the contact points and cleaning routine, not just the material name.
Home Use vs Small Commercial Use
A home barista and a small café may use the same style of pitcher, but they place different demands on it. At home, you might prepare one drink, rinse the vessel, and leave it to dry beside the machine. In a café, food truck, or bed-and-breakfast, the pitcher may move through repeated steaming, pouring, rinsing, and washing throughout service.
Home users usually benefit from a compact stainless-steel pitcher with a precise spout. A 12 oz or 16 oz size can be easier to control when you're making one cappuccino or latte, especially if you're still learning how much milk to start with. Appearance and comfort can reasonably influence the purchase because the tool won't face constant knocks or rapid rotation.
Small commercial users should think about workflow first. A heavier-gauge body, a durable rim, and a capacity that suits the menu become more important than decorative finishes. A 20 oz or 32 oz pitcher may be useful when staff prepare two drinks together or need more milk for a broader service pattern. A spout should match the café's normal pouring style. A sharp tip makes sense for detailed latte art, while a broader opening can speed up generous foam pours.
| Factor | Home Use | Small Commercial Use |
|---|---|---|
| Typical workflow | One drink or a short personal session | Repeated drinks across a service period |
| Useful capacity | Compact pitcher for single servings or occasional pairs | Larger pitcher for paired drinks and menu volume |
| Top priority | Comfort, control, easy cleaning, and precise pouring | Durability, heat tolerance, fast handling, and repeatability |
| Spout preference | Narrow or hybrid for learning latte art | Chosen around the café's signature drinks |
| Cleaning pattern | Rinse after use and clean before storage | Frequent rotation, rinsing, and organised washing |
| Number of pitchers | One can be enough to start | Several may be needed for continuous service |
For a home setup, a second pitcher is useful when you regularly switch between dairy and plant-based milk or want one vessel cooling while another is ready. For a small operation, colour-coding pitchers can help staff keep milk handling organised.
Service insight: Buy the pitcher that fits your busiest realistic routine, not the largest drink you might make once.
If you're setting up a broader hospitality or kitchen-supply workflow, this guide to wholesale kitchen supplies can help place the pitcher alongside the other tools your operation uses.
Basic Frothing and Pouring Technique
Technique becomes easier when the pitcher gives the milk enough room to move. Canadian product guidance recommends filling a pitcher about one-third to one-half full with cold milk, then placing the steam wand tip just below the surface so the milk forms a stable vortex rather than splashing, as described by KitchenAid Canada's milk-frothing guidance.

Start with the fill level
Use less milk than you think you need at first. For a latte, begin around one-third of the pitcher's capacity. A cappuccino often needs closer to half because you're building more foam, but the vessel still needs headroom for expansion.
The correct starting point depends on the drink, cup, and pitcher. The important part is avoiding two extremes. Too little milk makes the wand difficult to keep submerged, while too much leaves no space for expansion and can push liquid over the rim.
Add air, then create the roll
Purge the steam wand briefly before inserting it. Place the tip just below the milk surface and listen for a gentle paper-tearing sound. That sound indicates that air is entering the milk. Keep the pitcher steady while the milk begins to expand.
Once you've added enough air, lower the pitcher slightly so the wand tip sits deeper. The tearing sound should soften or stop, and the milk should begin circulating in a smooth whirlpool. The vortex folds the air through the liquid and breaks down larger bubbles into a more even texture.
The Specialty Coffee Association range cited by Wirecutter places practical steaming around 131 °F to 149 °F. That guidance also identifies the broader sweet spot as roughly 40 °C down to 20 °C, so the usable target is about 55 °C to 65 °C, depending on the milk and drink. Use the pitcher wall as your first temperature cue, then add a thermometer if you're struggling to stop consistently.
Let the foam settle before pouring
When the milk reaches your target, stop steaming and wipe the wand immediately. Swirl the pitcher to keep the liquid and foam integrated. Letting it stand briefly, roughly five to ten seconds, can help larger bubbles settle before the pour, but don't leave it sitting long enough for the texture to separate.
A narrow spout pulls the foam forward and supports hearts, tulips, and rosettas. A wider spout sends out a broader stream and can be easier for filling a cappuccino or splitting milk between cups. To keep developing your timing and hand position, use these latte-brewing tips to perfect your latte at home.
For a repeatable home workflow, the guide on how to use an espresso machine is useful alongside pitcher practice.
Here's the quick troubleshooting pass:
- Thin milk: You probably didn't introduce enough air during the opening stretch.
- Large bubbles: The wand tip sat too high, or the surface movement was too aggressive.
- Stiff foam: You added too much air or let the milk heat beyond its useful range.
- Foam that separates: The milk didn't roll smoothly, or it rested too long before pouring.
The pour should start with the pitcher held slightly higher to blend milk into the espresso. Lower the spout close to the surface when you want the foam to appear, then move the pitcher deliberately rather than flicking your wrist.
Use the following visual as a reminder of the sequence, especially while you're learning the sound of the steam:
Compatibility With Steam Wands and Frothers
The right pitcher depends on the tool creating the foam. A vessel that works beautifully under an espresso-machine wand may be awkward with a battery frother, while an automatic countertop unit may not need a separate steaming pitcher at all.
Espresso-machine steam wands
Standard home steam wands generally work with pitchers in the 350 ml to 600 ml range. The tip needs to sit just below the milk surface without forcing you to tilt the pitcher at an awkward angle. A taller, narrower shape can be helpful when a wand has several steam outlets or produces a strong flow, because the body keeps the liquid contained while it circulates.
Choose a pitcher with enough vertical depth for the wand, but don't select a large commercial vessel for a single home drink. The milk may sit too low, making it harder to create a reliable roll.
Handheld battery frothers
A handheld whisk doesn't require the same wand clearance, but the pitcher still needs a stable base and enough straight sidewall to keep milk from splashing. A narrower body usually makes it easier to keep the whisk below the surface. A very wide belly can send liquid up the sides before the foam has a chance to develop evenly.
A pointed spout is useful if you'll transfer directly from frothing to pouring. If the handheld frother creates foam in a separate vessel, you can pour that milk into a dedicated latte-art pitcher afterward.
Automatic countertop frothers
Many automatic frothers include their own jug or bowl. In that setup, a separate frothing milk pitcher is mainly a control vessel. You might transfer the finished milk into it for a cleaner pour, or use it when preparing extra drinks outside the automatic unit's normal workflow.
Material can matter here. A non-stick coating may not suit a magnetic whisk system, and very thick stainless steel can make heating feel slow on a small home machine. Check the frother's instructions before pairing it with another vessel.
| Frothing Tool | Best Pitcher Size | Spout Style | Material Note |
|---|---|---|---|
| Steam wand | 350 ml to 600 ml, matched to drink volume | Narrow or hybrid for controlled pouring | Stainless steel gives useful heat feedback |
| Handheld frother | Compact body with stable base | Narrow spout for direct latte-art pouring | Avoid shapes that encourage splashing |
| Automatic frother | Vessel sized for transfer and serving | Any style that suits the final pour | Check compatibility with magnetic whisk systems |
Buy a pitcher alone if your espresso machine already textures milk well. Pair it with a handheld or automatic frother when your setup lacks a steam wand or when you want a separate texturing stage.
Cleaning and Long-Term Care
Milk residue becomes harder to remove once it dries, so the best cleaning routine starts immediately after pouring. Rinse the pitcher with hot water, then use a non-abrasive sponge to remove the film from the inside and around the spout.
The spout deserves extra attention. Milk can dry inside the narrow opening even when the body looks clean, and that residue can alter the next pour. Wipe the spout interior daily with a soft cloth or suitable small brush, taking care not to bend the tip.

A simple care routine
- After every use: Rinse with hot water before milk proteins set.
- Wash daily: Wash the interior, exterior, handle, rim, and spout.
- During a deeper clean: Soak the pitcher in warm water with a suitable milk-system cleaner. A mild baking-soda soak can help with odour and residue, provided you rinse thoroughly afterward.
- Before storage: Dry the pitcher completely and keep it upright so the rim doesn't rest against a hard surface.
Most plain stainless-steel pitchers tolerate dishwashers, but coloured finishes and copper-plated surfaces may fade, dull, or lose their appearance. Hand-washing is the safer option for decorated exteriors and any pitcher with manufacturer-specific care instructions.
For broader kitchen-cleaning habits, this guide to cleaning food-storage containers offers a useful reminder that rinsing immediately is easier than removing dried residue later.
Know when to retire one
Replace the pitcher if the interior stays cloudy after cleaning, if deep pitting traps residue, or if the base has warped and rocks on the counter. A loose handle is a safety problem, and a spout tip bent inward can disrupt every pour.
Two pitchers make a practical home rotation. One can cool and dry while the other is ready for the next drink, which also helps when you're separating dairy and plant-based milk.
Sizing and Serving Guide for Real Setups
Capacity should follow the way you serve drinks, not the capacity printed largest on the product page. A single-drink household benefits from a compact vessel that keeps the milk deep enough for a stable vortex. A household preparing several drinks back-to-back needs more room, but still shouldn't choose a pitcher so large that a normal serving sits shallowly at the bottom.
Canadian guidance identifies 350 ml and 500 ml to 600 ml pitchers as standard working sizes, while Canadian retail listings also commonly show 12 oz/350 ml, 20 oz/590 ml, and 32 oz/940 ml formats. Those categories make a useful starting framework for home kitchens and low-volume hospitality setups.
| Setting | Typical Drinks Per Session | Recommended Pitcher Size | Fill Level Rule | Best For |
|---|---|---|---|---|
| Single-drink household | One drink at a time | 12 oz / 350 ml | About one-third for a latte, closer to half for a foam-heavy drink | Control, low waste, and learning |
| Small household | Two to four drinks back-to-back | 20 oz / 600 ml | Just over half when preparing two drinks | More swirl space and fewer refills |
| Low-volume café, food truck, or bed-and-breakfast | Several drinks across a service period | 32 oz / 950 ml for larger-volume work | Keep below two-thirds | Rotation, durability, and faster handling |
A 12 oz pitcher is often the easiest starting point for one cappuccino because it keeps the milk concentrated around the steam wand and reduces leftover milk. A 20 oz model gives a small household more flexibility, particularly when two drinks share a batch. The trade-off is that you'll need to measure carefully when making only one.
A 32 oz pitcher can suit a small hospitality setup, but it isn't automatically better for home use. Filling a large vessel with a single serving creates unnecessary waste and can make the vortex harder to manage. For batch preparation, stay below two-thirds full so the milk still has room to expand and circulate.
Quick sizing rule: One drink, roughly one-third full. Two drinks, just over half full. Batch work, never so full that the wand has no room to agitate.
Choose the smallest pitcher that comfortably handles your normal serving pattern. If latte art is your priority, put spout precision ahead of decorative finish. If speed and repeated service matter more, choose a durable body and a size that lets you work without constant refilling.
GrifGlo organises practical kitchen tools, comparisons, and sizing guidance for households and small businesses, which makes it a useful place to continue evaluating coffee equipment. Visit GrifGlo to compare everyday essentials and choose tools that fit your actual serving routine.



Laisser un commentaire
Ce site est protégé par hCaptcha, et la Politique de confidentialité et les Conditions de service de hCaptcha s’appliquent.