

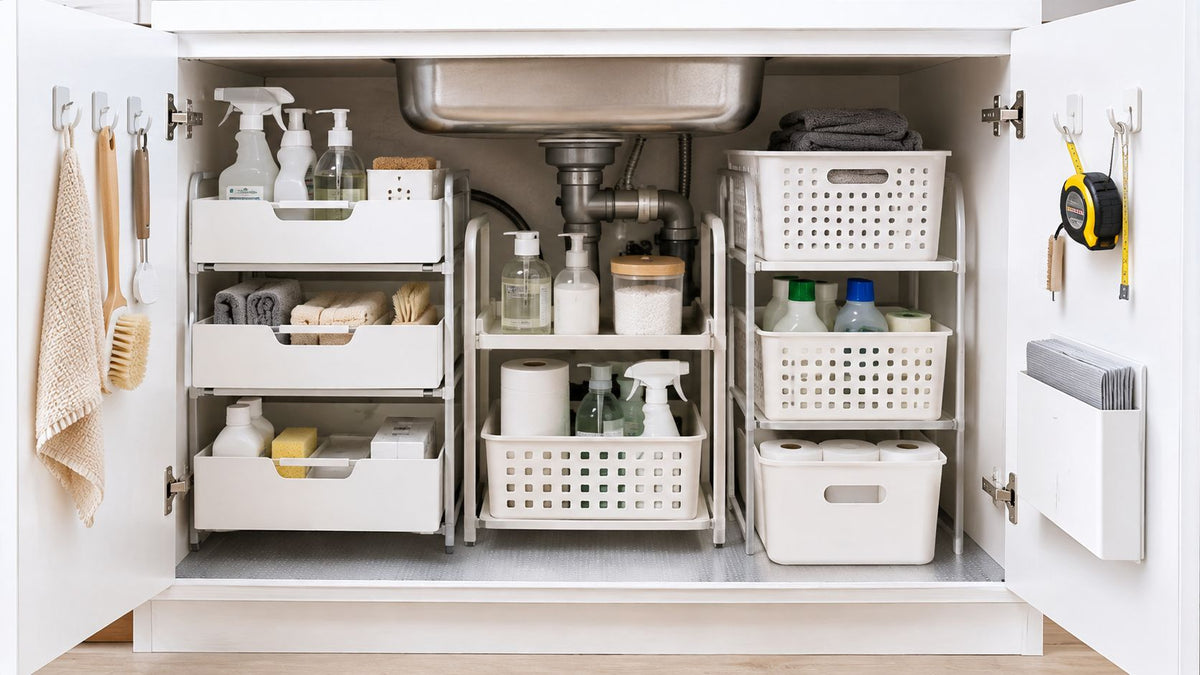
The cabinet beneath your sink looks deep until you account for the P-trap, supply lines, shutoff valves, leaks, and the door that has to close without hitting anything. Then the cleaning sprays disappear behind the plumbing, sponges collect in a damp corner, and you buy another bottle because the first one is impossible to find.
The best kitchen sink organization ideas start with the available space. Measure the cabinet's interior width, depth, and height, then note every pipe, valve, filter, bin, and door obstruction. Choose storage based on access and fit, not on the largest advertised capacity. A system that blocks a shutoff valve or forces you to unload the cabinet before reaching a sponge has failed.
This guide covers quick installs, renter-friendly changes, adjustable systems, DIY-friendly options, and moisture protection. Use pull-outs for deep cabinets, risers for unused vertical space, bins for shared routines, adhesive systems for rentals, and liners or moisture control wherever dampness is persistent. Small kitchens need compact access, families need clear categories, rental properties need repeatable systems, and hospitality spaces need easy reset and inspection.
Table of Contents
- 1. Under-Sink Pull-Out Organizers and Drawer Systems
- 2. Tiered Shelf Risers and Vertical Stacking Systems
- 3. Labeled Bin and Caddy Systems with Categorization
- 4. Magnetic Strips and Wall-Mounted Command Systems
- 5. Adjustable Shelf Dividers and Partition Systems
- 6. Drawer Liner-Based Zone Creation and Moisture Management
- 7. Hanging Organizer Bags and Over-the-Door Systems
- 8. Moisture Control and Ventilation Systems with Dehumidifiers
- Kitchen Sink Organization: 8-Option Comparison
- Choose the System That Fits Your Sink
1. Under-Sink Pull-Out Organizers and Drawer Systems
Pull-out shelves solve the most common under-sink problem: the cabinet is deep, but the usable front opening is narrow. Instead of reaching around pipes or moving several bottles, you slide the contents toward you. That makes daily products visible and keeps plumbing access available when the unit is positioned around the obstruction.
Measure the cabinet opening and the interior cavity separately. A frame may fit inside the cabinet but fail to pass through the door opening during installation. Check the organizer's width, depth, height, mounting method, and weight rating. Leave clear space around the P-trap, water lines, filtration equipment, and shutoff valves. If your cabinet has a centre stile, account for it before ordering.
A pull-out system from brands such as Rev-A-Shelf can suit a fixed home installation, while a modular shelf or drawer insert may be more appropriate for a starter home or rental property. Products designed for under-sink storage, such as these under-sink storage ideas, can help you compare layouts before committing to a configuration.
Practical rule: The drawer should bring supplies forward without making the plumbing harder to reach.
Use a shelf liner beneath cleaning products. It protects the cabinet base from drips and makes spills easier to identify. Add clear dividers so bottles don't tip as the shelf moves, and group supplies by task rather than by bottle shape. Keep dishwashing products in the front zone, backup products in a separate area, and plumbing tools away from chemical cleaners.
A pull-out is strongest in a deep cabinet where the rear space is otherwise wasted. It isn't the best choice if the cabinet opening is unusually narrow, the plumbing occupies most of the interior, or drilling isn't permitted. In those cases, a freestanding caddy or adjustable divider may provide better access with less installation.
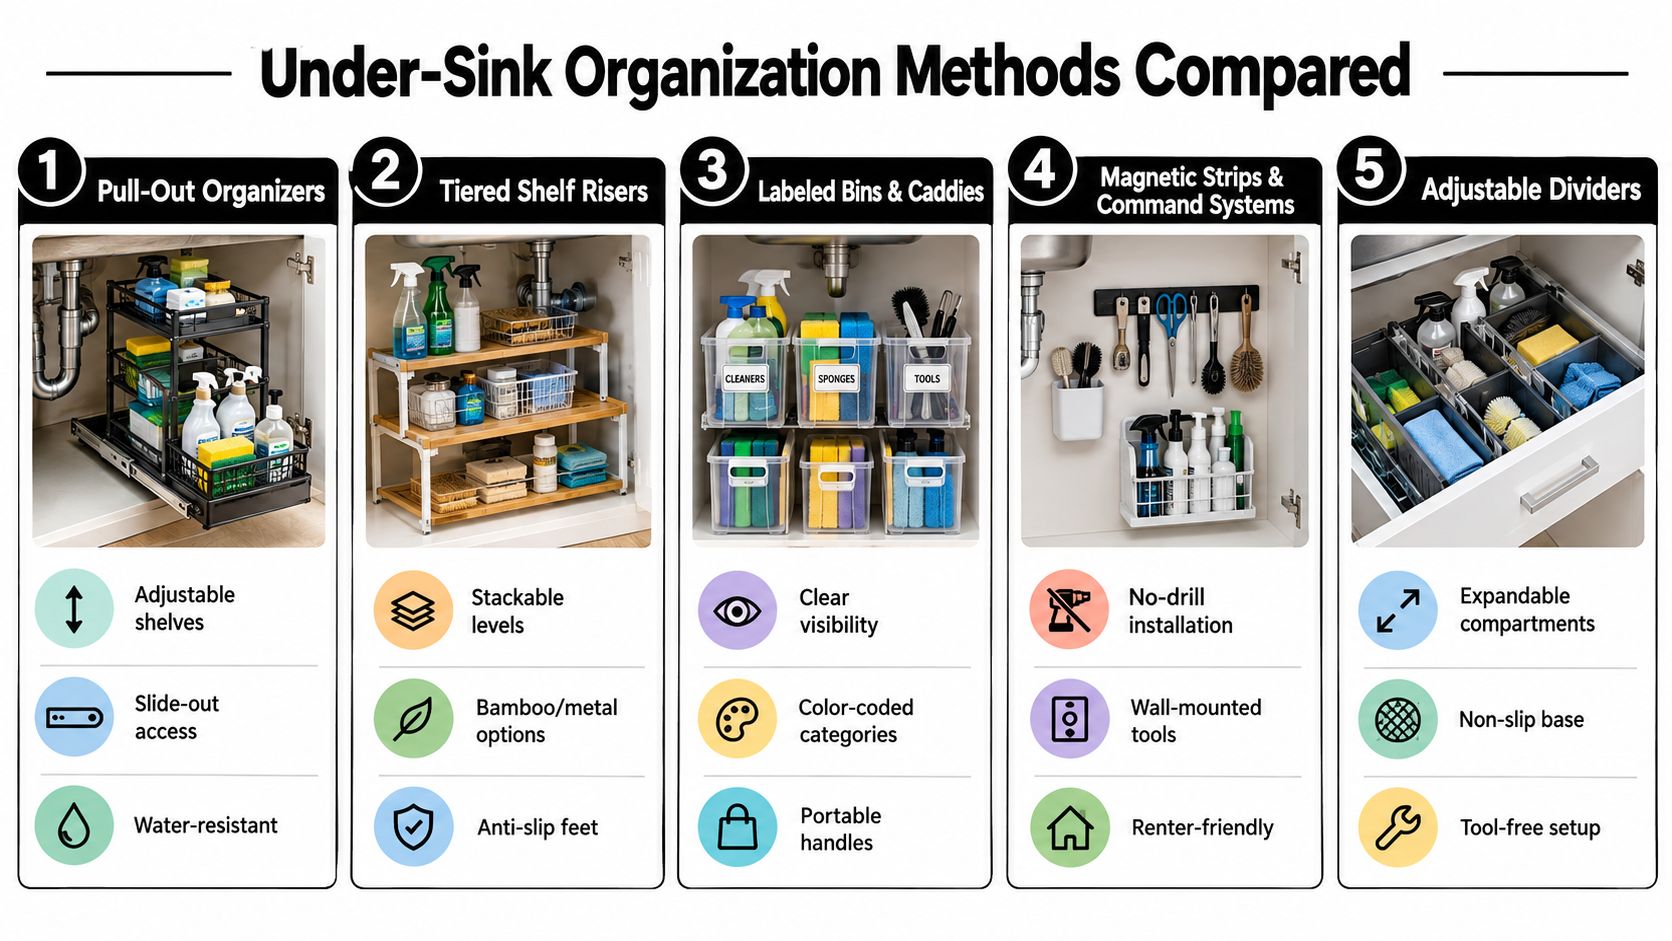
This video offers a visual reference for pull-out and under-sink layouts.
2. Tiered Shelf Risers and Vertical Stacking Systems
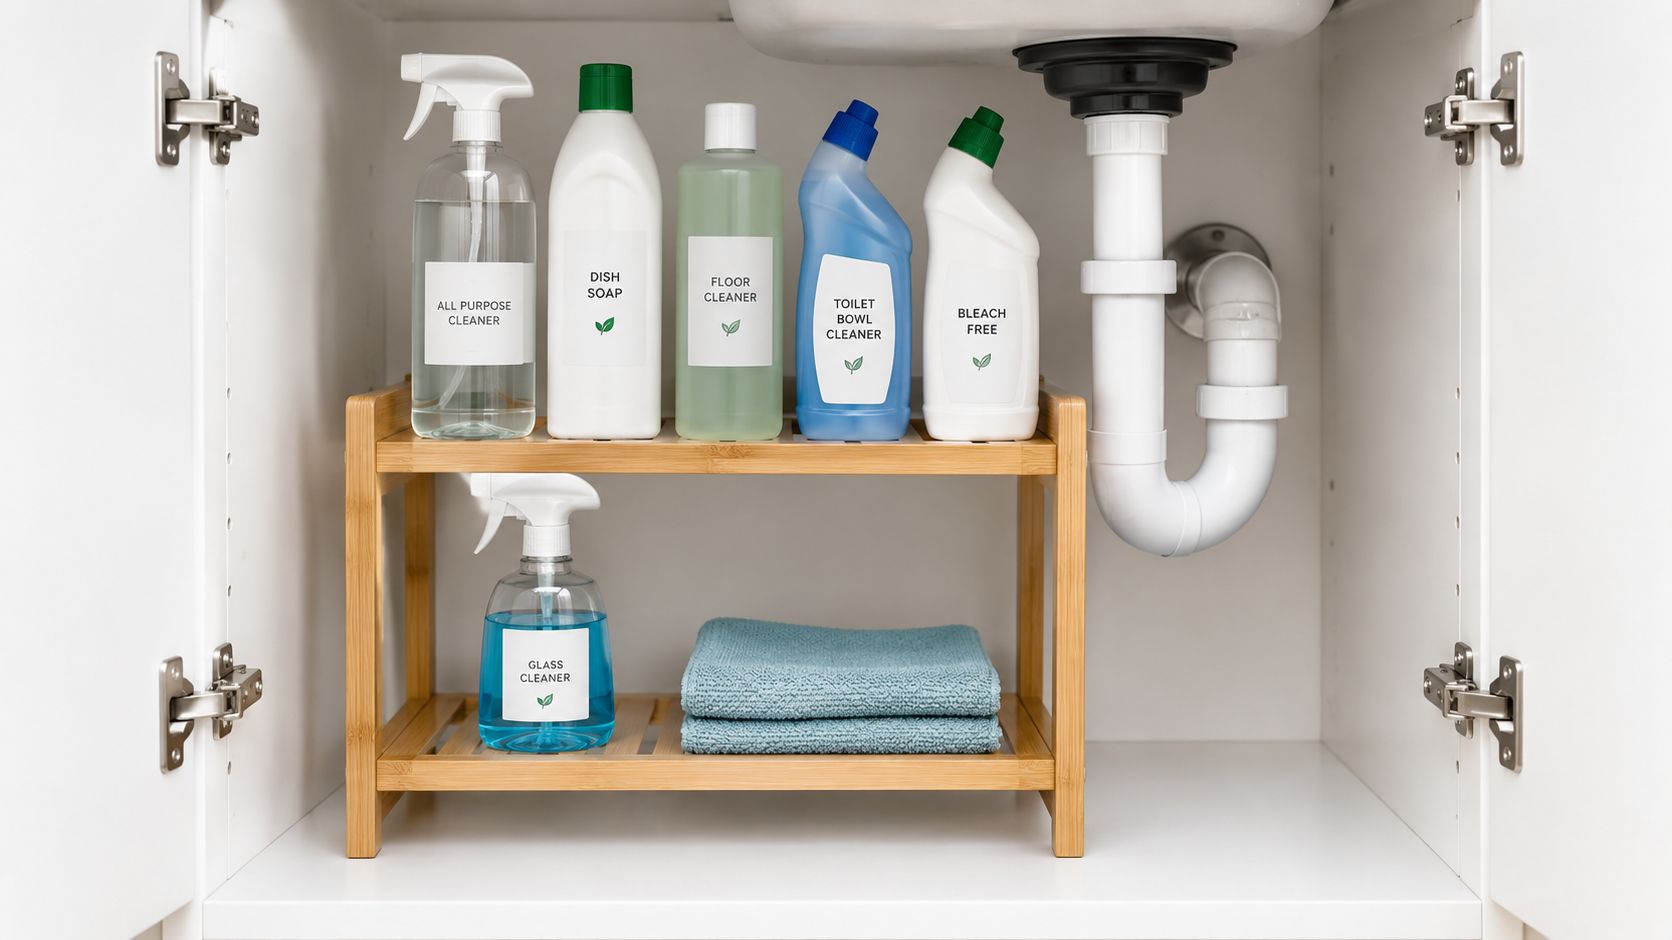
A riser is the simplest way to stop wasting the air above short bottles. It creates a second level, allowing you to see smaller items instead of hiding them behind taller sprays. Stackable versions work well when the cabinet has height but the plumbing limits how far a shelf can extend.
Choose the material according to the environment and load. Plastic handles routine splashes and is easy to wipe. Metal provides a rigid platform for heavier bottles, while bamboo can look better in a dry open shelf or a well-protected cabinet. Under a sink, appearance should come after stability and moisture resistance.
Arrange products by how often you use them. Daily dish soap, sponges, and cloths belong in the easiest-to-reach position. Backup supplies can sit behind or below them, but leave enough headroom to remove every container without tilting it into the pipework.
- Test stability first: Load the riser gradually and check that it doesn't flex, slide, or touch plumbing.
- Add a non-slip layer: A liner keeps the riser from shifting when you pull out a bottle.
- Keep tall products accessible: Don't place a spray bottle beneath a low shelf where the trigger catches.
- Reserve the plumbing zone: Treat the area around the P-trap as a service corridor, not as spare storage.
For an apartment kitchen with limited cabinet space, an expandable riser can adapt as supplies change. In an Airbnb or short-term rental, a washable metal riser provides a clear reset point for cleaners between stays. Office kitchens can use a compact riser to separate hand-washing products from shared cleaning materials.
The adjustable pantry shelving guide is useful when you're comparing flexible shelving principles for other kitchen zones. A riser won't solve poor categorization, and it won't create clearance where pipes already occupy the cabinet. Use it when the cabinet's vertical space is the constraint.
For adjacent refrigerator storage, the Magnet Shelf Rack for Refrigerator - Kitchen Organizer has a tray, a middle hook position, and a bottom wooden rail for towels or kitchen tools. It belongs outside the sink cabinet, where it can move small accessories away from the counter.
3. Labeled Bin and Caddy Systems with Categorization
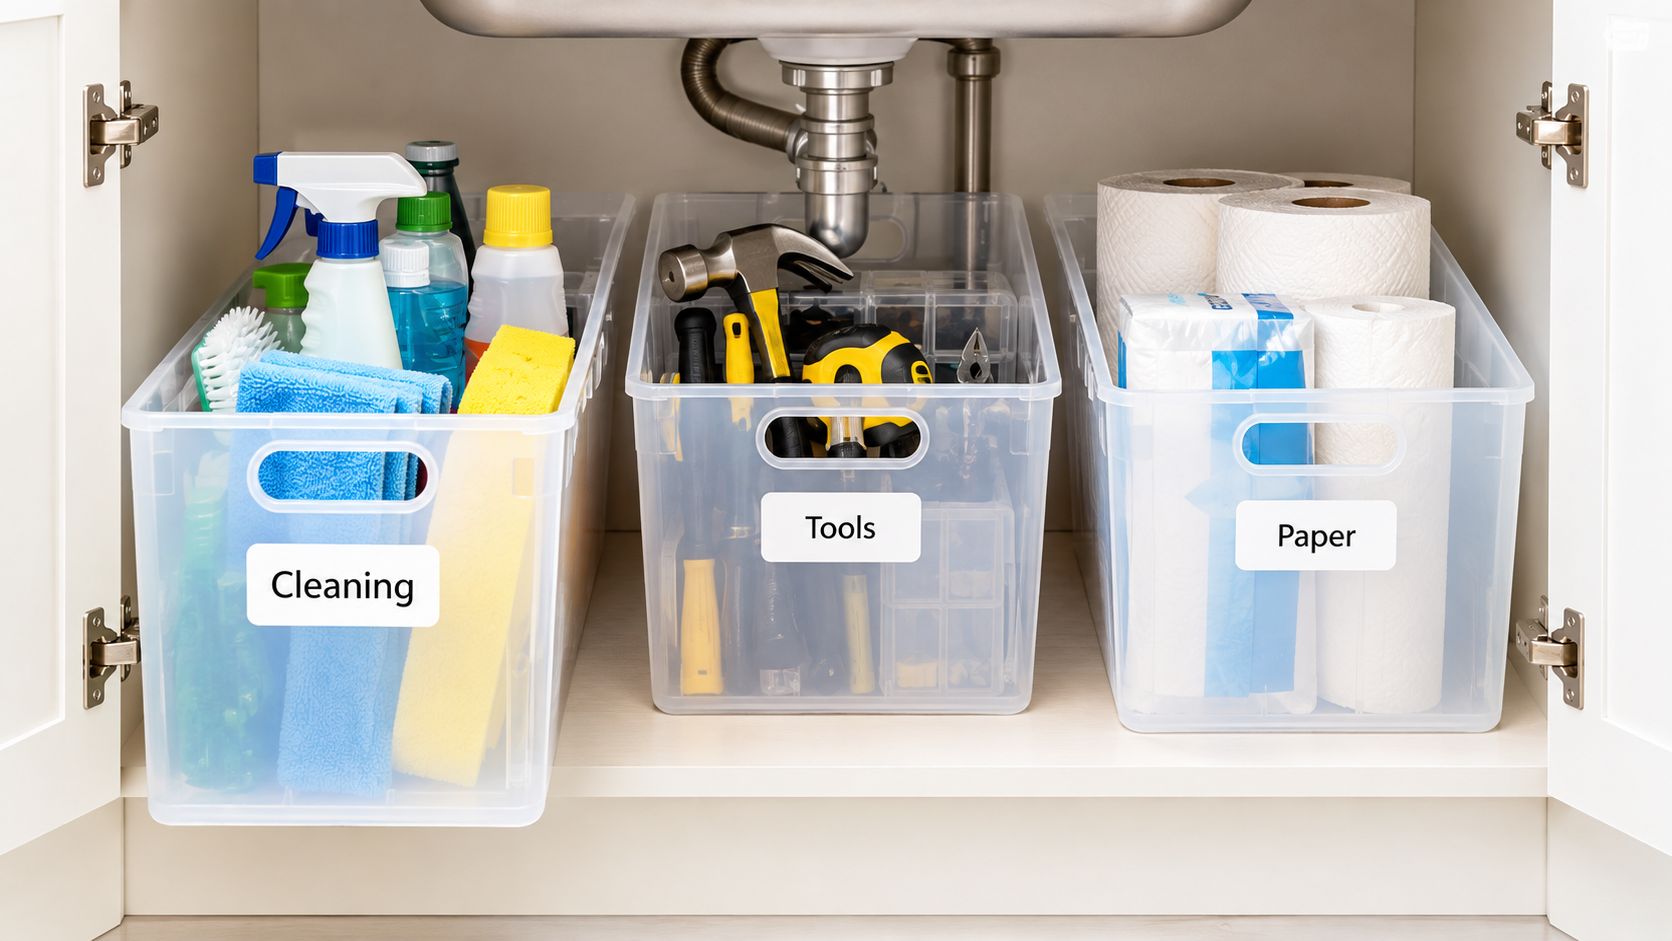
Bins work best when several people use the same sink. Instead of expecting everyone to return individual bottles to precise positions, create portable categories. One caddy can hold dishwashing supplies, another can hold surface cleaners, and a third can contain spare cloths or basic plumbing items.
Clear or semi-opaque containers make inventory visible. Choose handles that you can grip with wet hands, and select a size that can be removed without colliding with the P-trap. A large bin may hold more, but it can become heavy, awkward, and difficult to inspect. Several smaller categories usually provide better access than one deep container.
Waterproof labels matter under a sink. Use plain names such as “dishwashing,” “surface cleaning,” “cloths,” and “plumbing,” then keep hazardous products separate from general supplies. A colour system can help in hospitality or shared spaces, but it should support the written label rather than replace it.
Put the product category on the container, not on the shelf. The caddy should remain useful when someone carries it to the sink or another room.
Place heavier items low and keep the cabinet base protected with a washable liner. Avoid packing containers tightly against the cabinet walls, since trapped drips and poor air movement can leave moisture unnoticed. You don't need to fill every inch. Empty space makes removal easier and gives you room to inspect the plumbing.
A rental property can standardize the same caddy categories in every unit, making turnovers faster and reducing confusion for tenants. A small office kitchen can use labelled bins for shared supplies, while a family can assign one bin to children's cleaning products and another to adult-only products. The system also supports restocking because you can lift one caddy out and see what needs replacing.
Use the pantry storage containers guide when you want to apply the same category-first approach to dry storage. Under the sink, don't decant products into unmarked bottles, and don't store incompatible chemicals together. Labels and separation are more important than a perfectly matched set of containers.
4. Magnetic Strips and Wall-Mounted Command Systems
The best place for a frequently used tool may not be under the sink at all. A magnetic strip, adhesive hook, or command-style organiser can use the wall beside the sink or the inside of a cabinet door. Moving small tools upward frees the cabinet floor for bottles and keeps daily items within reach.
Start with the surface. Clean it thoroughly with rubbing alcohol, allow it to dry, and follow the mounting system's instructions. Don't hang heavy items immediately. Give the adhesive time to bond, then test it with a light object before adding more weight.
Inside a cabinet door, use the system for lightweight tools such as measuring spoons, a small brush, gloves, or a cloth. On an exposed wall, stainless steel can coordinate with modern fixtures, but the strip must stay clear of splash paths. A wet wall weakens some adhesives and can stain the surrounding surface.
Install the organiser where you can reach it without leaning across the sink. Keep sharp tools away from children and avoid placing anything that could fall into the basin or onto a food-preparation surface. If you're organising a compact kitchen, give daily-use items the prime position and move occasional tools to a higher or less visible location.
- Renters: Choose removable adhesive systems and check the wall finish before installation.
- Small kitchens: Use vertical space for tools that otherwise occupy the counter.
- Office kitchens: Store shared accessories where everyone can see and return them.
- Tiny homes: Keep the cabinet interior for bulkier supplies and the wall for lightweight tools.
A magnetic strip is not a substitute for a moisture barrier or a cabinet organiser. It removes clutter from the sink zone, but it doesn't protect the cabinet base from leaks. Pair it with one storage system only if the remaining space stays easy to inspect.
For a related example of using magnetic storage to move tools off crowded surfaces, see this magnetic knife strip guide. Use the same installation discipline, but choose the mounting location according to splash exposure and the weight of the objects you plan to hang.
5. Adjustable Shelf Dividers and Partition Systems
Shelf dividers turn a single uncontrolled compartment into several defined zones without adding a new shelf. They're useful when you already have a usable cabinet surface but bottles slide together, cloths collapse, or plumbing tools drift into the cleaning-supply area.
Measure the shelf's usable width and depth, not the cabinet's outside dimensions. Check whether the divider expands securely, whether its feet sit flat, and whether it leaves enough room to lift products out. Under a sink, position dividers around the pipes rather than forcing a straight grid across them.
Create a front access zone for everyday supplies and a separate side zone for items that must remain reachable during maintenance. If the P-trap occupies the centre, use dividers to form two side compartments. If one side holds a filter or waste-disposal equipment, leave that area open instead of trying to fill it.
Match each compartment to one routine
A family kitchen might use one section for dish soap and brushes, one for cloths, and one for spare liners. A rental apartment needs fewer categories and more empty space, since different occupants won't share the same storage habits. An office kitchen should use visible labels and avoid storing personal products beside communal supplies.
Place heavy containers in stable sections and keep the centre of gravity low. Dividers can separate products, but they don't strengthen a weak shelf or prevent a bottle from leaking. Add a removable liner beneath the system, then inspect the base whenever you change categories.
Access beats symmetry: A divider that creates a neat row but blocks the shutoff valve is in the wrong position.
Expandable dividers also make sense when your needs change. You can widen a compartment for a refill pouch, create a narrower slot for brushes, or remove a partition when the household shifts to different products. Don't stack unstable objects above the divider, and don't use a partition to support loads beyond its design.
This approach suits renters because it can require no drilling. It also works in rental properties where managers want a repeatable layout without modifying cabinetry. For hospitality use, choose wipeable materials and a simple arrangement that staff can restore quickly after cleaning.
6. Drawer Liner-Based Zone Creation and Moisture Management
A liner is the foundation of a safe sink cabinet, not a decorative finishing touch. It creates a removable barrier between the cabinet base and everyday drips, while a light colour or grid pattern makes dark corners easier to inspect. It can also define zones without adding another bulky organiser.
Empty and dry the cabinet before fitting the liner. Measure the base around the pipes, then cut the material so it lies flat without folding against the walls. A loose liner can trap moisture and make bottles unstable. If the cabinet has a persistent leak, repair the source before relying on a liner.
Use visual zones to support habits. Keep dishwashing products on one side, cloths in a washable container, and backup supplies away from the plumbing access area. A patterned liner can mark the boundaries, but the storage still needs clear categories and enough room for removal.
- Surface protection: Choose a material that wipes clean and won't absorb routine spills.
- Visibility: Light colours make leaks, residue, and dropped items easier to spot.
- Stability: Secure the liner if it shifts when you remove a caddy or bottle.
- Replacement: Inspect it during regular cabinet cleaning and change it when it curls, stains, or no longer lies flat.
Moisture-absorbing sachets or containers can supplement a liner, but they shouldn't hide a plumbing problem. Keep them where children and pets can't reach them, and replace or recharge them according to the product instructions. Don't place absorbent material directly against a wet cabinet wall.
In a rental property, a neutral liner can create a consistent baseline across units and make turnover inspection simpler. In a coastal or humid home, pair the liner with ventilation and a leak check. In a dry, well-sealed cabinet, the liner may be all you need.
A liner-based system is especially useful when drilling isn't allowed or when the cabinet cannot accept a drawer frame. It takes little space, preserves full access, and provides a clean foundation for bins or dividers. It won't make an overfilled cabinet usable, so keep the storage layer deliberately shallow.
7. Hanging Organizer Bags and Over-the-Door Systems
The inside of the cabinet door is often the only completely unused vertical surface. A hanging organiser can turn it into a place for light, frequently used items without consuming shelf space. Clear pockets make the contents visible, while removable systems can suit renters and temporary living arrangements.
Before installing one, close the door slowly and watch for contact with the cabinet frame, hinges, shelves, and plumbing. The organiser must fit inside the door profile, and its pockets shouldn't press against bottles or pipework. A system that prevents the door from closing will create more frustration than storage.
Use upper pockets for lightweight cloths, gloves, sponges, or replacement brushes. Keep heavier products low and avoid putting leak-sensitive paper products in a damp cabinet. If you store backup items in the pockets, rotate them so older supplies don't remain forgotten behind the door.
Keep door storage light and deliberate
A family may use the door for daily dishwashing tools, while a rental apartment can reserve it for basic supplies that tenants recognise immediately. An office kitchen can store napkins or small utensils, provided the door stays away from wet plumbing and the pockets can be cleaned.
Wipe the pockets regularly. Cleaning residue, dust, and damp cloths can make fabric organisers unpleasant under the sink. Plastic pockets are easier to inspect, but they still need airflow and shouldn't be packed tightly.
The over-the-door pantry organiser guide shows the broader principle of using doors as storage surfaces. Under a sink, apply that principle with stricter limits. Don't hang a loaded shoe organiser or large bottle rack unless the hinges and door construction can support it.
This option is valuable when the cabinet floor is crowded but the door has clear internal space. It isn't appropriate when hinges are weak, the door is shallow, or the organiser blocks plumbing access whenever the cabinet opens.
8. Moisture Control and Ventilation Systems with Dehumidifiers
Storage won't protect an under-sink cabinet if moisture keeps entering it. Check the supply connections, drain fittings, filter housing, waste-disposal connections, and cabinet seams before adding absorbers or a small dehumidifier. A damp smell, swollen particleboard, peeling finish, or repeated condensation indicates that the cabinet needs diagnosis, not just another storage product.
Start with passive control. Place a moisture absorber on a stable lower surface where it can't tip into the plumbing or cleaning supplies. Choose a container that is easy to inspect and replace. If the cabinet has a rechargeable unit, keep its electrical components away from leaks and follow the manufacturer's safety instructions.
Ventilation can help when the cabinet design allows it. Small vent openings near the upper section may improve air movement, but don't drill into a cabinet until you know where plumbing and electrical components run. For a rental home, request approval before making any permanent change. Leaving the door slightly ajar for a short period can help dry the area, but it isn't a substitute for fixing a leak.
A moisture-control product should make a dry cabinet easier to maintain. It shouldn't be used to conceal an active leak.
Use a combined approach in a persistently damp space. Keep the base lined, place the absorber where you can see it, and leave a clear route around the plumbing for inspections. Check wooden cabinets closely because swelling and delamination can spread beyond the immediate wet spot.
This matters in California kitchens that use efficient fixtures, filtration equipment, leak sensors, or compact plumbing layouts. The storage plan has to preserve access to those components. California's water-efficiency history also shows why sink routines deserve practical attention. A 50L Home Coalition and USGBC California effort reported a 23% reduction in overall hot water use and a 44% reduction in hot water use from kitchen faucets compared with prior consumption, as described in the USGBC California project account. A clear sink zone supports efficient routines because people can reach the right tool without wasted movement.
Kitchen Sink Organization: 8-Option Comparison
| Option | 🔄 Implementation complexity | ⚡ Resources & efficiency | 📊 Expected outcomes | 💡 Ideal use cases | ⭐ Key advantages |
|---|---|---|---|---|---|
| Under-Sink Pull-Out Organizers and Drawer Systems | Moderate, mount rails or drop-in assembly | $100–300; needs cabinet width/clearance; water-resistant materials | High accessibility and visibility; reduces reach and hidden clutter | Renters/homeowners maximizing deep cabinets; short-term rentals | Full cabinet access, spill containment, non-permanent |
| Tiered Shelf Risers and Vertical Stacking Systems | Low, place or assemble stackable tiers | $15–60; lightweight; no power; material-dependent capacity | Increases vertical storage and visibility | Small kitchens, apartments, office break rooms | Affordable, quick install, customizable height |
| Labeled Bin and Caddy Systems with Categorization | Very low, group, label and place | $10–40 per caddy; scalable; portable; no power | Clear categorization; easier restocking and inventory control | Hospitality, rentals, offices, multi-user households | Portable, scalable, prevents dangerous mixing |
| Magnetic Strips and Wall-Mounted Command Systems | Low–Moderate, adhesive or screw installation; surface prep advised | $10–40; requires wall/door space; adhesive sensitivity to humidity | Declutters counters/under-sink; instant visibility of tools | Renters, tiny homes, small kitchens, property managers | Renter-friendly, inexpensive, improves workflow |
| Adjustable Shelf Dividers and Partition Systems | Low, expand/position without tools | $10–30; no power; fits a range of shelf widths | Creates discrete compartments; prevents shifting of items | Shared kitchens, under-sink zones, rental units | Adjustable, reconfigurable, inexpensive |
| Drawer Liner-Based Zone Creation and Moisture Management | Very low, cut-to-fit and place (adhesive optional) | $10–25; replace periodically; no power | Protects cabinet surfaces; visual zones; some moisture reduction | Rental/hospitality, humid climates, cabinet protection | Surface protection, easy to clean, low-cost |
| Hanging Organizer Bags and Over-the-Door Systems | Low, hang hooks or adhesive mounts; minimal setup | $15–35; uses door interior space; limited weight capacity | Maximizes door space; quick access to small items | Small apartments, RVs, under-sink supplies, offices | Space-efficient, visible pockets, renter-friendly |
| Moisture Control and Ventilation Systems with Dehumidifiers | Low–Moderate, place desiccants or small dehumidifier; may need power/vent work | $10–50; rechargeable models may need power; occupies some space | Reduces mold/mildew, protects contents and cabinetry | Humid/coastal climates, older homes, units with plumbing issues | Prevents damage, reduces odors, extends product life |
Choose the System That Fits Your Sink
Start with measurements, not shopping. Record the cabinet's interior width, depth, and height, then measure the door opening and mark the P-trap, supply lines, shutoff valves, waste-disposal equipment, filter housings, and leak sensors. The smallest obstruction often determines which organiser will work.
Next, separate storage from moisture control. A liner can protect the base from routine drips, but it won't repair a loose connection. An absorber can collect condensation, but it shouldn't mask a leak. Keep the cabinet dry enough to inspect, and reserve a clear path to every valve and fitting that may need service.
Choose one primary access system first. A deep cabinet usually benefits from a pull-out, provided the frame clears the plumbing and door. A cabinet with unused height may need a riser instead. Bins are the practical choice for families, shared homes, rental properties, and hospitality settings because users can lift out a complete category rather than maintain a precise arrangement.
Use secondary storage only when it doesn't compromise the primary system:
- Pull-outs: Choose them for deep cabinets where rear access is poor.
- Risers: Use them when vertical space is available and containers have different heights.
- Bins and caddies: Select them for shared routines, portable categories, and easy restocking.
- Adhesive systems: Use them for renters and lightweight tools on suitable surfaces.
- Liners: Add them whenever the cabinet base needs a removable protective layer.
- Moisture control: Prioritise it where dampness persists, odours develop, or plumbing needs closer monitoring.
Space pressure makes this decision especially important in California. The state averaged 2.8 people per household, compared with 2.5 nationally, and offered 6.5 square feet of self-storage per capita, while 78% of California cities fell below the seven-square-foot benchmark described in the California self-storage market report. Those figures don't tell you which organiser to buy, but they do reinforce the practical value of making small utility zones work harder.
Visibility matters in Canada too. IKEA Canada's 2026 Store & Organize Report says Canadians spend an average of 28 minutes per day looking for misplaced items, with 30% identifying the kitchen countertop as the hardest area to keep clear and 21% saying they've bought duplicate items because they couldn't find the original, as reported in IKEA Canada's consumer research coverage. That supports shallow, visible categories over deep bins that hide supplies.
The Canadian under-sink organiser market also shows why durability and fit deserve attention. A Canada market analysis estimates the airtight under-sink organiser segment at CAD 140–170 million in 2026, with annual unit volume of roughly 5.5–7.0 million, while kitchen sink applications account for 60–65% of units. The same report describes a 3–5 year replacement cycle for basic wire racks and 5–8 years for premium modular systems. Treat those figures as market context, not a reason to overbuy. A reliable system still has to fit your cabinet and remain easy to clean.
For California homes with low-flow faucets, efficient dishwashers, filters, or leak sensors, preserve maintenance access instead of filling the cabinet. For renters and ADU households, favour removable caddies, liners, dividers, and adhesive systems that can move with you. Current California kitchen coverage highlights concealed storage and efficient fixtures, but the California kitchen design trends overview also points to the practical need to think about the utility zone behind that clean appearance.
GrifGlo can help you compare organisation essentials by fit, sizing, and intended use rather than by appearance alone. Before buying, remove expired supplies, empty the cabinet, test the usable dimensions with cardboard or painter's tape, and install the simplest system that keeps daily items visible while leaving the plumbing accessible.
GrifGlo offers curated kitchen and home organisation essentials, along with practical guides and sizing-focused comparisons for under-sink spaces. Visit GrifGlo to compare fit-for-purpose options for your kitchen, rental property, office, or hospitality routine.


Leave a comment
This site is protected by hCaptcha and the hCaptcha Privacy Policy and Terms of Service apply.