

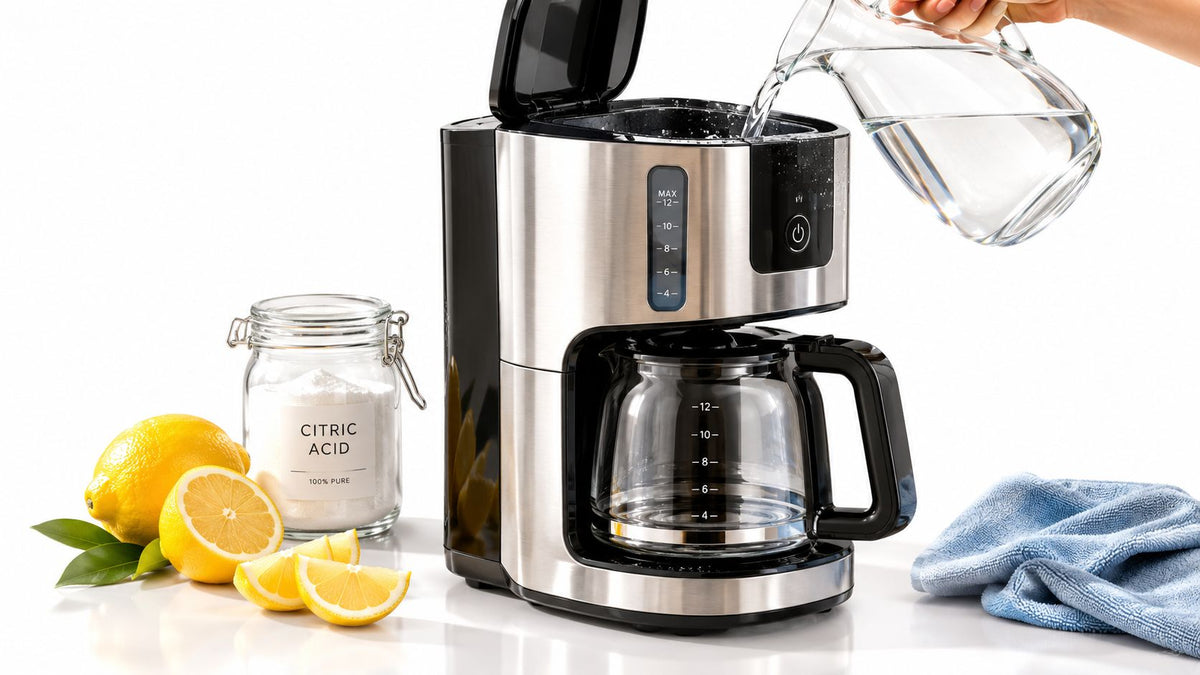
You know the cup. The one that tastes oddly flat even though the beans are fresh, or worse, sour at the front and bitter at the finish. Then the machine starts taking longer, spitting instead of flowing, or leaving a stale smell in the lid and basket. Blame the coffee first. The brewer is often the problem.
Cleaning a coffee maker has two separate jobs. One is removing old oils, grounds, and residue from the parts you touch every day. The other is descaling, which clears the mineral buildup you can't see inside the reservoir, tubing, boiler, or heating path. If you want a cleaner-tasting brew in the morning, both matter. If you're still dialing in your cup, a solid brewing routine helps too, especially if you're also refining how to brew coffee.
Table of Contents
- Why Your Coffee Tastes Off and When Cleaning Is Due
- What to Use and What to Avoid for Safe Descaling
- How to Clean Every Common Coffee Maker Type
- How Often to Clean Based on Water Hardness and Use
- Fixing Common Coffee Maker Problems After Cleaning
- Simple Habits That Keep Your Coffee Maker Fresh Longer
Why Your Coffee Tastes Off and When Cleaning Is Due
A dirty coffee maker usually shows itself in small ways before it becomes a full clog. The first sign is often flavour. Yesterday's oils stick to baskets, carafes, pod holders, and mesh filters. They don't just sit there harmlessly. They go stale, then every fresh brew picks up a bit of that old taste on the way through.
Mineral scale causes a different set of problems. In hard-water homes, calcium and magnesium collect on hot internal parts. That buildup narrows water flow, interferes with heating, and can leave a machine sounding rough or brewing unevenly. In rentals and shared kitchens, I see this constantly. The machine still technically works, but the coffee gets weaker, slower, and less consistent.
Daily grime versus deep scale
It helps to separate the mess into two categories:
- Surface residue: Grounds, coffee oils, splashes, and old paper-filter sediment in the basket, lid, carafe, pod chamber, or press filter.
- Internal scale: Chalky mineral deposits inside water paths, heating elements, boilers, and steam systems.
- Neglected extras: A forgotten filter cartridge, a blocked pod needle, or a steam wand crusted with dried milk.
Practical rule: If the machine smells stale, the removable parts need washing. If it's slowing down or sputtering, scale is usually involved.
Signs it's time to clean
You don't need to guess. Most machines tell you.
- Coffee tastes dull or harsh: Old oils are hanging on somewhere in the brew path.
- Brew time gets longer: Scale is restricting water movement or heat transfer.
- You see flakes or chalky residue: Internal mineral buildup is breaking loose.
- There's an odour when the lid opens: Moisture and residue have been sitting too long.
- Single-serve brewers spray or dribble: The puncture needle or pod holder may be partially blocked.
If you're searching for how to clean a coffee maker, this is why the answer can't be just “run vinegar through it.” Some machines need simple washing. Some need descaling. Many need both, in the right order.
What to Use and What to Avoid for Safe Descaling
The cleaner matters less than people think. The match between cleaner and machine matters more. The common mistake is assuming one solution works for every brewer, finish, seal, and water system. That's how people end up with a lingering smell, stripped rubber parts, or a machine that still tastes off after “cleaning.”
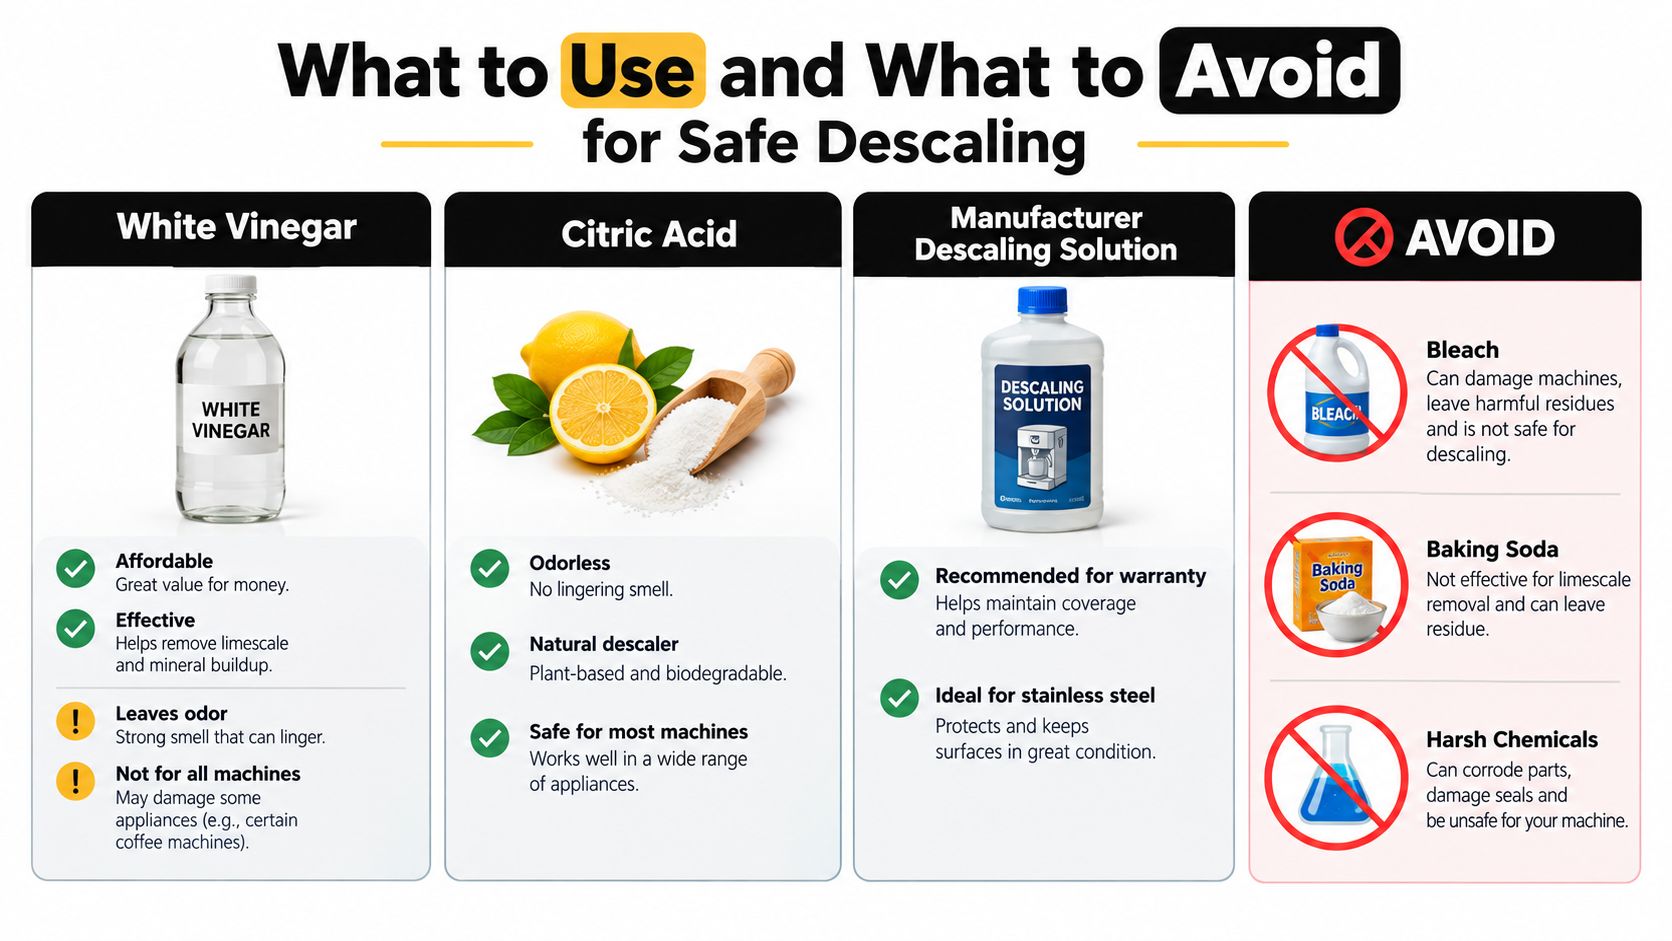
Vinegar, citric acid, or manufacturer descaler
Here's the practical version.
| Cleaner | Where it works well | Main trade-off | Best use case |
|---|---|---|---|
| White vinegar | Basic drip machines and simple brewers | Smell can cling, and some machines don't tolerate it well | Older or straightforward brewers without delicate internals |
| Citric acid | Many household coffee makers | Needs thorough dissolving and rinsing | People who want less odour and cleaner rinse-out |
| Manufacturer descaler | Espresso machines, newer pod brewers, premium machines | Costs more than pantry options | Machines with model-specific guidance, built-in filters, or finish concerns |
One of the biggest gaps in online advice is residue safety. Generic guides often default to vinegar, but that skips over machine type. Some manufacturer-focused guidance is much clearer: use the product your machine recommends when possible, consider citric acid as an alternative, and run 2–3 plain-water rinse cycles after descaling so you don't carry acid taste into the next brew, as reflected in this machine-care guidance and manual reference.
What I avoid
A lot of “hacks” create more work than they solve.
- Bleach: It has no place inside a coffee maker.
- Baking soda for descaling: It can be messy, hard to dissolve fully, and isn't my pick for internal mineral removal.
- Harsh scrubbers: They scratch non-stick warming plates, polished plastics, and specialty finishes.
- Random DIY mixes: Combining cleaners without knowing the material compatibility is where damage starts.
If you're already careful with specialty cookware, the same logic applies here. Gentle, surface-safe cleaning wins. It's the same reason people look up how to clean a non-stick frying pan instead of attacking it with abrasive powder.
The soak step is the part most people skip, and it's often the part that actually loosens what the machine can't flush on its own.
Basic kit that covers most machines
You don't need much:
- Soft cloths: For lids, splash zones, and exterior wipe-downs.
- A narrow brush: Useful for basket grooves, pod holders, and spouts.
- Dish soap and hot water: For removable parts only.
- Fresh cold water: For final flushing and everyday brewing.
If your manual warns against vinegar, listen to the manual. That's especially true for pod systems, machines with filter cartridges, and espresso units with more sensitive internal parts.
How to Clean Every Common Coffee Maker Type
Machine type changes the method. A French press doesn't need the same treatment as a pod brewer, and an espresso machine has failure points a drip brewer doesn't have.
Start with the broad rule first. Remove any used grounds, pods, or water that's been sitting. Wash the removable parts before you descale the internals. If you skip that order, you can descale a machine and still brew through stale residue.
Drip coffee makers
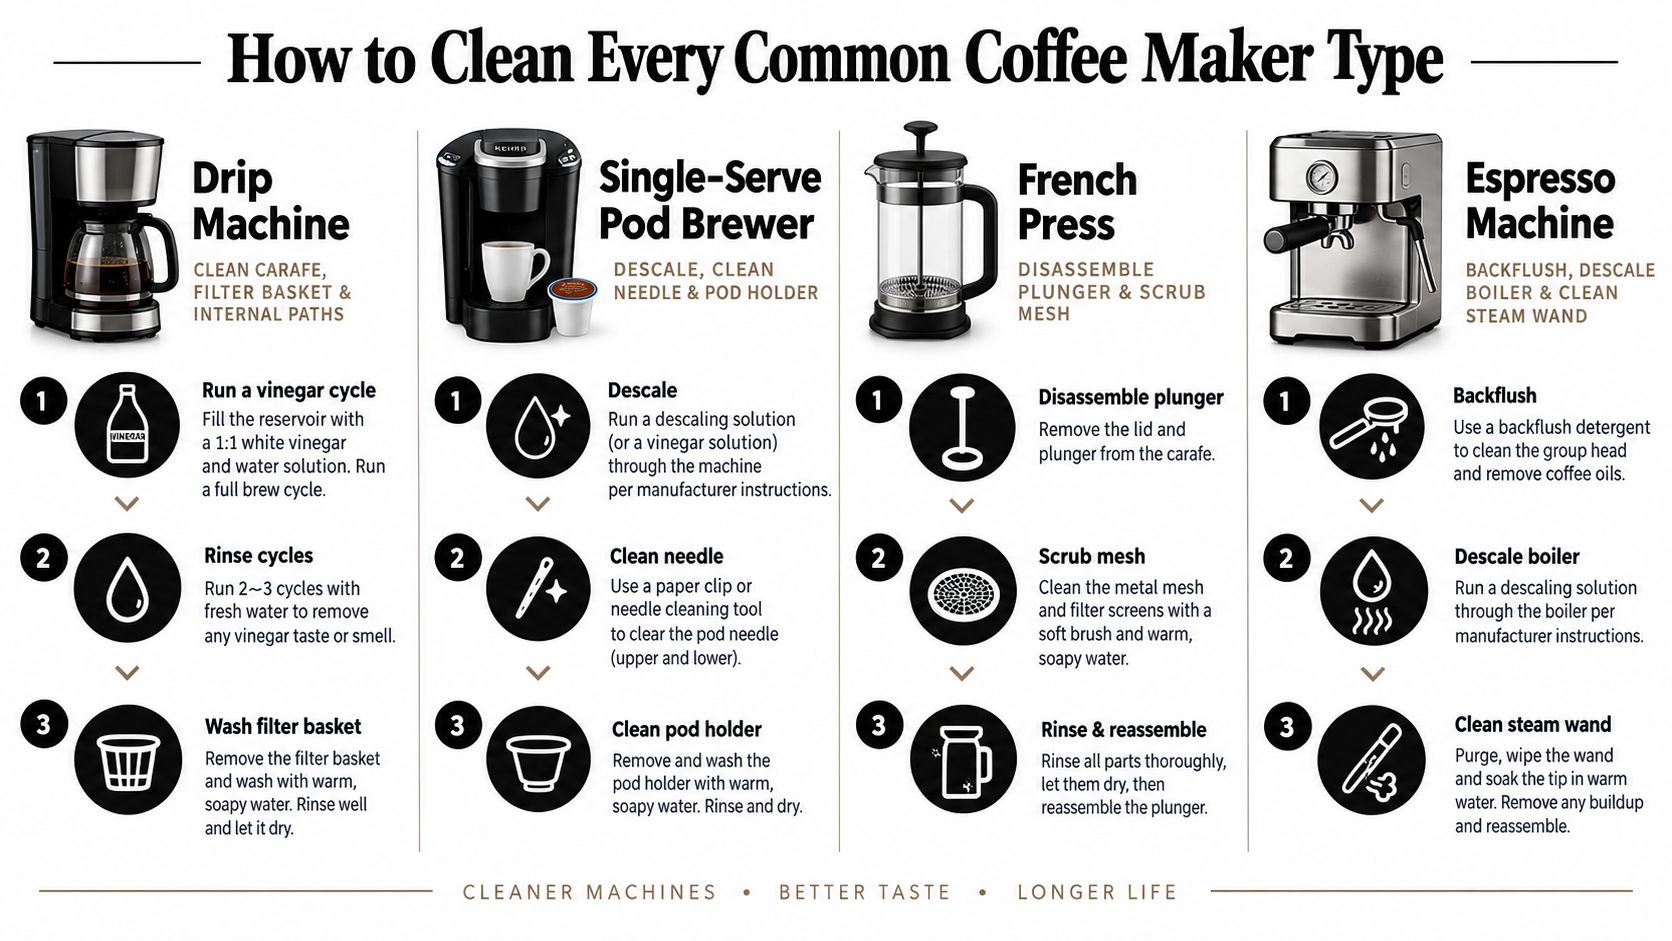
Drip machines are the most forgiving, but they still collect scale in the reservoir path and old oils in the basket, lid, and carafe. Canadian manufacturer guidance gives a practical workflow: dissolve a descaling tablet in lukewarm water, fill the tank, run a full cycle, then complete at least two plain-water rinse cycles before brewing again. KitchenAid Canada specifically recommends two full fresh-water brewing cycles and washing the brew basket and carafe with soap and hot water, which helps reduce leftover taste and chemical carryover, as described in this Bosch Canada descaling guidance.
After the internal cycle is done, wash the brew basket, lid, and carafe by hand. Dry them fully before reassembling. A damp machine put back together too quickly is how stale odours come back.
For coffee quality, the grinder matters too. If you're brewing fresh each day, a tool like the HAMILTON BEACH PROFESSIONAL 80405 Conical Burr Digital Coffee Grinder is designed to provide a precise, uniform grind, and its automatic operation and built-in scale can help keep brew prep consistent while you sort out whether the issue is the beans, grind, or the machine itself.
This visual gives a quick machine-by-machine reference before you start.
Single-serve pod brewers
Pod brewers hide residue in smaller spaces. The pod holder, puncture area, drip tray, and water line all need attention. If the machine spits, sprays, or gives you a partial cup, don't assume descaling alone will fix it. Often the needle or pod chamber has compacted coffee debris.
Remove the pod holder if your model allows it. Wash that part with soap and hot water, then wipe around the chamber with a soft cloth. If there's a removable water filter cartridge, take it out before descaling unless your manual says otherwise. Run the descaling cycle with the machine's recommended product or a compatible alternative, then rinse thoroughly.
Don't judge the machine after one rinse cycle. Residual taste is a flushing problem, not proof that the descaler “ruined” the brewer.
Espresso machines
Espresso machines need the most disciplined care because they have more heat, pressure, and parts in direct contact with coffee oils. The group head, portafilter, basket, steam wand, and water path all collect different kinds of residue.
Wipe and purge the steam wand right after use so milk doesn't dry inside. Rinse the portafilter and basket after each session. For descaling, follow the machine's own process and remove or bypass any water filter parts if the manual calls for it. If you need a deeper model-specific walkthrough, this guide on how to descale an espresso machine is the right companion.
Here's a practical demo if you'd rather watch the process than read it all at once.
French press and percolators
French press cleaning is mostly about oils and trapped fines, not internal scale. Disassemble the plunger assembly fully. That mesh stack holds onto old coffee far more than is often realised. Wash each piece with soap and hot water, scrub the screen gently, and let everything dry before rebuilding it.
Percolators sit somewhere in between. They have removable baskets and stems that need washing, plus internal metal surfaces that may need descaling if hard water leaves visible mineral film. Clean all removable pieces first, then descale only if the machine shows signs of mineral buildup.
How Often to Clean Based on Water Hardness and Use
If you use hard water, generic “every few months” advice isn't enough. Scale growth depends on how much calcium and magnesium your water carries, and those minerals don't care whether your machine is expensive or basic. They build up wherever water is heated.
The most useful benchmark comes from brewing-water guidance. The Specialty Coffee Association target for total hardness is 50–175 ppm as CaCO3, with calcium hardness around 50–68 ppm as CaCO3 for balanced extraction. A Canada-focused hardness comparison also points to municipal variation, with examples including Toronto at about 130 mg/L and Edmonton at about 197 mg/L, which helps explain why one household can stretch maintenance while another can't, according to this Roastopedia descaling overview.
What the numbers mean in real kitchens
In practical terms, the higher the hardness, the faster scale forms. That shifts your schedule from occasional descaling to routine descaling.
A useful city-specific example comes from California. In the Bay Area, tap water is often reported at about 120–180 ppm hardness, which sits firmly in the hard range. One regional guide says hard water in that band warrants descaling every 3–6 months, while very hard water above 180 ppm can require cleaning every 2–3 months. The same guide notes that an in-tank softener can stretch that interval to 6–9 months even in hard-water conditions, based on this Bay Area descaling guide.
Descaling frequency by water hardness
| Water Hardness Level | Hardness Range | Suggested Descaling Interval | Example Location |
|---|---|---|---|
| Balanced to moderately hard | 50–175 ppm as CaCO3 | Use your machine's normal descaling rhythm and watch for taste or flow changes | SCA brewing-water target range |
| Hard | 120–180 ppm | Every 3–6 months | Bay Area homes such as Berkeley and Oakland |
| Very hard | Above 180 ppm | Every 2–3 months | Hard-water households beyond the Bay Area guide's upper threshold |
| Hard municipal supply | About 130 mg/L | Often more frequent than generic advice. Some Canada-focused guidance suggests very frequent descaling in practice | Toronto |
| Very hard municipal supply | About 197 mg/L | Expect shorter intervals and closer monitoring | Edmonton |
A simpler rule for households
Recent Canada-relevant material shows why people get confused. A Toronto hardness page reports 130 mg/L and suggests citric-acid descaling as often as every 3 weeks, while other Canadian service advice still says only every 2–3 months or as needed. That gap is exactly why many households need a simpler schedule based on actual water conditions, as discussed on this Toronto water hardness page.
- If your water is clearly hard: Think monthly to every few months, depending on the machine and how heavily you use it.
- If you use an in-tank softener or better filtration: You may be able to stretch the interval.
- If you don't know your hardness: Go by symptoms early, then tighten the schedule once you see how fast scale returns.
If water quality is the root issue, a separate filtration plan often helps more than changing cleaners. That's where comparing water filter options for home use can make the maintenance schedule easier to manage.
Fixing Common Coffee Maker Problems After Cleaning
A lot of people assume that if the machine still tastes bad after cleaning, the cleaner failed. Usually, the cleaning worked. The rinse-out didn't.
Lingering taste and odour
If you still smell vinegar or get a sharp, chemical cup, run more plain-water cycles. Two is the minimum I trust after descaling many machines. Some brewers need an extra pass, especially if the water path is narrow or the reservoir has corners that trap solution.
Wash the brew basket, carafe, and lid again with soap and hot water if they were exposed to the descaling mix. Residual taste often clings there first.
Slow brewing or partial cups
If flow is still slow, don't jump straight to another full descale. Check the simple choke points first:
- Pod needle or puncture point: Clear old grounds carefully.
- Basket outlet or valve: Rinse away sediment lodged underneath.
- Water filter cartridge: Replace or remove it if it's old and restricting flow.
- Steam wand tip on espresso machines: Make sure dried milk isn't narrowing the opening.
A sputtering machine after descaling often means loosened debris has moved downstream. Flush first, then inspect the small parts.
Bitter, weak, or uneven coffee after cleaning
When the machine is clean but the cup is still wrong, the issue may no longer be the machine. Grind size, stale beans, or a dirty grinder can mimic a brewer problem. A grinder packed with old fines will taint fresh coffee fast, even if the coffee maker itself is spotless.
If you've ruled out the brewer, the next maintenance target is your grinder. A quick read on burr coffee grinders helps if you're troubleshooting flavour consistency from the other side of the brew setup.
Simple Habits That Keep Your Coffee Maker Fresh Longer
The easiest coffee maker to clean is the one that never gets heavily neglected. Daily care doesn't need to be elaborate. Empty old water if it's been sitting, toss used grounds right away, and rinse the parts that touched coffee before oils dry onto them.
Weekly, wash removable parts with soap and hot water and leave them to dry fully before reassembly. Keep lids open when possible so trapped moisture doesn't sit in the machine. In shared kitchens, this one habit cuts down on that stale, closed-up smell more than people expect.
For longer-term maintenance, tie descaling to your water, not to a vague calendar reminder. Hard water shortens the interval. Softer or treated water can buy you more time. The machine lasts longer when light cleaning happens often and heavy cleaning happens before the symptoms become obvious.
If you manage more than one unit, standardise the routine. Fresh water in, old grounds out, removable parts washed regularly, descaling done on a hardness-based schedule, and filters checked before they become the next blockage.
GrifGlo helps people sort through practical home and kitchen decisions without turning a simple purchase into a research project. If you're cleaning up your coffee setup, comparing brewers, grinders, filters, or everyday kitchen essentials, visit GrifGlo for decision-friendly guides and curated options that fit real routines.


Laisser un commentaire
Ce site est protégé par hCaptcha, et la Politique de confidentialité et les Conditions de service de hCaptcha s’appliquent.