

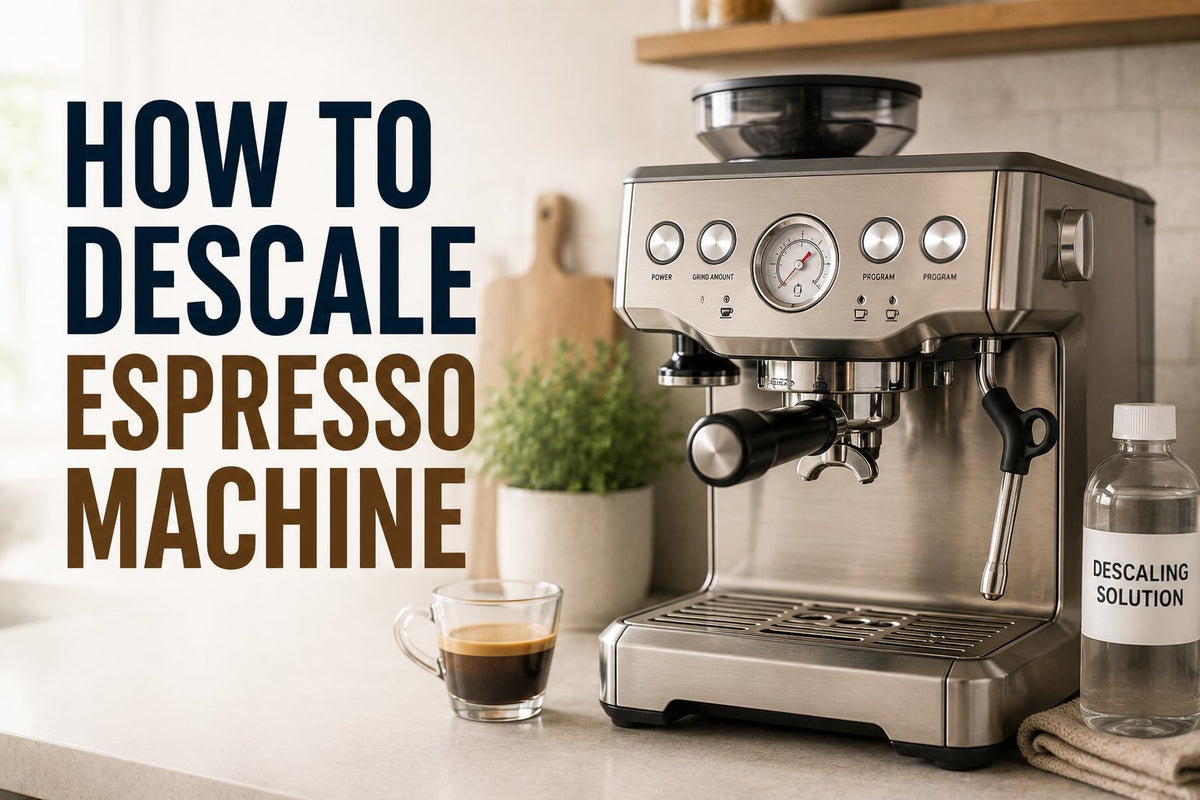
You fill the reservoir, lock in the portafilter, and expect the usual clean stream. Instead, the pump sounds strained, the shot crawls, or the descale light starts blinking before breakfast. That doesn't automatically mean the machine is failing. In many homes, the more likely cause is mineral scale, and the correct answer depends less on the calendar than on the hardness of your water.
The practical method is simple: test the water, choose a descaler compatible with the boiler and water path, run the machine's approved cycle, and rinse until every chemical trace is gone. The details change between a manual machine, an E61 semi-automatic, a super-automatic, a pod machine, and a steam-wand model, so follow the path that matches your equipment.
Table of Contents
- Why Espresso Machines Need Descaling in the First Place
- Testing Your Water Hardness Before You Descale
- Choosing a Safe Descaler and the Right Dose
- The Universal Descaling Workflow You Will Reuse
- Adapting the Routine to Your Machine Type
- Troubleshooting Common Descaling Problems
- Building a Maintenance Schedule That Sticks
Why Espresso Machines Need Descaling in the First Place
Descaling is a water-quality task, not a substitute for ordinary coffee cleaning. Tap water carries dissolved minerals, especially calcium and magnesium compounds. Once that water is heated repeatedly, some minerals precipitate and form hard deposits on boiler walls, heating elements, valves, narrow tubes, and group components.
Those deposits create several problems at once. A coating on a heating element reduces heat transfer, while scale inside a small passage restricts flow. Deposits can also interfere with solenoid valves and temperature control, which is why a machine may produce inconsistent shots even when the grinder, dose, and tamp haven't changed.

Scale and coffee residue are different problems
A sticky group head, oily basket, or dirty shower screen needs cleaning with water and an espresso-machine detergent. Backflushing removes coffee oils and grounds from the brew circuit, but it doesn't dissolve mineral deposits inside the boiler or water lines. Descaling uses an acid formulated for that mineral buildup.
Watch for clues rather than waiting for a complete blockage:
- Slower flow: Water takes longer to leave the group or hot-water outlet.
- Temperature inconsistency: Shots taste different despite the same coffee settings.
- Unexpected noise: The pump works against a restricted path.
- Taste changes: Shots become flat, sour, bitter, or chemically tainted after an incomplete rinse.
- Early descale alerts: A sensor or programmed volume reminder may indicate that service is due, although it can't replace a hardness test.
For a useful foundation on brewing variables, the espresso brewing guide can help separate water-related faults from grind, dose, and extraction problems.
The severity of scale depends on the minerals entering the machine. Bay Area tap water is commonly reported around 120 to 180 ppm hardness in Berkeley, Oakland, and much of the East Bay, which is considered hard and can require descaling every 3 to 6 months without softening, according to this California espresso descaling guide. A softener can extend that interval to 6 to 9 months, while water above 180 ppm may shorten it to 2 to 3 months.
That's why the five machine paths below begin with water testing. A manual boiler and a super-automatic don't share the same service procedure, but both respond to the same mineral load.
Testing Your Water Hardness Before You Descale
If your espresso machine draws hard tap water every day, a calendar-based descale can come too late or waste a service cycle. Test the water first, then set the interval from the measured total hardness, usually reported in ppm or mg/L. Household tests generally treat those units as equivalent. Some kits report German degrees, such as gpg or °dH, so use the kit's conversion chart instead of estimating.
An SCA-aligned espresso target is roughly 50 to 175 ppm total hardness. Staying toward the lower end usually reduces scale while retaining some mineral content. Total hardness does not cover every water risk. A California-focused summary also discusses 75 to 250 ppm TDS, 40 to 75 ppm alkalinity, and pH 6.5 to 7.5. See this espresso water hardness reference for the relevant ranges.
Three ways to measure hardness
A municipal water report is a useful first check and costs nothing, but its figure may describe the supply zone rather than the water reaching your tap. Test strips suit routine home checks. Titration-drop kits provide finer readings when you are managing a costly prosumer machine or comparing filters.
Use cold water from the same tap that fills the espresso reservoir. Record the reading and date, then consult this Ring Hot Water water tester guide if you need help selecting or using a test method.
| Measured Hardness (ppm) | Water Profile | Recommended Descale Interval |
|---|---|---|
| Under 60 | Soft | About every 9 to 12 months |
| 60 to 120 | Moderate | About every 6 months |
| 120 to 200 | Hard | About every 3 months |
| Over 200 | Very hard | About every 6 to 8 weeks, or install a filter |
Treat those intervals as starting points. Canadian guidance places a practical espresso target around 50 ppm, or 1 to 3 gpg. At or below that level, annual descaling may be possible, while harder water can require service every couple of months, as explained in this Canadian water-quality guide for espresso machines. If the machine still needs frequent descaling, correcting the incoming water is usually more effective than repeatedly adding acid.
Very low hardness also needs caution. Water below 30 ppm can contribute to corrosion and flavour problems. Do not pursue zero minerals with distilled or aggressively demineralised water unless the manufacturer directs you to. For filter selection and replacement considerations, review this espresso machine water filter guide.
The BLACK+DECKER BDC120VA 20V MAX* POWERCONNECT Cordless Drill with 100-Piece Kit is listed with 20V MAX cordless drill power, 24-position clutch control, a 100-piece accessory kit, and a comfort grip. It is not a descaling tool, but those catalogue details may help when organising general home maintenance equipment.
Choosing a Safe Descaler and the Right Dose
The safest descaler is the one your machine manufacturer approves for the materials in its boiler, thermoblock, valves, seals, and internal coatings. Acid strength matters, but compatibility matters more. A product that clears scale quickly can still damage aluminium, plating, seals, or sensors if it's wrong for the machine.
Compare the common options
| Descaler Type | Dose per Liter | Boiler Safety | Notes |
|---|---|---|---|
| Citric acid | 25 to 30 g per litre of warm water | Generally gentle and food-safe | Suitable for compatible stainless systems, but confirm the manual first |
| Lactic acid blend | 15 to 20 ml per litre | A practical middle ground for compatible aluminium and stainless systems | Often easier to use as a liquid |
| Commercial sulfamic-acid product, such as Dezcal or Durgol | 30 to 50 g per litre | Not suitable for aluminium boilers or anodised surfaces | Fast acting, so material compatibility is essential |
| Proprietary pod or capsule cartridge | Factory-dosed | Designed for the specified machine | Use the branded cartridge or sachet when the service programme requires it |
The dose column is a starting reference from the brief, not permission to override the bottle or manual. If the manufacturer specifies a proprietary sachet, use that ratio even if a generic powder appears cheaper. Canadian OEM guidance notes that recurring descale prompts can indicate water that's too hard, making a filter or the machine's built-in programme more appropriate than repeatedly adding acid. That distinction is covered in this Canadian coffee-machine support guidance.
What I won't use in a service routine
Vinegar is a common shortcut, but it can leave a persistent smell and may degrade gaskets and seals. Household products containing hydrochloric acid are inappropriate for nickel-plated brass E61 components, and a descaler with strong surfactants can leave residue that affects the next drinks.
Material rule: Never select an acid by cleaning power alone. Check the boiler metal, plated surfaces, seals, and the manufacturer's warranty instructions first.
For a stainless manual machine, a compatible citric or lactic product can be reasonable. An E61 or prosumer unit deserves the manufacturer-approved product, especially where nickel plating, brass galleries, or a complex heat-exchanger path is involved. Super-automatic and pod machines are usually safest with their branded sachets, cartridges, or programmed solutions.
Before mixing anything, verify that the label identifies the product for coffee or food equipment, provides a clear dilution ratio, and lists any material restrictions. Look for food-equipment certification where available, but treat certification as one check, not a replacement for the machine manual. Never combine descalers, and don't store mixed solution in the reservoir after the cycle.
The Universal Descaling Workflow You Will Reuse
Use one controlled routine, then adapt the water path to the machine. The most expensive mistakes I see are rushed mixing, running a descaler through a filter, and stopping the rinse because the tank looks empty.
Begin by confirming that descaling is due. Check the measured hardness, the machine's alert, and the symptoms. If the problem is coffee oil, a dirty shower screen, or a blocked basket, descaling won't solve it.

Prepare before solution enters the machine
- Power down safely: Turn the machine off and let hot components cool as the manual requires.
- Clear the work area: Empty and wash the drip tray, grounds container, and any removable brew parts.
- Remove filtration: Take the water filter out of the tank unless the manufacturer explicitly says it can remain installed.
- Inspect the tank: Rinse away old water and check the intake valve, float, and seating surfaces.
- Measure accurately: Mix the specified amount of descaler with the specified water volume. Don't estimate from the bottle cap.
Test a small mixed sample before filling the tank, especially with a concentrated liquid. Use fresh filtered water unless the product or machine instructions require another type. You'll find related operating guidance in this espresso machine usage guide.
Install the tank, place a heatproof container under each outlet, and remove the coffee-filled portafilter. If the machine has an automatic descale programme, select it and follow every prompt. For a manual cycle, divide the solution into batches and pause between runs so the pump and heater aren't forced to work continuously.
Let the solution soak for the period specified by the product or manual. Don't extend the contact time because you assume more acid will produce a better result. Drain the solution completely, then rinse the tank until no powder or film remains.
Run fresh water through every route that received descaler. That includes the group, hot-water outlet, and steam circuit where applicable. Continue with complete fresh-water cycles until there's no chemical smell, foam, unusual odour, or altered taste.
The universal sequence is easier to remember when you treat it as five jobs: confirm, cool, clean, circulate, rinse.
Here's a visual walkthrough of the controlled preparation stage:
After rinsing, reinstall the water filter only if it's still serviceable, refit the brew components, and return the tray. Run a short blank shot, inspect for leaks, and confirm that water flow has returned to normal. If the machine still behaves strangely, stop repeating the chemical cycle and diagnose the actual fault.
Adapting the Routine to Your Machine Type
The machine's water path determines the safe procedure. A compact pod machine has little in common with a dual-boiler E61, and forcing one method across both is how owners damage parts or leave scale trapped in an unused circuit.
Manual machines
Manual lever and straightforward single-boiler machines usually have a simple route through the tank, heater, group, and sometimes steam outlet. Remove the filter, mix the approved solution, and circulate it through the group with an empty portafilter or open outlet. If the design uses a piston or closed valve, don't force solution through it or immerse parts that the manual identifies as non-washable.
Use short controlled runs followed by pauses. The aim is even contact with the internal path, not maximum pressure. Finish by flushing the group and any hot-water or steam circuit separately, then run clean water until the output is neutral.
Semi-automatic E61 machines
E61 groups need more care because the group gallery and lever-operated valve can hold scale and solution. Remove the shower screen for separate cleaning, but remove the group-head screw only when the manufacturer's instructions call for it. Keep the lever in the correct operating position during circulation so the relevant valve path remains open.
An E61 owner should never use a generic acid just because it dissolves scale quickly. Plated brass, seals, and heat-exchanger plumbing can react badly to an unsuitable product. For general water-system maintenance principles, this Praz Pure Water maintenance guide offers useful context, although your espresso-machine manual remains the controlling instruction.
Super-automatic machines
Empty the grounds container and drip tray before starting. Remove the brew group only if the manual permits it, and never put removable parts into an acid cycle unless the instructions specifically allow that treatment.
Use the built-in descale programme with the required branded sachet or cartridge. The machine may pause for soaking, pump solution through several outlets, and request fresh-water rinses. Complete every prompt, even if the reservoir appears clear before the programme finishes. Generic citric acid can be a poor substitute when the machine expects a calibrated cartridge or solution.
For a brand-specific operating reference, follow the procedures in this De'Longhi automatic espresso-machine guide.
Pod and capsule machines
Pod machines generally need a water-path flush rather than group disassembly. Remove the pod or capsule, empty the holder, rinse the tank, and run the dedicated descale programme if present. If there's no programme, follow the manual's procedure for circulating approved solution through the brew outlet.
Run a large blank brew into a suitable container, pause as instructed, and repeat with clean water. Don't leave a capsule installed during descaling, and don't assume the machine has flushed its internal path because the tank is empty.
Machines with steam wands
A steam wand can share the boiler or thermoblock, so it may need its own purge. Before descaling, purge the wand with cold water if the manual permits, then follow the approved boiler procedure. Some machines require the wand to be capped, immersed, or plugged during the cycle. Others require it to remain open.
Never guess. A wand left open can spray hot acidic solution, while a blocked wand can prevent the cycle from completing. After the final rinse, run a short fresh-water steam burst, wipe the wand, and check that the tip opens and closes normally.
| Machine type | Key setup | Descale method | Critical caution |
|---|---|---|---|
| Manual | Remove filter and removable brew parts | Controlled group circulation and separate outlet flushing | Don't force solution through a closed piston |
| Semi-automatic E61 | Clean screen and position lever correctly | Circulate through group, boiler path, and outlets as specified | Protect plated brass and seals |
| Super-automatic | Empty grounds container and follow display prompts | Use the programmed cycle and approved cartridge or sachet | Complete every rinse prompt |
| Pod or capsule | Remove pod and empty holder | Run approved solution through the water path | Don't leave a capsule installed |
| Steam-wand machine | Purge and configure wand as instructed | Descale boiler path, then rinse and purge wand | Never assume the wand can remain open |
Troubleshooting Common Descaling Problems
A machine can look worse immediately after descaling because the acid loosens material that was already sitting inside the water path. Diagnose the symptom before adding stronger solution or repeating the whole cycle.

The descale light stays on
First empty the drip tray and check the float. A full tray, missing float, or incorrectly seated tank can keep a sensor from resetting. Reseat the tank, reinstall removable parts, and run the required fresh-water rinse programme. On a super-automatic, an incomplete prompted cycle is a common reason the light remains active.
Don't repeatedly press the descale button without correcting the setup. If the light returns quickly after a complete service, test the water hardness and consider filtration rather than repeating acid treatment.
Flow becomes slower after servicing
Loose flakes may have moved into the shower screen, group-head passage, solenoid filter, or scale catcher. Remove and clean only the parts the manual allows you to remove, then inspect the outlet for debris.
Repair-shop habit: Never increase descaler concentration to compensate for restricted flow. Clear the restriction mechanically where permitted, because stronger solution can damage components without opening the blockage.
The first shots taste sour or chemical
A chemical smell, foam, or sharp taste means the rinse isn't finished. Empty the tank, wash it, refill with clean water, and flush every outlet again. Don't reinstall a disposable filter until the output tastes neutral, because the filter can retain or release residue.
Sour or bitter coffee can also follow a disturbed brew group, sensor, or portafilter. Recheck that each component is seated correctly, discard the first shot, and return to the previous grinder and temperature settings before making further adjustments.
The group head leaks
A leak under the group often follows shower-screen removal. Check the screen seal, retaining screw, and seating surfaces, then tighten only to the manufacturer's specification. A damaged gasket needs replacement, not extra force.
If the pump runs dry, loses prime, or the machine overheats, stop the cycle. Restore a safe water level, allow the machine to cool, and restart only with fresh solution if the manual permits it. Persistent leaks or erratic heater, pump, flow-sensor, or circuit-board behaviour calls for a technician.
Building a Maintenance Schedule That Sticks
A schedule works when it follows the water entering the machine. Descaling removes mineral deposits, while rinsing, backflushing, and grinder care address coffee oils, grounds, and milk residue. Keep those jobs in separate routines, then set the descale interval from your measured hardness rather than a fixed calendar reminder.
The four maintenance loops
- Daily loop: Rinse the portafilter, basket, and shower screen after use. Purge and wipe the steam wand immediately after steaming milk.
- Weekly loop: Backflush with plain water on compatible manual and semi-automatic machines. Empty the drip tray and check the steam-wand tip.
- Monthly loop: Backflush with an approved espresso-machine cleaner, inspect the water filter, and clean around the grinder burrs. Use this burr coffee grinder guide for the grinder portion of the routine.
- Quarterly loop: Recheck hardness, inspect the group gasket, and assess whether the water profile has reached the machine's descale point.
The quarterly check does not mean quarterly descaling for every owner. Water at or below 50 ppm may call for annual descaling, while harder water can shorten the interval to every couple of months. Bay Area water in the 120 to 180 ppm range belongs in the hard-water plan, not under a generic reminder.
A practical calendar
| Water profile | Descale planning |
|---|---|
| Around 50 ppm | Plan roughly annually, then revise after testing |
| Around 150 ppm | Plan several times through the year and monitor flow |
| 250 ppm or higher | Plan every 6 to 8 weeks or install suitable filtration |
Use these as planning anchors, not guarantees. Filtration can extend the interval, but treated water still needs testing. Record the hardness reading and descale date on the reservoir or a fridge note, and replace the filter according to its instructions.
A short checklist prevents busy weeks from wiping out the routine:
- Every day: Rinse brew parts and purge the wand.
- Every week: Water backflush, drip-tray emptying, and tip check.
- Every month: Detergent backflush, filter inspection, and grinder cleaning.
- Every quarter: Hardness review and gasket inspection.
- At the measured interval: Approved descale followed by a complete rinse.
This schedule suits a household or small hospitality team because it separates daily cleaning from mineral control while keeping both tied to the water supply.
GrifGlo curates practical kitchen, home, and maintenance essentials with guides that help compare fit, function, and everyday usability. Visit GrifGlo to organise tools and care products for a cleaner, more reliable coffee routine.


Leave a comment
This site is protected by hCaptcha and the hCaptcha Privacy Policy and Terms of Service apply.