

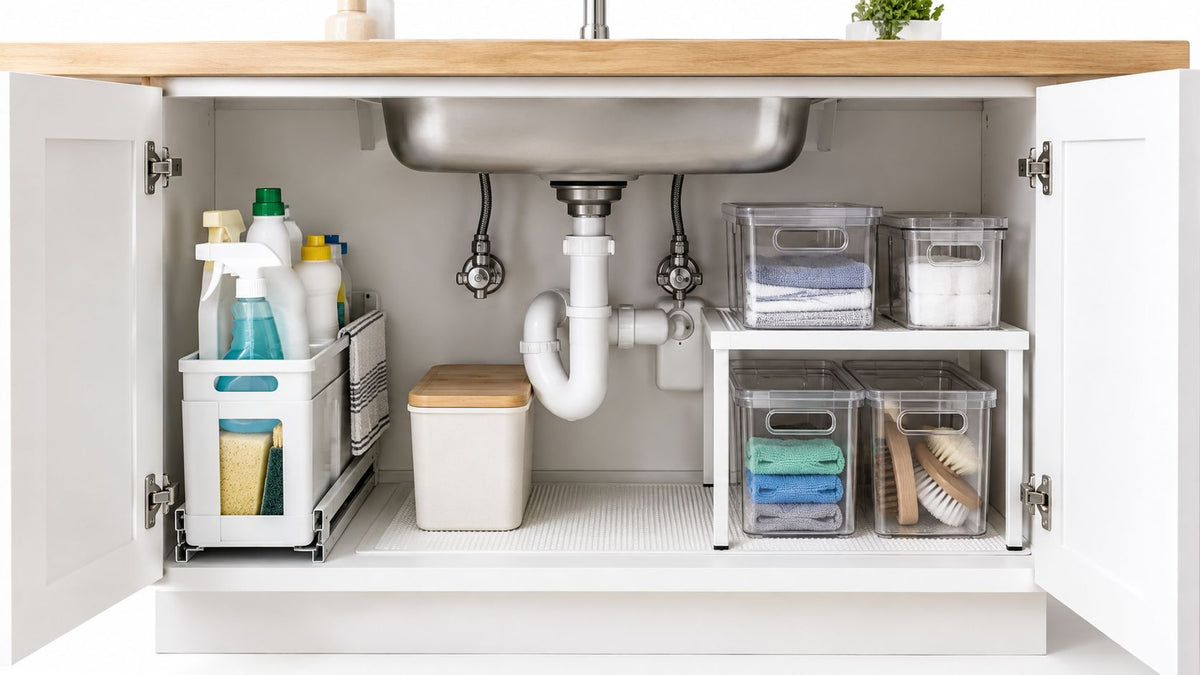
You open the cabinet under the sink and find the usual tangle: half-used cleaners, crumpled bags, sponges, and bottles wedged around the P-trap. The item you need is at the back, so you move three things, scrape your knuckles on a pipe, and still can't see the leak-prone bottle hiding underneath.
The fix isn't automatically a larger bin. Under sink storage containers work when they fit the cabinet's real shape, including plumbing, hinges, the door swing, shutoff valves, and the space needed for a quick inspection. A cabinet under a sink isn't an ordinary shelf with a pipe passing through it. It's an obstructed cavity, and the best layout leaves room for both storage and service.
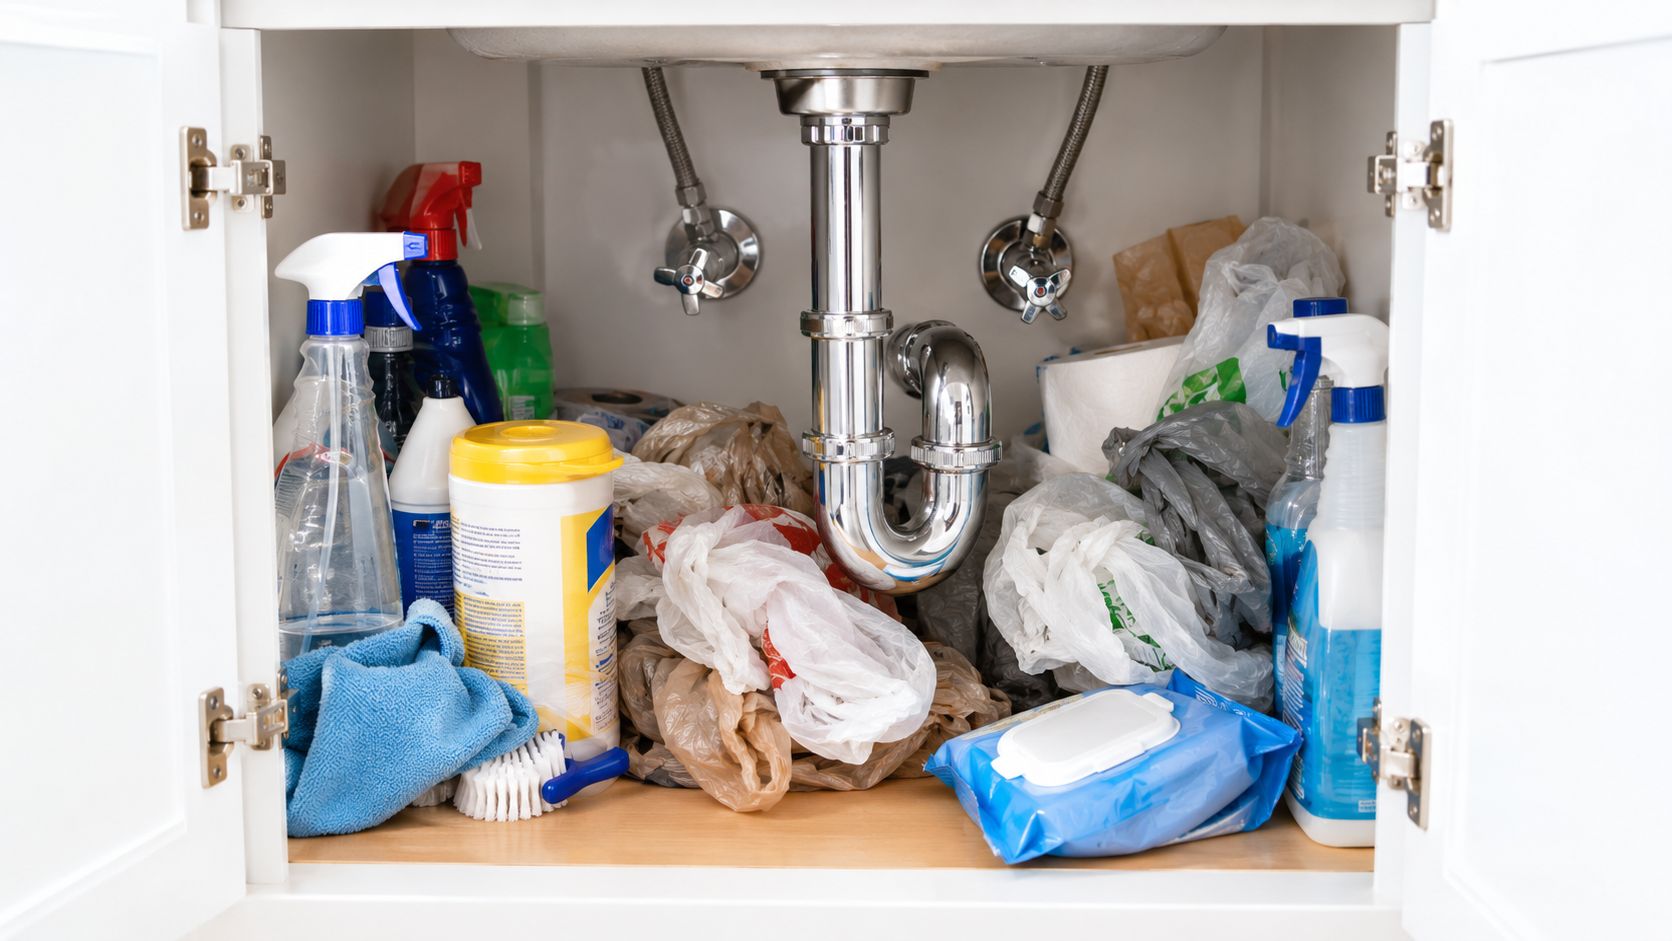
This matters across Canadian homes, rental properties, offices, and small businesses. Canada's category is structurally import-dependent, with over 80% of unit supply sourced from China and Vietnam, and annual unit volume is estimated at roughly 5.5 million to 7.0 million organizers in 2026, according to IndexBox's Canada under-sink organizer market analysis. Residential kitchens account for about 60% to 65% of units, while the category is projected to grow at a 4% to 6% CAGR through 2035. Those figures describe demand, not a guarantee that any particular container will fit your cabinet.
A fit-first system starts with the cavity, then chooses the container. You'll identify the storage zones around the plumbing, compare materials for damp conditions, measure the usable opening, and copy a layout that suits your cabinet. For broader cabinet principles, the guide to organising kitchen cabinets is a useful companion.
Table of Contents
- Introduction to Under Sink Storage That Works in Real Cabinets
- How Under Sink Storage Containers Create Order Around Plumbing
- Choosing Materials and Container Types for Damp Cabinets
- Measuring Your Cabinet and Checking Fit Before You Buy
- Layout Templates That Maximize Every Inch Without Blocking Pipes
- Keeping Under Sink Storage Safe Dry and Easy to Maintain
- Smart Buying Checklist and Recommendations for Every Home
Introduction to Under Sink Storage That Works in Real Cabinets
The cabinet under your sink often looks like a small storage room until you try to organise it. The floor may be interrupted by a drain trap, the rear wall may have supply lines, and the hinges can occupy more room than expected near the front corners. A tall bottle that fits the cabinet's interior height may still collide with the pipe or door before it reaches its intended position.
A typical mistake is to shop by container volume. A large rectangular bin sounds efficient, but it may cover the shutoff valves, trap moisture around a slow leak, or force shorter items into the least accessible corner. The useful measurement isn't the cabinet's total space. It's the space you can reach, use, and inspect without moving everything else.
Practical rule: Treat the plumbing as a permanent room divider, not an inconvenience you can ignore.
Start with what the cabinet needs to do. Kitchen users might need a front position for dish soap and a sponge, a dry area for dishwasher tablets, and a reachable place for rubbish or recycling. Bathroom users may prefer small open trays for toiletries and a raised liner beneath products that could spill. A rental host or office manager may need a repeatable arrangement that another person can reset easily.
The system becomes simpler when each item has a job:
- Daily-use items belong at the front or on a pull-out surface.
- Backup stock can occupy a rear zone if it remains visible.
- Leak-prone bottles need a raised, wipeable base rather than a sealed container by default.
- Plumbing access must remain clear enough for inspection and maintenance.
This approach also prevents the common cycle of buying a container, discovering it doesn't fit, and leaving it empty on a shelf elsewhere. You won't need the same solution in every cabinet. You need a measured combination of trays, bins, risers, or sliding hardware that respects the obstacles already there.
How Under Sink Storage Containers Create Order Around Plumbing
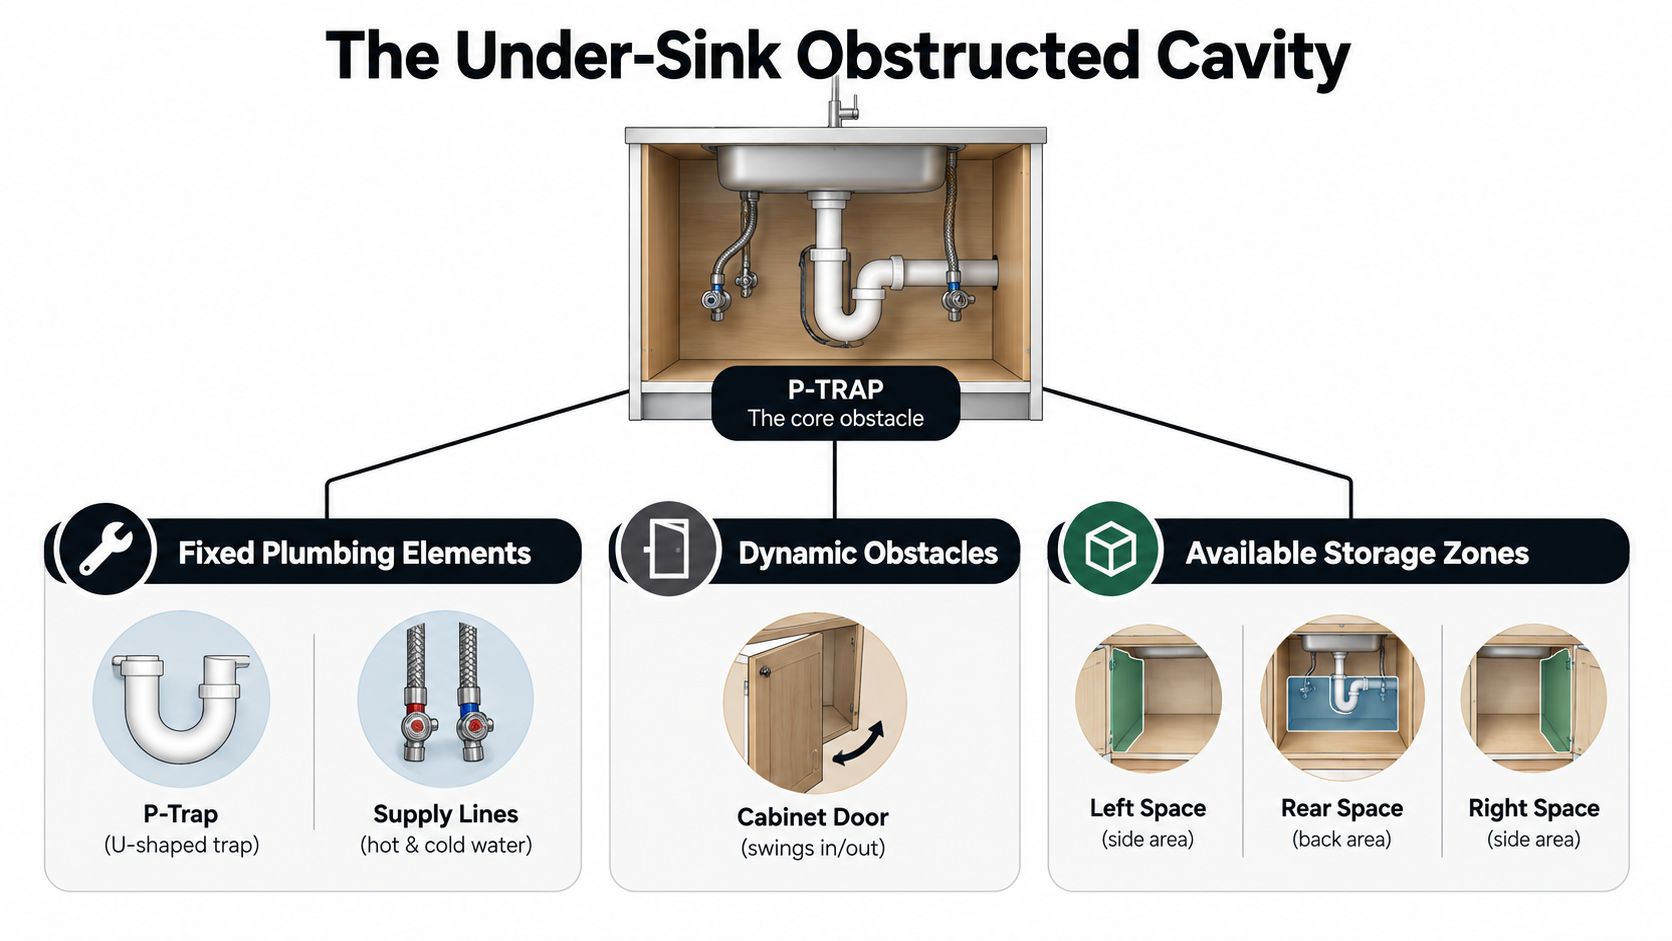
Think of the cabinet as a small parking lot with pillars. The P-trap and supply lines are the pillars, the door is a moving gate, and your containers are vehicles that need to park without blocking traffic. A container's total capacity matters less than its width, depth, height, and clearance path.
Start with the fixed and moving obstacles
The fixed obstacles are usually the drain trap, drain pipe, water supply lines, and the cabinet's centre support or face frame. The dynamic obstacles include hinges, the door swing, and anything attached to the inside of the door. A container that clears the plumbing when pushed straight in may still fail when you pull it forward and the door edge narrows the route.
Mark three kinds of zones before choosing products:
- A front access zone, where you can reach daily items without unloading the cabinet.
- A side zone, placed to the left or right of the trap for narrow containers.
- A rear or offset zone, reserved for backups only when you can retrieve them without disturbing plumbing.
Keep the trap and shutoff valves visually accessible. You don't need an empty cabinet, but you do need a clear service corridor around the components that might require attention.
Match the container family to the zone
Open trays are forgiving. They let you spot spills, lift out a group of products, and provide ventilation. They're suitable for bottles and cloths, but they don't contain a leak.
Lidded bins control visual clutter and keep dry items together. They make more sense for sealed spare sponges, bags, or backup stock than for products that may leak or evaporate residue.
Stackable drawers use vertical space while keeping small items visible. Their value depends on enough height above each drawer and a stable base. If the upper drawer blocks a pipe or prevents access to the lower one, the stack is working against you.
Expandable shelves can bridge a low, open area beside plumbing. A Canadian Tire under-sink expandable shelf lists an assembled depth of 11.77 inches and a maximum load of 5.0 kg, details shown on the Canadian Tire under-sink expandable shelf listing. Use published dimensions and load limits as selection data, not as a promise that the shelf suits every cabinet.
Sliding caddies and pull-out bins bring the rear forward, but their rails require a precise installation envelope. They also add hardware that can collect residue if spills aren't cleaned promptly.
Once you name the obstruction and the intended access pattern, product browsing becomes much less random. You're no longer asking, “Which bin looks useful?” You're asking, “Which container can park in this zone and still let me reach the tap?”
Choosing Materials and Container Types for Damp Cabinets
Moisture changes the buying decision. Below a sink, a container can encounter condensation, a loose bottle cap, cleaning residue, or a slow leak that nobody notices immediately. An enclosed container isn't automatically safer, because a lid can trap humidity and make a small spill harder to detect.
Plastic and polypropylene are usually practical for this environment because they're light, washable, and easy to reposition. Look for smooth surfaces and rounded corners that don't hold sticky residue. A rigid plastic tray with a raised edge can contain minor drips while keeping the contents visible, but it won't replace a waterproof cabinet liner or plumbing repair.
Metal brings rigidity and can support heavier items, though rust resistance and coating quality matter. A metal frame with a removable plastic tray is easier to clean than a fixed wire surface where bottle rings and grit remain below the products. Bamboo and other wood-based materials can look warm, but they need protection from standing water and should be used only where the cabinet stays dry.
Fabric containers are soft and light, yet they're a poor choice for leak-prone liquids. They absorb spills, take longer to dry, and can hold odours. Reserve them for dry cloths or sealed spare items, and keep them away from the lowest-risk area near pipes.
| Material Type | Moisture Handling | Weight and Durability | Best For |
|---|---|---|---|
| Plastic or polypropylene tray | Wipeable and generally resistant to routine splashes | Lightweight and easy to move | Daily cleaners, bottles, sponges, and renter-friendly layouts |
| Lidded plastic bin | Protects contents from dust, but can conceal or trap moisture | Light, with durability depending on construction | Dry backup stock and sealed supplies |
| Coated metal | Can handle a rigid load, but needs rust-resistant surfaces | Stable and durable, often heavier | Supported bottles or fixed frames in dry cabinets |
| Bamboo or wood | Vulnerable to standing water unless well protected | Rigid but less forgiving around leaks | Dry, decorative storage away from plumbing |
| Fabric | Absorbs water and residue | Very light, but difficult to sanitise after a spill | Dry cloths and sealed accessories |
Choose access before appearance
A stackable layout makes sense when you have vertical clearance and many small items. A sliding design is more useful when the rear of the cabinet holds supplies you reach for regularly. Open trays improve visibility, while lidded bins create cleaner grouping for items that don't need daily inspection.
For homes with children or pets, use stable, low containers and keep hazardous products out of easy reach. For cleaning chemicals, retain the original labels and avoid decanting products into unmarked containers. In a rental, favour freestanding trays and removable liners over drilled rails. The pantry storage container guide offers related principles for choosing washable, purpose-matched containers in other storage zones.
Measuring Your Cabinet and Checking Fit Before You Buy
Measure the cabinet as though you're preparing a small piece of furniture for a narrow doorway. The interior width is only the starting point. You also need the usable depth behind the door, the height below the lowest obstruction, and the location of every pipe projection.
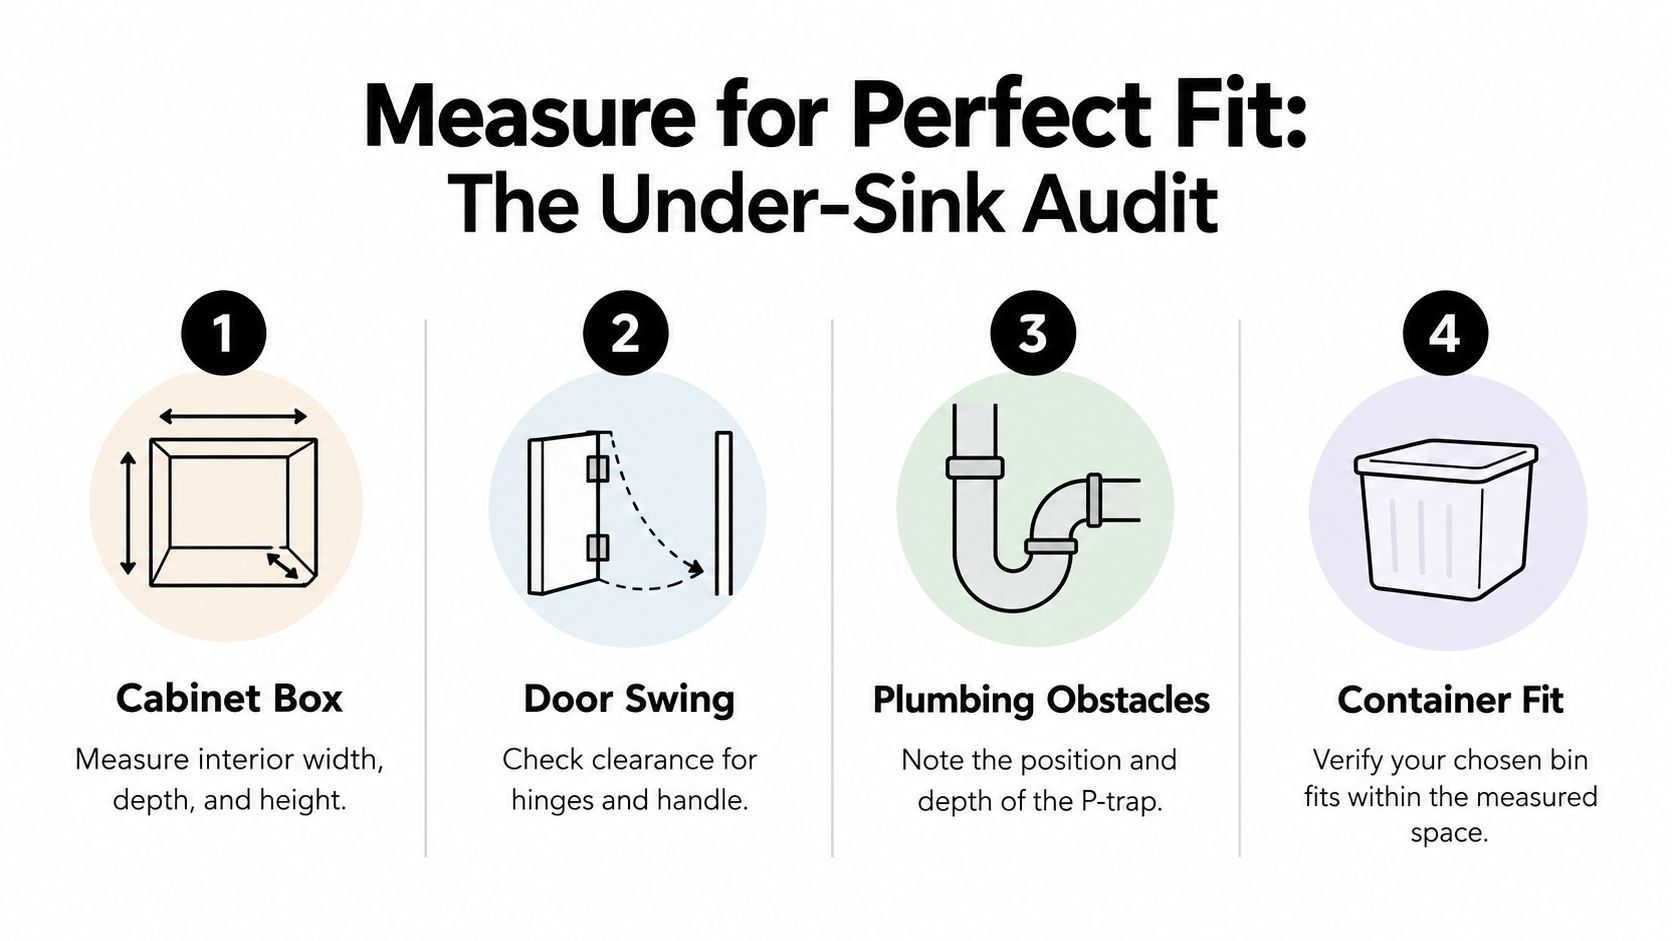
Use a four-part cabinet audit
- Measure the cabinet box. Record the clear interior width, depth, and height. Measure at the floor and again higher up if the cabinet narrows or has a face frame.
- Check the door swing. Open the door fully and note the space taken by hinges, handles, and any door-mounted rack. Measure the opening the container must pass through, not only the cabinet interior.
- Map the plumbing. Record the trap's left-to-right position, its projection from the back wall, and the height where it interrupts storage. Note supply lines and shutoff valves separately.
- Test the container path. Compare the product's external dimensions with your measurements, then check whether it can be inserted, pulled forward, and removed without striking a pipe or hinge.
Published installation dimensions matter more than product dimensions when a container uses slides or a frame. A Home Depot Canada listing for the Richelieu 2 × 25 L pull-out bin gives product dimensions of 11 inches W × 22 inches D × 19 3/4 inches H, installation dimensions of 11 3/4 inches W × 22 1/4 inches D × 20 inches H, and a 55 lb (25 kg) weight capacity, as shown in the Richelieu pull-out bin installation document. The extra space is part of the mechanism's requirement, not spare room for guesswork.
Write the measurements on masking tape and place it on the cabinet floor. This turns online shopping into a direct comparison rather than a memory test.
Measure the route, not just the destination.
Keep a fit-check record
- Clear width: ______
- Usable depth behind the door: ______
- Clear height beside the trap: ______
- Trap position and projection: ______
- Hinge and face-frame interference: ______
- Container outer width: ______
- Container outer depth: ______
- Container height: ______
- Required installation width and depth: ______
- Published weight limit: ______
If you need to identify how your hinges affect the opening, consult this overview of cabinet hinge types. For comparison, a separate kitchen storage item such as the Magnet Shelf Rack for Refrigerator - Kitchen Organizer is described as a refrigerator side-hanging rack with a stable tray, middle hook position, and bottom wooden rail. Its stated use is outside the under-sink cavity, so don't assume a product designed for a refrigerator side will suit a plumbing-obstructed cabinet.
Use a tape measure first, then make a cardboard rectangle to the container's footprint. Slide the template through the door opening and around the pipes. Cardboard reveals collisions that a product page's neat photograph won't.
Layout Templates That Maximize Every Inch Without Blocking Pipes
A good layout assigns each part of the cabinet a role. The front is for frequency, the rear is for reserve stock, and the area around the trap is a service corridor. These templates are starting points, not fixed product recipes. Adjust them to your measurements.
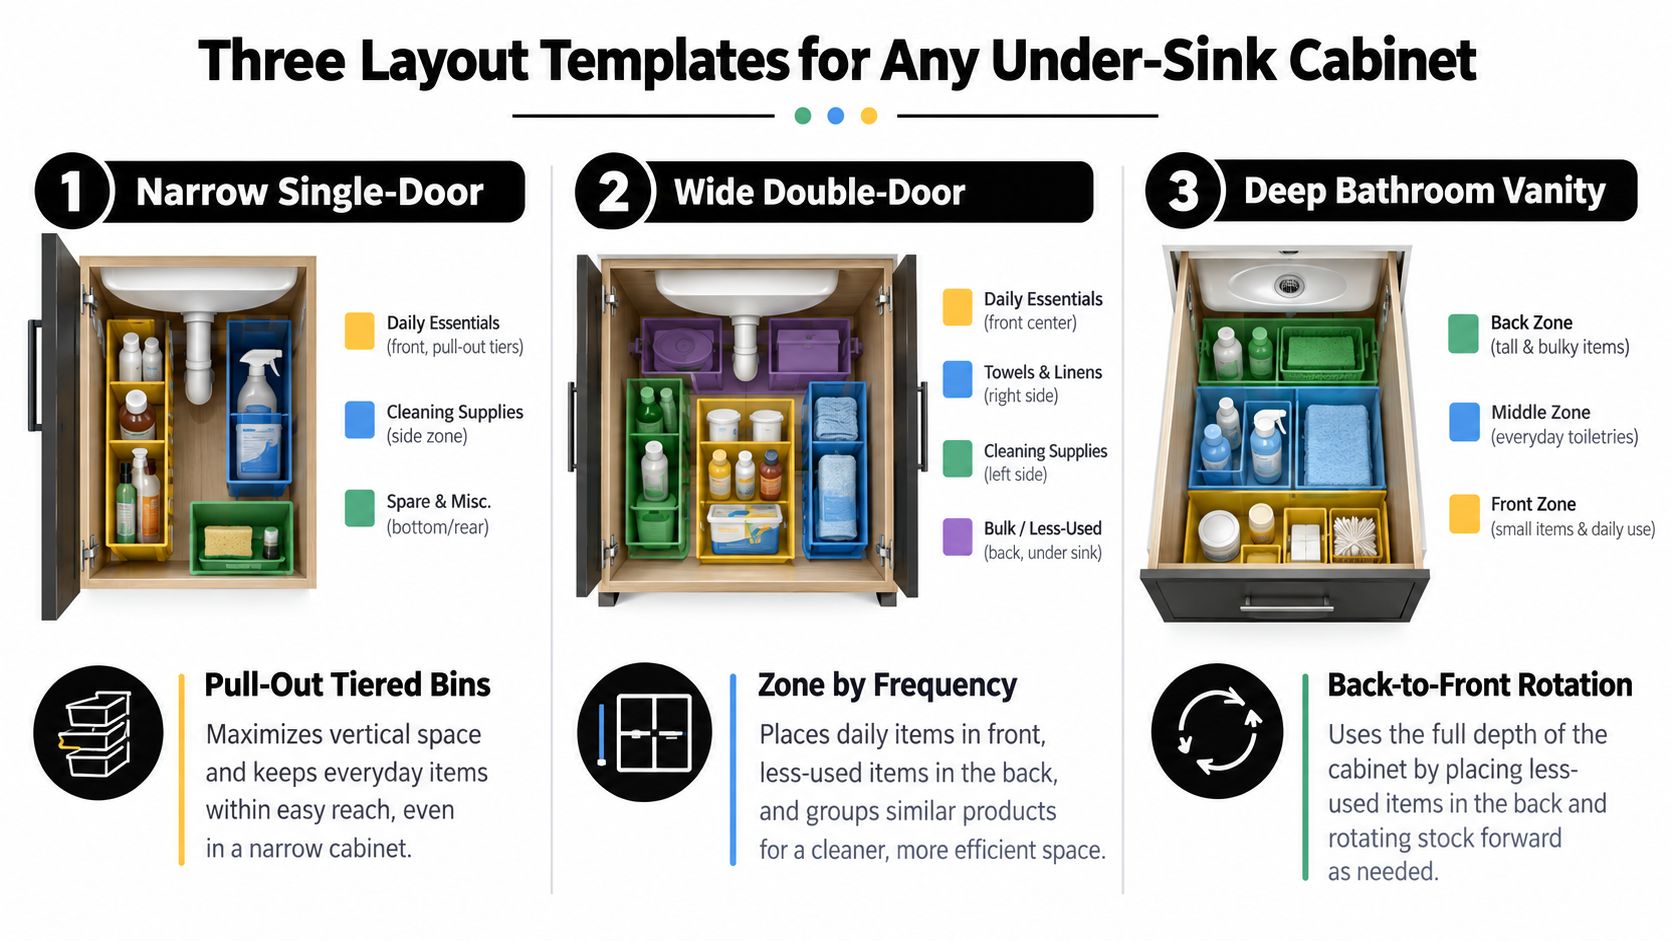
Narrow single-door cabinet
Use the clearest side of the cabinet for a slim open tray or pull-out caddy. Place the daily spray, dish soap, and cloth at the front. On the opposite side, use a low riser or narrow bin for spare sponges and sealed refills.
Leave the pipe's projection uncovered. If the cabinet is especially tight, a container that is shorter and shallower will outperform a larger bin because you can remove it without first disconnecting the entire arrangement. Keep the heaviest bottles on the floor or a low tray, rather than on a tall riser.
Wide double-door cabinet
Divide the cabinet into left, centre, and right zones. The left and right sides can hold open trays or bins, while the centre remains open around the drain path. Put daily cleaners on the side nearest your usual hand, and use the opposite side for backup stock.
A wide cabinet can tempt you to fill every gap. Resist that urge. A visible central corridor makes leaks easier to spot and lets you reach shutoffs quickly. Use stackable storage only where the upper level doesn't block the trap or door hardware.
Deep bathroom vanity
Use a back-to-front rotation. Store occasional-use products in a rear bin, then place a small open tray near the front for daily toiletries or cleaning items. A raised waterproof liner should sit below bottles, particularly where the cabinet floor is difficult to inspect.
For renters, choose freestanding pieces, removable liners, adhesive hooks rated for the intended surface, and caddies that lift out as one unit. Don't drill into the cabinet merely to gain a small amount of convenience. A movable arrangement is also easier to revise when a future repair changes the pipe position.
Leave an inspection lane. If you can't see the cabinet floor, shutoff valves, and the main pipe connections, the layout is too dense.
Sketch the cabinet from above. Draw the trap as a circle or U-shape, mark the door opening, then outline each container's footprint. Add arrows showing how every tray comes out. If two arrows cross, one of those containers belongs in a different zone.
Keeping Under Sink Storage Safe Dry and Easy to Maintain
The strongest under-sink system is one you can inspect without dismantling. Moisture, chemical residue, and overloaded hardware cause more trouble than a slightly untidy cabinet. A liner and a raised tray create a protective base, but they work only when you still notice what collects underneath.
Start with a five-minute monthly check:
- Remove the front trays and wipe the cabinet floor and container bases.
- Feel around pipe joints and the back corners for dampness.
- Check that bottles are closed, labels remain readable, and no product has crusted around a cap.
- Confirm that sliding rails move smoothly and aren't carrying more weight than their published limit.
- Return daily items to the front and leave the plumbing corridor open.
Use open trays where ventilation and leak visibility matter. Closed bins should hold dry supplies or sealed products, and they shouldn't be packed so tightly that air can't circulate. If you use a lidded container, lift it during the routine rather than assuming the lid means the contents are protected.
A small leak detector placed on the cabinet floor can provide another warning layer, but it doesn't replace checking connections. Keep corrosive or hazardous products in their original packaging, and follow the product label for safe storage. Don't combine incompatible cleaners, even inside separate-looking containers.
Lightweight, repositionable plastic is valuable during inspections because you can lift it out quickly. Sliding hardware adds convenience, yet it also creates more surfaces where residue can collect. If a drawer starts to stick, remove the contents and clean the mechanism before adding lubricant or more weight.
For offices, rental properties, and other shared spaces, label zones by use rather than by a person's name. A simple “daily”, “refill”, or “cloths” label helps the next person restore the cabinet. GrifGlo's commercial cleaning supplies guide provides related organisation considerations for higher-use environments.
Smart Buying Checklist and Recommendations for Every Home
Buy the container only after it passes a fit test. A visually attractive bin that blocks the trap or hides a spill is a poor storage tool, regardless of its finish.
Use this checklist before ordering:
- Exact dimensions: Confirm outer width, depth, and height, then compare them with the usable cavity.
- Installation envelope: For slides and frames, check the required opening dimensions, not only the bin body.
- Weight capacity: Match the stated limit to the contents, with sensible room for movement and inspection.
- Material: Prefer washable, moisture-tolerant surfaces near liquids.
- Access style: Choose open trays for visibility, drawers for frequent rear access, and lidded bins for dry backups.
- Plumbing clearance: Make sure the P-trap, supply lines, shutoffs, and door hinges remain reachable.
- Stability: Check whether the base rocks, the stack locks, or the pull-out frame needs fastening.
- Retailer signals: Look for complete measurements, care guidance, return terms, and a clear manufacturer or retailer identity.
Match the system to the household
A busy household usually benefits from an open front caddy, a raised liner, and a separate dry backup bin. That combination keeps daily products reachable without enclosing every bottle. If children or pets are present, use stable, low storage and keep hazardous products secured according to their labels.
Renters should favour freestanding and removable solutions. Open trays, narrow stackable bins, and a cardboard fit template let you improve access without drilling. Choose products you can lift out when cleaning or moving.
Small businesses, offices, rental properties, and hospitality teams need consistency more than novelty. Record the cabinet measurements, choose a small number of container formats, and use the same zone labels across locations. GrifGlo functions as a curated platform for home, kitchen, organisation, and smart-living essentials, with decision-friendly guides and routes to third-party retailers. Its decision-making framework can help teams document criteria before making repeat purchases.
The decisive question is simple: does this container fit the measured cavity, preserve inspection access, and suit the moisture risk? If the answer isn't clear from the product information, keep looking.
GrifGlo brings together practical organisation products, sizing guidance, comparisons, and structured purchasing support for households, renters, property managers, offices, and hospitality teams. Visit GrifGlo to compare fit-for-purpose essentials and build an under-sink system that stays accessible, dry, and easy to reset.

Laisser un commentaire
Ce site est protégé par hCaptcha, et la Politique de confidentialité et les Conditions de service de hCaptcha s’appliquent.